Chapter 7. Security
In this chapter, we look at various ways of securing your application. We’ll look at common patterns for integrating your application with standard security systems. We’ll look at how you can audit your code for several common security flaws. In several recipes in this chapter, we will use the WebAuthn API to integrate an application with security devices, such as fingerprint sensors and physical tokens. WebAuthn is an exciting and underused technology that can increase your application’s security and enhance the user’s experience.
Secure Requests, Not Routes
Problem
“Create Secured Routes” showed how you could use React Router to create secured routes. That means if the user tries to get to specific paths within your application, you can force them to submit a login form before seeing the contents of that page.
The secured routes approach is a good, reasonably general approach when you are first building an application. However, some applications don’t fall so easily into this static model of security. Some pages will be secure, and some will be insecure. But in many applications, it’s easier to secure data services rather than pages. What matters is not which page you are on but the data you are viewing.
All of these complexities are usually straightforward to define at the API level. But it’s the kind of complexity that you don’t want to reproduce in the logic of your frontend client. For these reasons, the simple approach of marking some routes secure and others as insecure is not good enough.
Solution
If defining routes as secure or insecure is not sufficient for your client’s security, you might want to consider controlling access to your application by using the security responses you receive from the backend server.
With this approach, you begin by assuming the user can go anywhere in your app. You don’t worry about secure routes and insecure routes. You just have routes. If a user visits a path that contains private data, the API server will return an error, typically an HTTP status 401 (Unauthorized). When the error occurs, the security redirects the user to a login form.
With this approach, the API server drives the policy of what is private and what is public. If the security policies change, you only need to modify the code on the API server without changing the client code.
Let’s take a look at the code for the original secured-routes recipe again. In our application, we inject a SecurityProvider,
which controls the security of all of its child components. In the example application, we do this in the App.js file:
import'./App.css'import{BrowserRouter,Route,Switch}from'react-router-dom'importPublicfrom'./Public'importPrivate1from'./Private1'importPrivate2from'./Private2'importHomefrom'./Home'importSecurityProviderfrom'./SecurityProvider'importSecureRoutefrom'./SecureRoute'functionApp(){return(<divclassName="App"><BrowserRouter><SecurityProvider><Switch><Routeexactpath="/"><Home/></Route><SecureRoutepath="/private1"><Private1/></SecureRoute><SecureRoutepath="/private2"><Private2/></SecureRoute><Routeexactpath="/public"><Public/></Route></Switch></SecurityProvider></BrowserRouter></div>)}exportdefaultApp
You can see that the application has simple Routes and SecuredRoutes. If an unauthenticated user tries to access a secured
route, they are redirected to the login form, as you can see in Figure 7-1.

Figure 7-1. When you first access a secured route, you see a login form
Once they are logged in (see Figure 7-2), they can access the secured content.

Figure 7-2. Once you are logged in, secured routes are visible
If we want to base our security upon the security of the backend API, we’ll begin by replacing all of the SecuredRoutes with
simple Routes. The application simply doesn’t know, until the API server tells it, which data is private and public. For the
example app in this recipe, we’ll have two pages on the application that contain a mix of public and private data. The Transactions
page will read secure data from the server. The Offers page will read insecure data from the server. Here is the new version of our
App.js file:
import'./App.css'import{BrowserRouter,Route,Switch}from'react-router-dom'importTransactionsfrom'./Transactions'importOffersfrom'./Offers'importHomefrom'./Home'importSecurityProviderfrom'./SecurityProvider'functionApp(){return(<divclassName="App"><BrowserRouter><SecurityProvider><Switch><Routeexactpath="/"><Home/></Route><Routeexactpath="/transactions"><Transactions/></Route><Routeexactpath="/offers"><Offers/></Route></Switch></SecurityProvider></BrowserRouter></div>)}exportdefaultApp
We’ll also need to make a change to our SecurityProvider. In an API security model, the client begins by assuming that all data is
public, which is the opposite of the secured-routes approach, which assumes you don’t have access until you prove that you do by
logging in.
This means our new SecurityProvider has to default its initial logged-in state to true:
import{useState}from'react'importSecurityContextfrom'./SecurityContext'importLoginfrom'./Login'importaxiosfrom'axios'constSecurityProvider=(props)=>{const[loggedIn,setLoggedIn]=useState(true)return(<SecurityContext.Providervalue={{login:async(username,password)=>{awaitaxios.post('/api/login',{username,password})setLoggedIn(true)},logout:async()=>{awaitaxios.post('/api/logout')returnsetLoggedIn(false)},onFailure(){returnsetLoggedIn(false)},loggedIn,}}>{loggedIn?props.children:<Login/>}</SecurityContext.Provider>)}exportdefaultSecurityProvider
We’ve also made several other changes:
-
The code that decides whether the user should see the
Loginform is now in theSecurityProvider. This code used to live inside theSecuredRoutecomponent, but now we display it centrally. -
We’ve replaced the dummy username/password checks with calls to the backend services called /api/login and /api/logout. It would be best if you replaced these with whatever security code applies to your system.
-
The
SecurityProvidernow provides a new function calledonFailure, which simply marks the person as logged out.
When you call this function, it forces the user to log in. If we no longer have secured routes, at what point do we perform the security checks? We do them in the API calls themselves.
In a real application, you would want to add code that deals with an invalid login attempt. To keep the code short, we’ve omitted any special handling here. A failed login will simply leave you in the login form without any error messages.
Let’s look at our new Transactions page, as defined in src/Transactions.js. This component reads the transactions data and displays it on the screen:
importuseTransactionsfrom'./useTransactions'constTransactions=()=>{const{data:transactions}=useTransactions()return(<div><h1>Transactions</h1><main><table><thead><tr><th>Date</th><th>Amount</th><th>Description</th></tr></thead><tbody>{transactions&&transactions.map((trx)=>(<tr><td>{trx.date}</td><td>{trx.amount}</td><td>{trx.description}</td></tr>))}</tbody></table></main></div>)}exportdefaultTransactions
The useTransactions hook contains the network code to read data from the server. It’s inside this hook that we need to add our
check for a 401 (Unauthorized) response from the server:
import{useEffect,useState}from'react'importaxiosfrom'axios'importuseSecurityfrom'./useSecurity'constuseTransactions=()=>{constsecurity=useSecurity()const[transactions,setTransactions]=useState([])useEffect(()=>{;(async()=>{try{constresult=awaitaxios.get('/api/transactions')setTransactions(result.data)}catch(err){conststatus=err.response&&err.response.statusif(status===401){security.onFailure()}// Handle other exceptions here (consider a shared// error handler -- see elsewhere in the book)}})()},[])return{data:transactions}}exportdefaultuseTransactions
In the example application, we’re using the axios library to contact the server. axios handles HTTP errors such as 401 (the
HTTP status for Unauthorized) as exceptions. That makes it a little clearer which code is dealing with an unexpected response. If
you were using a different API standard, like GraphQL, you would be able to deal with security errors in an analogous way by
examining the contents of the error object that GraphQL returns.
In the event that there’s an unauthorized response from the server, the useTransactions hook makes a call to the onFailure
function in the SecurityProvider.
We’ll build the Offers page in the same way. The src/Offers.js component will format the offers data from the server:
importuseOffersfrom'./useOffers'constOffers=()=>{const{data:offers}=useOffers()return(<div><h1>Offers</h1><main><ul>{offers&&offers.map((offer)=><liclassName="offer">{offer}</li>)}</ul></main></div>)}exportdefaultOffers
And the code that reads the data is inside the src/useOffers.js hook:
import{useEffect,useState}from'react'importaxiosfrom'axios'importuseSecurityfrom'./useSecurity'constuseOffers=()=>{constsecurity=useSecurity()const[offers,setOffers]=useState([])useEffect(()=>{;(async()=>{try{constresult=awaitaxios.get('/api/offers')setOffers(result.data)}catch(err){conststatus=err.response&&err.response.statusif(status===401){security.onFailure()}// Handle other exceptions here (consider a shared// error handler -- see elsewhere in the book)}})()},[])return{data:offers}}exportdefaultuseOffers
Even though the /api/offers endpoint is not secured, we still have code that checks for security errors. One consequence of the API security approach is that you have to treat all endpoints as secure, just in case they become secure in the future.
Let’s try our example application. We’ll begin by opening the front page (see Figure 7-3).
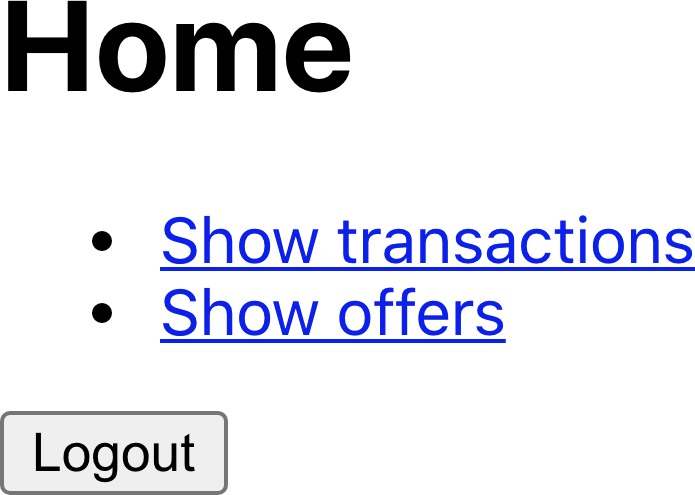
Figure 7-3. The front page of the application
If we click the Offers link, we see the offers read from the server (see Figure 7-4). This data is unsecured, and the application doesn’t ask us to log in.

Figure 7-4. If we click the Offers link, we can see the contents
If we now go back to the home page and click the Transactions link, the application asks us to log in (see Figure 7-5). The
transactions page has attempted to download transaction data from the server, which resulted in a 401 (Unauthorized) response. The
code catches this as an exception and calls the onFailure function in the
SecurityProvider, which then displays the login form
(see Figure 7-5).
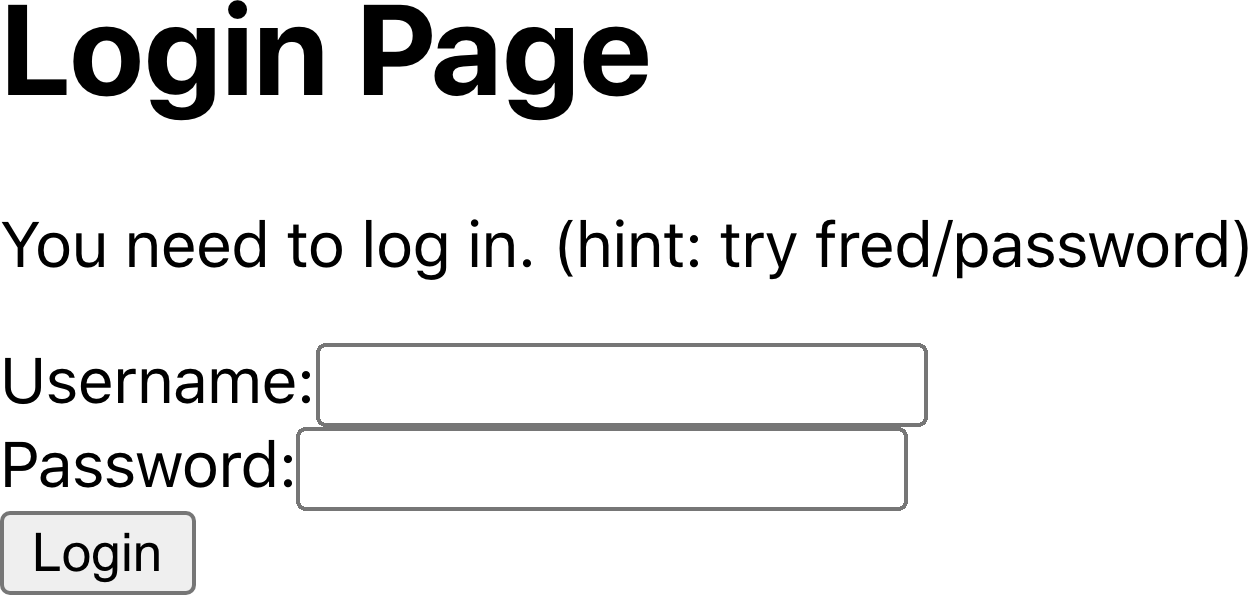
Figure 7-5. If we try to access the Transactions page, we are asked to log in
If we log in, the application sends our username and password to the server. Assuming that doesn’t result in an error, the
SecurityProvider hides the login form, the Transactions page is re-rendered, and the data is now able to be read as we’ve
logged in (see Figure 7-6).
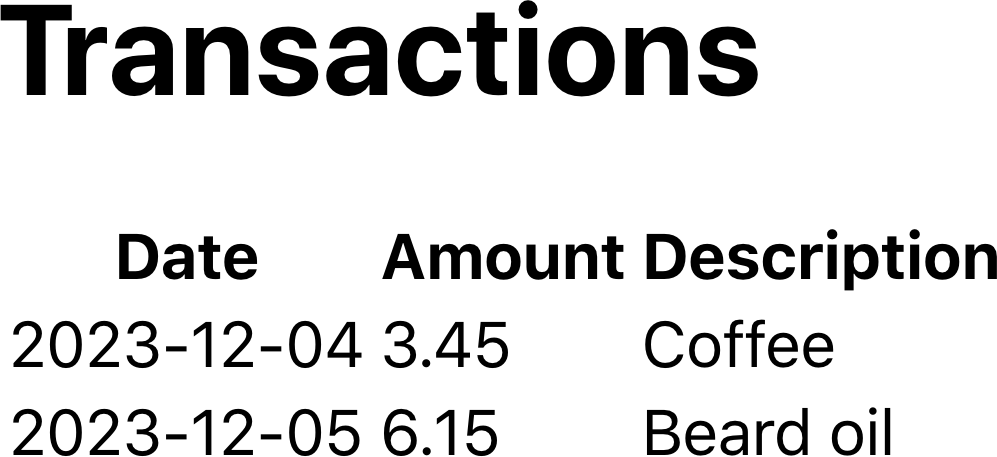
Figure 7-6. Once we log in, we can see the Transactions page
Discussion
Our example app now contains nothing to indicate which APIs are secured and which are unsecured. The server now handles all of that work. The API endpoints are entirely in charge of the security of the application.
Using this approach, you should apply the same security handling to all API calls. One of the benefits of extracting API calls into
custom hooks is that the hooks can share the security code. Hooks can call other hooks, and a common approach is to create hooks
that act as general-purpose GET and POST calls.1 A general-purpose
GET hook could not only handle access failures but also include request cancellations, debouncing (Recipes 5.3 and 5.6), and shared error handling (“Build a Centralized Error Handler”).
Another advantage to the secured API approach is that it’s possible to disable security in some circumstances entirely. For example, during development, you can do away with the need for developers to have an identity provider configured. You can also choose to have different security configurations in different deployments.
Finally, for automated testing systems, like Cypress, which can simulate network responses, you can split the testing of application functionality from nonfunctional security testing. It’s a good idea to have additional server-only security tests that are separate from the UI tests to ensure that the server is secure in its own right.
You can download the source for this recipe from the GitHub site.
Authenticate with Physical Tokens
Problem
Usernames and passwords are not always enough; they might be stolen or guessed. So some users might only use applications that provide additional security.
An increasing number of systems now provide two-factor authentication. A two-factor system requires the user to log in with a form and then provide some additional information. The additional information might be a code sent to them by an SMS text message. Or it might be an application on their phone that generates a one-time password. Or, perhaps most securely, it might involve the use of a physical hardware device, like a YubiKey, which is attached to the computer when required and pressed.
These physical tokens work using public-key cryptography, which generates a public key for use with a given application and encrypts strings using a private key. An application can send a random “challenge” string to the device, generating a signature using the private key. The application can then use the public key to check that the string was signed correctly.
But how do you integrate them with your React application?
Solution
Web Authentication (also known as WebAuthn) is a widely supported2 W3C standard that allows a browser to communicate with a physical device, like a YubiKey.
There are two flows in web authentication. The first is called attestation. During attestation, a user registers a security device with an application. During assertion, the user can verify their identity to log in to a system.
First, let’s look at attestation. During this flow, the user registers a physical device against their account. That means that the user should always be logged in during attestation.
The code for this recipe includes a dummy Node server, which you can run from the server directory within the application:
$ cd server$ npm install$ npm run start
There are three steps to attestation:
-
The server generates an attestation request, saying what kind of device is acceptable.
-
The user connects the device and activates it, probably by pressing a button on it.
-
A response is generated from the device, which includes the public key, and is then returned to the server, where it can be stored against the user’s account.
We can tell if the browser supports WebAuthn by checking for the existence of
window.PublicKeyCredential. If it exists, you’re
good to go.
There is an endpoint at /startRegister, which will create the attestation request on the server. So we’ll begin by calling that:
importaxiosfrom'axios'...// Ask to start registering a physical token for the current userconstresponse=awaitaxios.post('/startRegister')
This is what an attestation request looks like:
{"rpName":"Physical Token Server","rpID":"localhost","userID":"1234","userName":"freda","excludeCredentials":[{"id":"existingKey1","type":"public-key"}],"authenticatorSelection":{"userVerification":"discouraged"},"extensions":{"credProps":true}}
Some of the attributes begin with the letters rp..., which stands for relying party. The relying party is the application that
generated the request.
The rpName is a free-form text string that describes the application. You should set the rpId to the current domain name. Here
it’s localhost because we’re running on a development server. The userID is a string that uniquely identifies the user. The
userName is the name of the user.
excludeCredentials is an interesting attribute. Users might record multiple devices against their accounts. This value lists the
devices that are already recorded to avoid the user registering the same device twice. If you attempt to register the same device
more than once, the browser will immediately throw an exception saying that the device has been registered elsewhere.
The authenticatorSelection allows you to set various options about what the user needs to do when they activate their device. Here
we’re setting userVerification to false to prevent the user from performing any additional steps (such as entering a PIN) when
activating their device. Consequently, when asked to plug in their device, the user will insert it into the USB socket and press the
button, with nothing else needed.
The credProps extension asks the device to return additional credential properties, which might be helpful to the server.
Once the server has generated the attestation request, we need to ask the user to connect their security device. We do this with a browser function called:
navigator.credentials.create()
The create function accepts an attestation request object. Unfortunately, the data within the object needs to be in a variety of
low-level binary forms, such as byte arrays. We can make our life significantly easier by installing a library from GitHub called
webauthn-json, which lets you use JSON to specify the request:
$ npm install "@github/webauthn-json"We can then pass the contents of the WebAuthn request to the GitHub version of the create function:
import{create}from'@github/webauthn-json'importaxiosfrom'axios'...// Ask to start registering a physical token for the current userconstresponse=awaitaxios.post('/startRegister')// Pass the WebAuthn config to webauthn-json 'create' functionconstattestation=awaitcreate({publicKey:response.data})
This is the point where the browser asks the user to insert and activate their security device (see Figure 7-7).
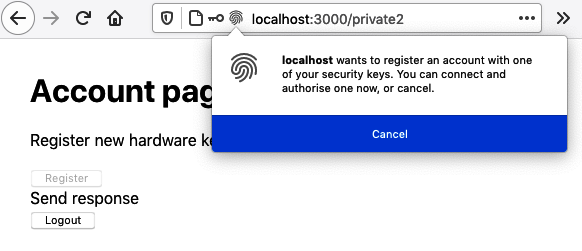
Figure 7-7. The browser asks for the token when create is called
The create function resolves to an attestation object, which you can think of as the registration information for the device.
The server can use the attestation object to verify the user’s identity when they log in. We need to record the attestation object
against the user’s account. We’ll do that by posting it back to an endpoint on the example server at /register:
import{create}from'@github/webauthn-json'importaxiosfrom'axios'...// Ask to start registering a physical token for the current userconstresponse=awaitaxios.post('/startRegister')// Pass the WebAuthn config to webauthn-json 'create' functionconstattestation=awaitcreate({publicKey:response.data})// Send the details of the physical YubiKey to be stored against the userconstattestationResponse=awaitaxios.post('/register',{attestation,})
That’s the overview of how we register a new device for a user. But where do we put that in the code?
The example application has an Account page (see Figure 7-8), and we’ll add a button in there to register a new key.
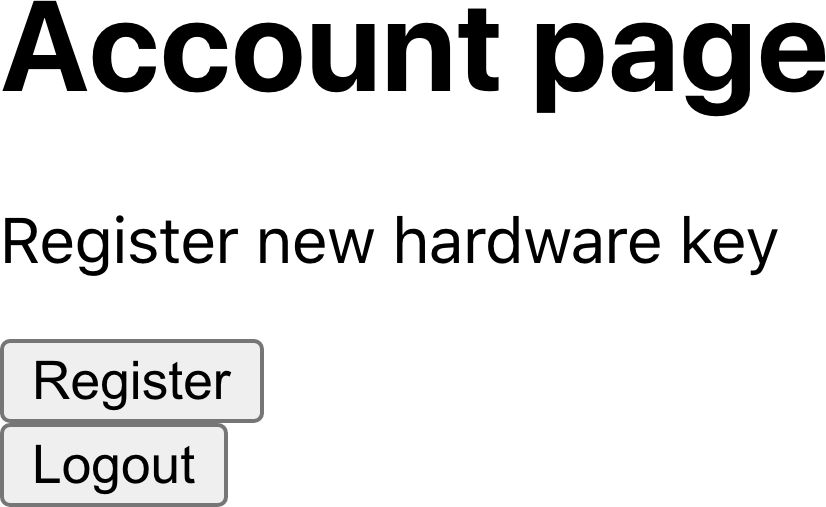
Figure 7-8. We’ll add a button to the account page to register a new device
Here is the registration code in place:
import{useState}from'react'importLogoutfrom'./Logout'importaxiosfrom'axios'import{create}from'@github/webauthn-json'constPrivate2=()=>{const[busy,setBusy]=useState(false)const[message,setMessage]=useState()return(<divclassName="Private2"><h1>Accountpage</h1>{window.PublicKeyCredential&&(<><p>Registernewhardwarekey</p><buttononClick={async()=>{setBusy(true)try{constresponse=awaitaxios.post('/startRegister')setMessage('Send response')constattestation=awaitcreate({publicKey:response.data,})setMessage('Create attestation')constattestationResponse=awaitaxios.post('/register',{attestation,})setMessage('registered!')if(attestationResponse.data&&attestationResponse.data.verified){alert('New key registered')}}catch(err){setMessage(''+err)}finally{setBusy(false)}}}disabled={busy}>Register</button></>)}<divclassName="Account-message">{message}</div><Logout/></div>)}exportdefaultPrivate2
If we click the registration button on the account page, the browser asks us to connect the security device (see Figure 7-9). Once we do that, the application sends the device’s credentials to the server and then tells us it has recorded a new device against our account (see Figure 7-10).
Figure 7-9. When you choose to register a new device, you are asked to activate it
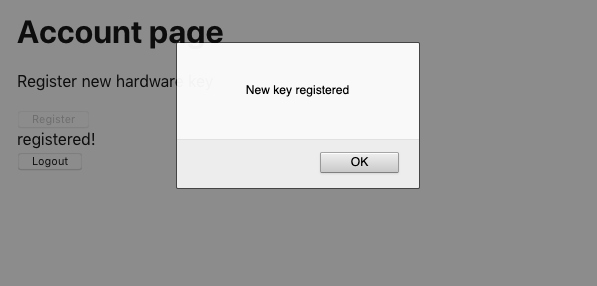
Figure 7-10. We are told when a new device is registered
The next flow we need to think about is assertion. Assertion happens when a user verifies their identity when logging in.
The steps are pretty similar to attestation:
-
The application asks the server to create an assertion request.
-
The user converts that request into an assertion object by activating their security device.
-
The server checks the assertion against its stored credentials to prove the person is who they say they are.
Let’s begin with the first stage when we create an assertion request. This is what an assertion request looks like:
{"allowCredentials":[{"id":"existingTokenID","type":"public-key"}],"attestation":"direct","extensions":{"credProps":true,},"rpID":"localhost","timeout":60000,"challenge":"someRandomString"}
The allowCredentials attribute is an array of registered devices that will be acceptable. The browser will use this array to check
that the user has connected the correct device.
The assertion request also includes a challenge string: a randomly generated string the device will need to create a signature
with its private key. The server will check this signature with the public key to ensure that we used the correct device.
The timeout specifies how long the user will have to prove their identity.
The example server generates an assertion request when you call the /startVerify endpoint with a specified user ID:
importaxiosfrom'axios'...// Ask for a challenge to verify user userIDconstresponse=awaitaxios.post('/startVerify',{userID})
We can then pass the assertion request to the get webauthn-json function, which will ask the user to verify their identity by
connecting an acceptable device (see Figure 7-11):
import{get}from'@github/webauthn-json'importaxiosfrom'axios'...constresponse=awaitaxios.post('/startVerify',{userID})constassertion=awaitget({publicKey:response.data})

Figure 7-11. The get function asks the user to connect the device
The get function returns an assertion object, which contains a signature for the challenge string sent back to the server’s
/verify endpoint to check the signature. The response to that call will tell us if the user has correctly verified their
identity:
import{get}from'@github/webauthn-json'importaxiosfrom'axios'...constresponse=awaitaxios.post('/startVerify',{userID})constassertion=awaitget({publicKey:response.data})constresp2=awaitaxios.post('/verify',{userID,assertion})if(resp2.data&&resp2.data.verified){// User is verified}
Where do we put this code in the application?
The example application is based on the secured-routes recipe.3 It contains a
SecurityProvider,
which manages the security for all of its child components. The SecurityProvider provides a login function, which is called with
the username and password when the user submits a login form. We’ll put the verification code in here:
import{useState}from'react'importSecurityContextfrom'./SecurityContext'import{get}from'@github/webauthn-json'importaxiosfrom'axios'constSecurityProvider=(props)=>{const[loggedIn,setLoggedIn]=useState(false)return(<SecurityContext.Providervalue={{login:async(username,password)=>{constresponse=awaitaxios.post('/login',{username,password,})const{data}=responseif(data.twoFactorNeeded){constuserID=data.userIDconstresponse=awaitaxios.post('/startVerify',{userID,})constassertion=awaitget({publicKey:response.data})constresp2=awaitaxios.post('/verify',{userID,assertion,})if(resp2.data&&resp2.data.verified){setLoggedIn(true)}}else{setLoggedIn(true)}},logout:async()=>{awaitaxios.post('/logout')setLoggedIn(false)},loggedIn,}}>{props.children}</SecurityContext.Provider>)}exportdefaultSecurityProvider
We first send the username and password to the /login endpoint. If the user has registered a security device, the response to
the /login will have a twoFactorNeeded attribute set to true. We can call the /startVerify endpoint with the user’s
ID and use the resulting assertion request to ask the user to activate their device. We can send the assertion back to the server. And
if all is well, we set loggedIn to true, and the user will then see the page.
Let’s look at it in action. We’ll assume we’ve already registered the device against our account. We open the application and click the Account page (see Figure 7-12).
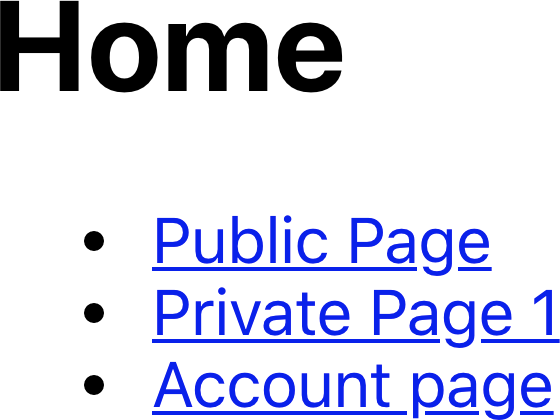
Figure 7-12. When the application opens, click the Account link
The Account page is secured, so we’re asked for a username and password (see Figure 7-13.) In the example application, you can enter
freda as the username and mypassword as the password.
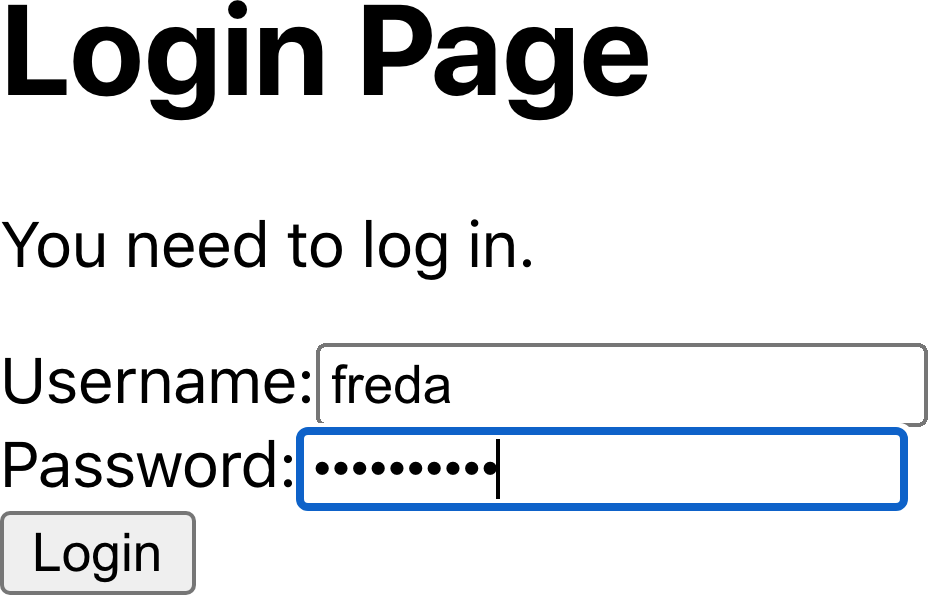
Figure 7-13. The login form appears
Once we’ve entered the username and password, the browser asks us to connect the security device (see Figure 7-14).
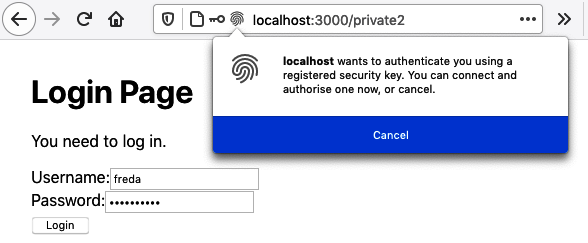
Figure 7-14. The browser asks the user to activate their security device
If they connect their device and activate it, the user can see the secured page (see Figure 7-15).

Figure 7-15. The Account page is visible once the user has verified their identity
Discussion
As you can probably tell, WebAuthn is quite a complex API. It uses quite obscure language (attestation for registration, and
assertion for verification) and uses some low-level data types, which fortunately the GitHub webauthn-json allows us to avoid.
The complexity lives on the server. The example server in the downloadable source code uses a library called SimpleWebAuthn to handle most of the cryptological stuff for us. If you are planning on using SimpleWebAuthn for the server side of your application, be aware that there is also a client SimpleWebAuthn library that works with it. We’ve avoided using it in the example client source to avoid making our code too SimpleWebAuthn-specific.
If you implement two-factor authentication, you will need to think about what you will do if a user loses their security device. Technically, all you will have to do to re-enable their account is remove the device that’s registered against their name. But it would be best to be extremely careful. A typical attack against two-factor authentication is to call the service desk and pretend to be a user who has lost their token.
Instead, you will need to create a sufficiently rigorous process that will check the identity of any person asking for an account reset.
You can download the source for this recipe from the GitHub site.
Enable HTTPS
Problem
HTTPS is often used in production environments, but there are circumstances where it can be helpful to use HTTPS during development. Some networked services will only work from within pages secured with HTTPS. WebAuthn will only work remotely with HTTPS.4 Numerous bugs and other issues can creep into your code if your application uses a proxy server with HTTPS.
Enabling HTTPS on production servers is now relatively straightforward,5 but how do you enable HTTPS on a development server?
Solution
If you’ve created your application with create-react-app, you can enable HTTPS by:
-
Generating a self-signed SSL certificate
-
Registering the certificate with your development server
To generate a self-signed certificate, we need to understand a little about how HTTPS works.
HTTPS is just HTTP that is tunneled through an encrypted Secure Sockets Layer (SSL) connection. When a browser connects to an HTTPS address, it opens a connection to a secure socket on the server.6 The server has to provide a certificate from an organization the browser trusts. If the browser accepts the certificate, it will then send encrypted data to the secure socket on the server, which will then be decrypted on the server and forwarded to an HTTP server.
The main difficulty setting up an HTTPS server is getting a certificate that a web browser will trust. Browsers maintain a set of root certificates. These are certificates that large, trustworthy organizations issue. When an HTTPS server presents a certificate to a browser, that certificate must be signed by one of the browser’s root certificates.
If we want to generate an SSL certificate, we will first need to create a root certificate and tell the browser to trust it. Then we must generate a certificate for our development server that has been signed by the root certificate.
If this sounds complicated, it’s because it is.
Let’s begin by creating a root certificate. To do this, you will need a tool called OpenSSL installed on your machine.
We’ll use the openssl command to create a key file. It will ask you for a passphrase, which you will have to enter twice:
$ openssl genrsa -des3 -out mykey.key 2048Generating RSA private key, 2048 bit long modulus.......................................................+++.................................+++e is 65537 (0x10001)Enter pass phrase for mykey.key:Verifying - Enter pass phrase for mykey.key:$
The mykey.key file now contains a private key, which can be used for encrypting data. We can use the key file to create a certificate file. A certificate file contains information about an organization and an end date after which it is no longer valid.
You can create a certificate using the following command:
$ openssl req -x509 -new -nodes -key mykey.key -sha256 -days 2048 -out mypem.pemEnter pass phrase for mykey.key:You are about to be asked to enter information that will be incorporatedinto your certificate request.What you are about to enter is what is called a Distinguished Name or a DN.There are quite a few fields but you can leave some blankFor some fields there will be a default value,If you enter '.', the field will be left blank.-----Country Name (2 letter code) []:USState or Province Name (full name) []:MassachusettsLocality Name (eg, city) []:CambridgeOrganization Name (eg, company) []:O'Reilly MediaOrganizational Unit Name (eg, section) []:Harmless scribesCommon Name (eg, fully qualified host name) []:LocalEmail Address []:me@example.com$
Here we are creating a certificate that will be valid for the next 2,048 days. The passphrase you are asked for is the one you set when you created the mykey.key file. It doesn’t matter what you enter for the organization details, as you will be using it only on your local machine.
The certificate is stored in a file called mypem.pem, and we need to install this file as a root certificate on our machine.7 There are several ways to install root certificates on your machine.8 You can use a root certificate to sign website certificates, which is what we’ll do next.
We’ll create a local key file, and a certificate signing request (CSR) file, with the following command:
$ openssl req -new -sha256 -nodes -out myprivate.csr -newkey rsa:2048 \-keyout myprivate.key \-subj "/C=US/ST=Massachusetts/L=Cambridge/O=O'Reilly \Media/OU=Harmless scribes/CN=Local/emailAddress=me@example.com"Generating a 2048 bit RSA private key....................+++..+++writing new private key to 'myprivate.key'-----$
Next, create a file called extfile.txt, containing the following:
authorityKeyIdentifier=keyid,issuer
basicConstraints=CA:FALSE
keyUsage=digitalSignature,nonRepudiation,keyEncipherment,dataEncipherment
subjectAltName=DNS:localhost
We can now run a command that will generate an SSL certificate for our application:
$ openssl x509 -req -in myprivate.csr -CA mypem.pem -CAkey mykey.key \-CAcreateserial -out \myprivate.crt -days 500 -sha256 -extfile ./extfile.txtSignature oksubject=/C=US/ST=Massachusetts/L=Cambridge/O=O'ReillyMedia/OU=Harmless scribes/CN=Local/emailAddress=me@example.comGetting CA Private KeyEnter pass phrase for mykey.key:$
Remember, the passphrase is the one you created when you first created the mykey.key file.
The result of going through all of those steps is that we have two files that we can use to secure our development server:
-
The myprivate.crt file is a certificate signed by the root certificate, which is the file that reassures the browser that it can trust our application
-
The myprivate.key file will be used to encrypt connections between the development server and the browser.
If you created your application with create-react-app, you could enable HTTPS by putting this in a .env file in your application
directory:
HTTPS=true
SSL_CRT_FILE=myprivate.crt
SSL_KEY_FILE=myprivate.key
If you restart your server, you should be able to access your application at https://localhost:3000 instead of http://localhost:3000.
Discussion
Self-signed certificates are pretty complex things to create, but there are circumstances when they are required. However, even if you don’t need to run HTTPS in your development environment, it can still be worth understanding what HTTPS is, how it works, and why you should trust it.
You can download the source for this recipe from the GitHub site.
Authenticate with Fingerprints
Problem
“Authenticate with Physical Tokens” looked at how physical tokens, such as YubiKeys, can be used for two-factor authentication. But physical tokens are still relatively rare and can be pretty expensive. Most people already have mobile devices, such as cell phones and tablets. Many of those have built-in fingerprint sensors. But how can we get a React application to use a fingerprint sensor for two-factor authentication?
Solution
We can use fingerprint sensors as WebAuthn authentication tokens. They connect to the API in the same way, although several configuration changes are required.
This recipe is based on “Authenticate with Physical Tokens” for using removable tokens for two-factor authentication. We saw in “Authenticate with Physical Tokens” that there are two main flows in WebAuthn authentication:
- Attestation
-
In this flow, the user registers a device or token against their account. One way to do this is by pressing the fingerprint sensor on their phone.
- Assertion
-
In this flow, the user activates the device or token, and the server checks that it matches the device or token that was previously registered.
Both attestation and assertion have three stages:
-
The server generates a request.
-
The user uses the token, which generates a response.
-
The response is sent to the server.
If we want to switch from using a removable physical token to using the built-in fingerprint sensor in a device, we will only need to change the attestation request stage. The attestation request says what kind of token the browser can register for a user. For removable physical tokens, like YubiKeys, we generated an attestation request that looked like this:
{"rpName":"Physical Token Server","rpID":"localhost","userID":"1234","userName":"freda","excludeCredentials":[{"id":"existingKey1","type":"public-key"}],"authenticatorSelection":{"userVerification":"discouraged"},"extensions":{"credProps":true,},}
We need to change this slightly to allow the user to use a fingerprint sensor:
{"rpName":"Physical Token Server","rpID":"localhost","userID":"1234","userName":"freda","excludeCredentials":[{"id":"existingKey1","type":"public-key"}],"authenticatorSelection":{"authenticatorAttachment":"platform","userVerification":"required"},"attestation":"direct","extensions":{"credProps":true,},}
The two requests are almost the same. The first change is in the authenticator selection. We now want to use a platform
authenticator because fingerprint sensors are built into the device and not removable, which means we effectively limit the user to
their current physical device. In contrast, a YubiKey can be disconnected from one machine and then connected to another.
We’re also saying that we want to use direct attestation, which means we won’t require any additional verification. For example, we won’t be asking the user to press the fingerprint sensor and then enter a PIN.
Beyond changing this initial attestation request object, all of the other code remains the same. Once a user responds to the attestation request by pressing the fingerprint sensor, it will generate a public key that we can store against the user. When the user logs back in and confirms their identity by pressing the fingerprint sensor, it will sign the challenge string in the same way that a YubiKey would.
Therefore, if you’re going to support one type of authenticator, it’s worth allowing the user to use both fingerprint sensors and removable tokens.
Unless a user has a removable token that also works on mobile devices—for example, by using Near-Field Communication (NFC)—it’s unlikely that any user will register both removable tokens and fingerprints. As soon as they have registered a fingerprint, they won’t be able to log in and register a removable token, and vice versa.
Here is the updated component that allows a user to register a token:
import{useState}from'react'importLogoutfrom'./Logout'importaxiosfrom'axios'import{create}from'@github/webauthn-json'constPrivate2=()=>{const[busy,setBusy]=useState(false)const[message,setMessage]=useState()constregisterToken=async(startRegistrationEndpoint)=>{setBusy(true)try{constresponse=awaitaxios.post(startRegistrationEndpoint)setMessage('Send response')constattestation=awaitcreate({publicKey:response.data})setMessage('Create attestation')constattestationResponse=awaitaxios.post('/register',{attestation,})setMessage('registered!')if(attestationResponse.data&&attestationResponse.data.verified){alert('New key registered')}}catch(err){setMessage(''+err)}finally{setBusy(false)}}return(<divclassName="Private2"><h1>Accountpage</h1>{window.PublicKeyCredential&&(<><p>Registernewhardwarekey</p><buttononClick={()=>registerToken('/startRegister')}disabled={busy}>RegisterRemovableToken</button><buttononClick={()=>registerToken('/startFingerprint')}disabled={busy}>RegisterFingerprint</button></>)}<divclassName="Account-message">{message}</div><Logout/></div>)}exportdefaultPrivate2
We’re calling a slightly different endpoint when we want to register a fingerprint. Otherwise, the rest of the code remains the same.
To try it, you’ll need to use a device with a fingerprint sensor. We can only use WebAuthn if we run the application on localhost or a remote server using HTTPS. To test this code from a mobile device, you will need to configure HTTPS on your development server (see “Enable HTTPS”), or you will need to configure your device to proxy localhost connections to your development machine (see “Test on an Android Device”).
To run the example application, you will need to change into the application directory and start the development server with the following:
$ npm run startYou will also need to run the API server. Open a separate terminal for this and then run it from the server subdirectory:
$ cd server$ npm run start
The development server will run on port 3000 and the API server on port 5000. The development server will proxy API requests to the API server.
When you open the application, you should click the “Account page” link (see Figure 7-16).

Figure 7-16. Click the “Account page” link on the home page
The application will ask you to sign in. Enter the username freda and the password mypassword (see Figure 7-17). These values have been hardcoded in the example server.
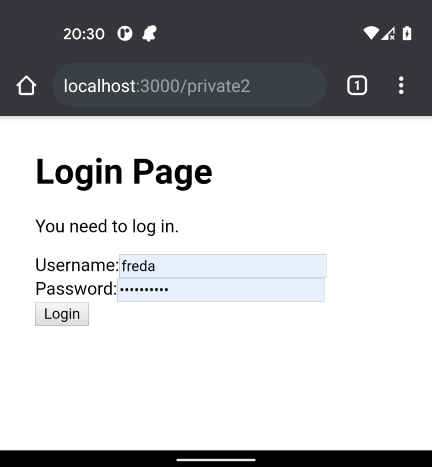
Figure 7-17. Enter freda/mypassword into the login form
You will now see two buttons for registering tokens against your account: one for removable tokens, the other for fingerprints (see Figure 7-18).
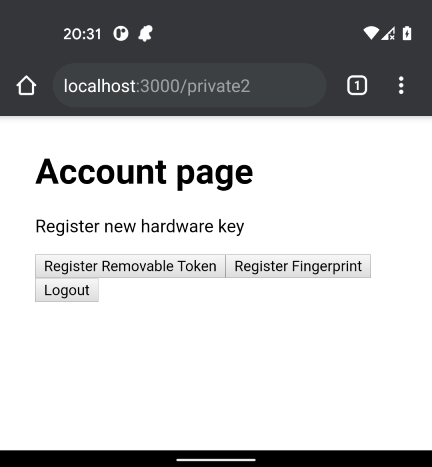
Figure 7-18. There are buttons to register removable tokens and fingerprints
Press the button to register a fingerprint. Your mobile device will ask you to press the fingerprint sensor. Your fingerprint sensor will generate a public key that the application can store against the freda account. A message box will appear to tell you when this has been done, as shown in Figure 7-19.
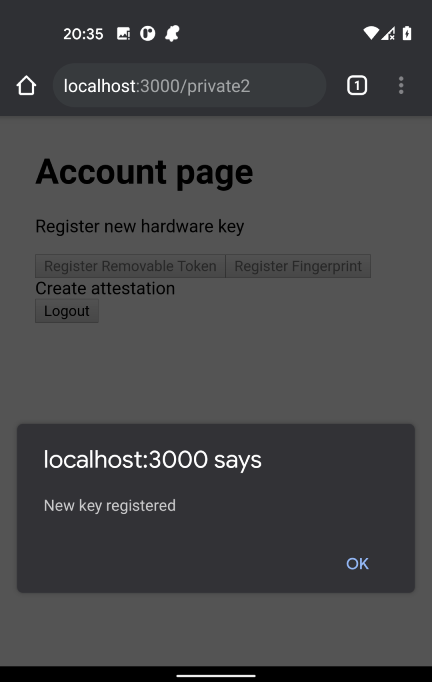
Figure 7-19. The application will confirm when the token is registered
Now log out. When you log back in again, enter freda and mypassword in the form. The application will now ask you to confirm
your identity by pressing the fingerprint sensor, and it will then log you back in.
Discussion
Built-in fingerprint sensors are much more common than removable tokens like YubiKeys. There is a difference in the usage pattern of the two devices. YubiKeys can be moved from device to device, whereas fingerprints are typically limited to a single device.9 Removable tokens, therefore, have additional flexibility for users who might want to connect from several devices. The downside to removable devices is that they are far easier to lose than a cell phone. In most cases, it is worth supporting both types of devices and leaving it to the users to decide which option is best for them.
You can download the source for this recipe from the GitHub site.
Use Confirmation Logins
Problem
Sometimes a user might want to perform operations that are more dangerous or are not easily reversible. They might want to delete data, remove a user account, or do something that will send an email. How do you prevent a malicious third party from carrying out these operations if they find a logged-in but unattended machine?
Solution
Many systems force users to confirm their login credentials before being able to perform sensitive operations. You will most likely want to do this for several operations, so it would be helpful if there was a way of doing the confirmation centrally.
We’ll base this recipe on the code for the secured routes in “Create Secured Routes”. In that recipe, we built a SecurityProvider
component that provided login and logout functions to its child components:
import{useState}from'react'importSecurityContextfrom'./SecurityContext'constSecurityProvider=(props)=>{const[loggedIn,setLoggedIn]=useState(false)return(<SecurityContext.Providervalue={{login:(username,password)=>{// Note to engineering team:// Maybe make this more secure...if(username==='fred'&&password==='password'){setLoggedIn(true)}},logout:()=>setLoggedIn(false),loggedIn,}}>{props.children}</SecurityContext.Provider>)}exportdefaultSecurityProvider
Components that needed to use the login and logout functions could access them from the useSecurity hook:
constsecurity=useSecurity()...// Anywhere that we need to logout...security.logout()
For this recipe, we’ll add an extra function to SecurityProvider that will allow a child component to confirm that the user is
logged in. Once they’ve provided the username and password, we allow them to perform the dangerous operation.
We could do this by creating a function that accepts a callback function containing the dangerous operation, which the application
calls after the user confirms their login details. This function will be easier to implement in the SecurityProvider but will have
some issues when we call it from a component. We could return a success/failure flag:
// We WON'T do it like thisconfirmLogin((success)=>{if(success){// Do dangerous thing here}else{// Handle the user canceling the login}})
This approach has the disadvantage that if you forget to check the value of the success flag, the code will perform the dangerous
operation, even if the user cancels the login form.
Alternatively, we will have to pass two separate callbacks: one for success and one for cancellation:
// We WON'T do it like this eitherconfirmLogin(()=>{// Do dangerous thing here},()=>{// Handle the user canceling the login});
However, this code is a little ugly.
Instead, we’ll implement the code with a promise, which will make the implementation more complex, but it will simplify any code that calls it.
This is a version of SecurityProvider, complete with the new confirmLogin
function:
import{useRef,useState}from'react'importSecurityContextfrom'./SecurityContext'importLoginFormfrom'./LoginForm'exportdefault(props)=>{const[showLogin,setShowLogin]=useState(false)const[loggedIn,setLoggedIn]=useState(false)constresolver=useRef()constrejecter=useRef()constonLogin=async(username,password)=>{// Note to engineering team:// Maybe make this more secure...if(username==='fred'&&password==='password'){setLoggedIn(true)}}constonConfirmLogin=async(username,password)=>{// Note to engineering team:// Same here...returnusername==='fred'&&password==='password'}return(<SecurityContext.Providervalue={{login:onLogin,confirmLogin:async(callback)=>{setShowLogin(true)returnnewPromise((res,rej)=>{resolver.current=resrejecter.current=rej})},logout:()=>setLoggedIn(false),loggedIn,}}>{showLogin?(<LoginFormonLogin={async(username,password)=>{constvalid=awaitonConfirmLogin(username,password)if(valid){setShowLogin(false)resolver.current()}}}onCancel={()=>{setShowLogin(false)rejecter.current()}}/>):null}{props.children}</SecurityContext.Provider>)}
If the user calls the confirmLogin function, the SecurityProvider will display a login form to allow the user to confirm their
username and password. The confirmLogin function returns a promise that will resolve only if the user types in the username and
password correctly. If the user cancels the login form, the promise will be
rejected.
We’re not showing the details of the LoginForm component here, but you can find it in the downloadable source for this recipe.
Our example code here checks the username and password against static strings to see if they’re correct. In your version of the code, you will replace this with a call to some security service.
When we call the confirmLogin, we’re storing the promise in a ref. Refs commonly point to elements in the DOM, but you can
use them to store any piece of state. Unlike useState, refs will update immediately. In general, it’s not good practice to use a
lot of refs in your code, and we’re only using them here so we can record the promise immediately, without waiting for a useState
operation to finish.
How would you use the confirmLogin function in practice? Let’s say we have a component that contains a button that performs some
dangerous operation:
import{useState}from'react'importLogoutfrom'./Logout'constPrivate1=()=>{const[message,setMessage]=useState()constdoDangerousThing=()=>{setMessage('DANGEROUS ACTION!')}return(<divclassName="Private1"><h1>Privatepage1</h1><buttononClick={()=>{doDangerousThing()}}>Dodangerousthing</button><pclassName="message">{message}</p><Logout/></div>)}exportdefaultPrivate1
If we want the user to confirm their login details before performing this operation, we can first get hold of the context provided
by the SecurityProvider:
constsecurity=useSecurity()
In the code that performs the dangerous operation, we can then await the promise returned by confirmLogin:
constsecurity=useSecurity()...awaitsecurity.confirmLogin()setMessage('DANGEROUS ACTION!')
The code following the call to confirmLogin will run only if the user provides the correct username and password.
If the user cancels the login dialog, the promise will be rejected, and we can handle the cancellation in a catch block.
Here is a modified version of the component performing dangerous code that now confirms the user’s login before proceeding:
import{useState}from'react'importLogoutfrom'./Logout'importuseSecurityfrom'./useSecurity'exportdefault()=>{constsecurity=useSecurity()const[message,setMessage]=useState()constdoDangerousThing=async()=>{try{awaitsecurity.confirmLogin()setMessage('DANGEROUS ACTION!')}catch(err){setMessage('DANGEROUS ACTION CANCELLED!')}}return(<divclassName="Private1"><h1>Privatepage1</h1><buttononClick={()=>{doDangerousThing()}}>Dodangerousthing</button><pclassName="message">{message}</p><Logout/></div>)}
If we try the code, we will first need to run the application from the app directory:
$ npm run startWhen the application opens (see Figure 7-20), you will need to click Private Page 1.
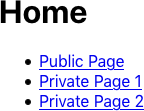
Figure 7-20. Begin by clicking the Private Page 1 link
The application will then ask you to log in (see Figure 7-21.) You should log in with fred/password.
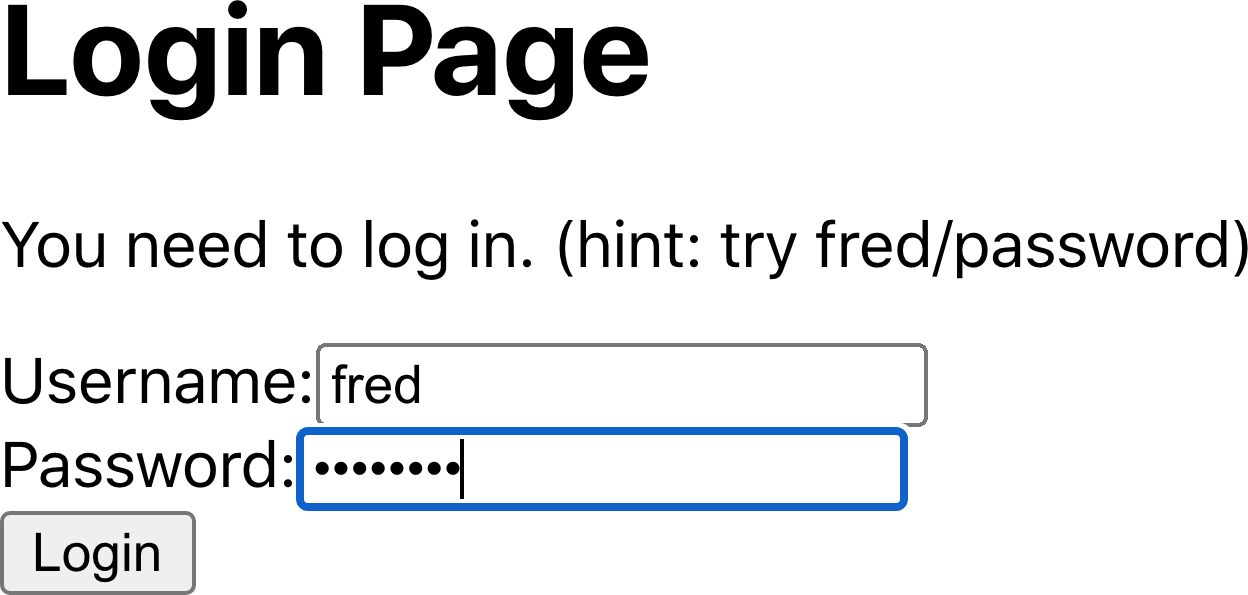
Figure 7-21. The page is secured, so you will need to log in
If you now click the button to perform the dangerous operation, you will need to confirm your credentials before continuing (as shown in Figure 7-22).
Figure 7-22. You must confirm your login details before continuing
Discussion
This recipe centralizes your confirmation code in the SecurityProvider, which has an advantage: not only does this lighten the
code in our components, but it means that user confirmation can take place inside custom hooks. If you abstract a set of operations
into some hook-based service,10
you can also include the confirmation logic in that service. As a result, your components will be completely unaware of which
operations are dangerous and which are not.
You can download the source for this recipe from the GitHub site.
Use Single-Factor Authentication
Problem
We’ve already seen that removable tokens and fingerprints can be used in a two-factor authentication system to provide additional security to a user’s account.
However, you can also use them as a simple login convenience. Many mobile applications allow a user to log in by pressing the fingerprint sensor without entering a username or password.
How do you enable single-factor authentication for a React application?
Solution
Security tokens, such as fingerprint sensors and USB devices like YubiKeys, need to be recorded against a user account on the server. The problem with single-factor authentication is that we don’t know who the user is supposed to be when they tap the fingerprint sensor. In a two-factor system, they have just typed their username into a form. But in a single-factor system, we need to know who the user is supposed to be when we create the assertion request.11
We can avoid this problem by setting a cookie in the browser containing the user ID whenever a person with a token-enabled account logs in.12
When the application displays the login form, the app can check for the existence of the cookie and then use it to create an assertion request and ask the user for the security token. If the user does not want to use the token, they can cancel the request and simply use the login form.13
User IDs are often machine-generated internal keys, which contain no secure information. However, if your user IDs are more easily identifiable, such as an email address, you should not use this approach.
We’re basing the code for this recipe on the secured routes code from “Create Secured Routes”. We manage all of our security through a wrapper
component called SecurityProvider. This provides child components with login and logout functions. We’ll add another functions called loginWithToken:
import{useState}from'react'importSecurityContextfrom'./SecurityContext'import{get}from'@github/webauthn-json'importaxiosfrom'axios'constSecurityProvider=(props)=>{const[loggedIn,setLoggedIn]=useState(false)return(<SecurityContext.Providervalue={{login:async(username,password)=>{constresponse=awaitaxios.post('/login',{username,password,})setLoggedIn(true)},loginWithToken:async(userID)=>{constresponse=awaitaxios.post('/startVerify',{userID,})constassertion=awaitget({publicKey:response.data})awaitaxios.post('/verify',{userID,assertion})setLoggedIn(true)},logout:async()=>{awaitaxios.post('/logout')setLoggedIn(false)},loggedIn,}}>{props.children}</SecurityContext.Provider>)}exportdefaultSecurityProvider
The loginWithToken accepts a user ID and then asks the user to verify their identity with a token by:
-
Calling a
startVerifyfunction on the server to create an assertion request -
Passing the request to WebAuthn to ask the user to press the fingerprint sensor
-
Passing the generated assertion back to an endpoint called
verifyto check that the token is valid
You will need to replace the startVerify and verify endpoints in your
implementation.
To call the loginWithToken function in SecurityProvider, we will need to find the current user’s ID from the cookies. We’ll do this by installing the js-cookie library:
$ npm install js-cookieThis will allow us to read a userID cookie like this:
importCookiesfrom'js-cookie'...constuserIDCookie=Cookies.get('userID')
We can now use this code in a Login component, which will check for a userID cookie. If one exists, it will ask to log in by
token. Otherwise, it will allow the user to log in using a username and password:
import{useEffect,useState}from'react'importuseSecurityfrom'./useSecurity'importCookiesfrom'js-cookie'constLogin=()=>{const{login,loginWithToken}=useSecurity()const[username,setUsername]=useState()const[password,setPassword]=useState()constuserIDCookie=Cookies.get('userID')useEffect(()=>{;(async()=>{if(userIDCookie){loginWithToken(userIDCookie)}})()},[userIDCookie])return(<div><h1>LoginPage</h1><p>Youneedtologin.</p><labelhtmlFor="username">Username:</label><inputid="username"name="username"type="text"value={username}onChange={(evt)=>setUsername(evt.target.value)}/><br/><labelhtmlFor="password">Password:</label><inputid="password"name="password"type="password"value={password}onChange={(evt)=>setPassword(evt.target.value)}/><br/><buttononClick={()=>login(username,password)}>Login</button></div>)}exportdefaultLogin
Let’s try the example application. We must first start the development server from the application directory:
$ npm run startThen in a separate terminal, we can start the example API server:
$ cd server$ npm run start
The development server runs on port 3000; the API server runs on port 5000.
When the application starts, click the link to the Account page (as shown in Figure 7-23).
Figure 7-23. When the app opens, click the link to the Account page
The application asks us to log in (see Figure 7-24). Use the username freda and the password mypassword.

Figure 7-24. Log in with freda/mypassword
The account page asks if we want to enable login with a fingerprint sensor or physical token (see Figure 7-25). You can register a token and then log out.
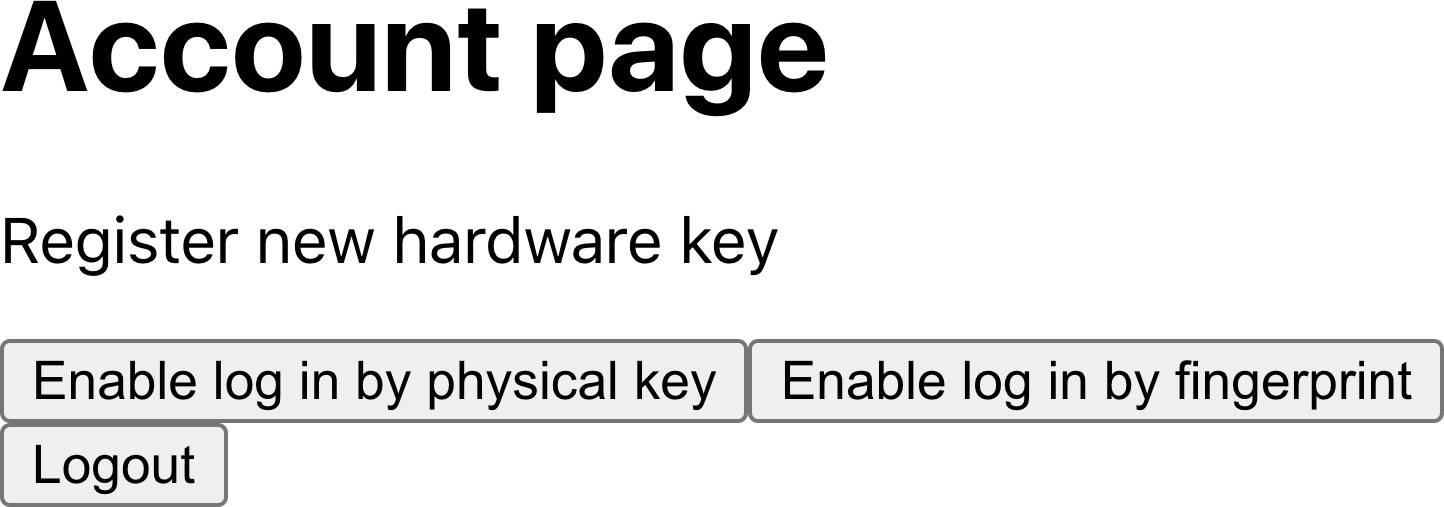
Figure 7-25. Choose to enable login with a physical token or fingerprint
The next time we log in, we will immediately see the request to activate a token (see Figure 7-26).
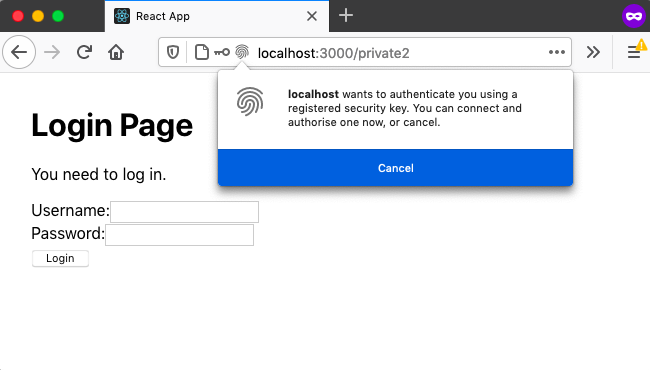
Figure 7-26. Once enabled, you can log in with just the token
If we activate the token, we will log in without providing a username and password.
Discussion
It’s important to note that single-factor authentication is about increasing convenience rather than security. Fingerprint sensors are particularly convenient, as logging in literally involves moving one finger.
You should always provide the ability to fall back to using the login form. Doing so will not reduce the security of your application, as a wily hacker could delete the cookie and fall back to using the form anyway.
You can download the source for this recipe from the GitHub site.
Test on an Android Device
Problem
You can perform most mobile browser testing with a desktop browser simulating the appearance of a mobile device (see Figure 7-27).
Figure 7-27. You can use a desktop browser for most mobile testing
But there are times when it is best to test a React application on a physical mobile device, which is usually not a problem; the mobile device can access the React application remotely using the IP address of the development machine.
There are, however, circumstances where that is not true:
-
Your mobile device might not be able to connect to the same network as your development machine.
-
You might be using a technology, such as WebAuthn, that requires HTTPS for domains other than localhost.
Is it possible to configure a mobile device to access a React app as if it is running on localhost, even though it is running on a separate machine?
Solution
This recipe will look at how we can proxy the network on an Android-based device so that connections to localhost will go to the server on your development machine.
The first thing you’ll need is an Android device that has USB debugging enabled. You will also need a copy of the Android SDK installed, which will allow you to use a tool called the Android Debug Bridge (ADB). The ADB opens a communication channel between your development machine and an Android device.
You will then need to connect your Android device to your development machine with a USB cable and ensure that the adb command is
available on your command path.14 You can then list the Android devices connected to your machine:
$ adb devices* daemon not running; starting now at tcp:5037* daemon started successfullyList of devices attached25PRIFFEJZWWDFWO device$
Here you can see there is a single device connected, with a device ID of 25PRIFFEJZWWDFWO.
You can now use the adb command to configure a proxy on the Android device, which will redirect all HTTP traffic to its internal
port 3000:
$ adb shell settings put global http_proxy localhost:3000If you have more than one Android device connected to your machine, you will need to specify its device ID with the adb
option -s <device-id>.
You will next need to tell adb to run a proxy service on the Android device, which will forward any traffic from port 3000 on the device to port 3000 on the development machine:
$ adb reverse tcp:3000 tcp:3000If you now open a browser on the Android device and tell it to go to http://localhost:3000, it will display the app running on your development machine, as if it’s running inside the device (see Figure 7-28).
Figure 7-28. If you open a mobile browser to localhost, it will connect to the development machine
Once you have finished using the app, you will need to disable the proxy setting on the Android device.
If you fail to disable the proxy on the Android device, it will no longer access the network.
You can do this by resetting the proxy back to :0:
$ adb shell settings put global http_proxy :0Check Security with ESlint
Problem
Just a few common coding issues frequently cause security threats in JavaScript. You can decide to create a set of coding standards that will avoid those errors. However, you will need to frequently review the standards to keep them up-to-date with the latest changes in technology, and you will also need to introduce slow and expensive code review processes.
Is there a way to check for poor security practices in code that will not slow down your development processes?
Solution
One way to introduce security reviews is to try to automate them. One tool that will allow you to do this is eslint. If you’ve
created your application with a tool like create-react-app, you have probably already got eslint installed. In fact,
create-react-app runs eslint each time it restarts its development server. If you’ve ever seen coding issues highlighted in the
terminal, that output has come from eslint:
Compiled with warnings.src/App.jsLine 5:9: 'x' is assigned a value but never used no-unused-varsSearch for the keywords to learn more about each warning.To ignore, add // eslint-disable-next-line to the line before.
If you don’t have eslint installed, you can install it through npm:
$ npm install --save-dev eslintOnce installed, you can initialize it like this:
$ node_modules/.bin/eslint --init- How would you like to use ESLint? · problems- What type of modules does your project use? · esm- Which framework does your project use? · react- Does your project use TypeScript? · No / Yes- Where does your code run? · browser- What format do you want your config file to be in? · JavaScriptLocal ESLint installation not found.The config that you've selected requires the following dependencies:eslint-plugin-react@latest eslint@latest- Would you like to install them now with npm? · No / Yes$
Remember: you don’t need to initialize eslint if you’re using create-react-app; it’s already done for you.
At this point, you could choose to write your own set of eslint rules to check for breaches of any security practices. However,
it’s far easier to install an eslint plugin with a set of security rules already written for you.
For example, let’s install the eslint-plugin-react-security package, which is created and managed by Slyk:
$ npm install --save-dev eslint-plugin-react-securityOnce installed, we can enable this plugin by editing the eslintConfig section of package.json (if you’re using
create-react-app) or the eslintrc* file in your app
directory.
You should change it from this:
"eslintConfig":{"extends":["react-app","react-app/jest"]},
to this:
"eslintConfig":{"extends":["react-app","react-app/jest"],"plugins":["react-security"],"rules":{"react-security/no-javascript-urls":"warn","react-security/no-dangerously-set-innerhtml":"warn","react-security/no-find-dom-node":"warn","react-security/no-refs":"warn"}},
This change will enable four rules from the React Security plugin.
To check that they work, let’s add some code to an application that will contravene the no-dangerously-set-innerhtml rule:
importlogofrom'./logo.svg'import'./App.css'functionApp(){return(<divclassName="App"><headerclassName="App-header"><imgsrc={logo}className="App-logo"alt="logo"/><p>Edit<code>src/App.js</code>andsavetoreload.</p><divdangerouslySetInnerHTML={{__html:'<p>This is a bad idea</p>',}}/><aclassName="App-link"href="https://reactjs.org"target="_blank"rel="noopener noreferrer">LearnReact</a></header></div>)}exportdefaultApp
If you’ve installed eslint manually, you can now scan this file with:
$ node_modules/.bin/eslint src/App.jsIf you’re using create-react-app, you just need to restart the server to ensure that it reloads the eslint config:
Compiled with warnings.src/App.jsLine 12:16: dangrouslySetInnerHTML prop usage detectedreact-security/no-dangerously-set-innerhtmlSearch for the keywords to learn more about each warning.To ignore, add // eslint-disable-next-line to the line before.
Discussion
If you have a team of developers, you might also want to run the eslint checks using a Git pre-commit hook to prevent developers
from ever checking in code that fails the audit. A Git hook will give faster feedback to the developer and prevent them from failing
the build for everyone else.
If you want to configure pre-commit hooks through your package.json file, consider installing Husky code hooks.
Another advantage of automating your security checks is that you can add them to your build-and-deploy pipeline. If you run the checks at the start of the pipeline, you can reject a commit immediately and notify the developer.
You can download the source for this recipe from the GitHub site.
Make Login Forms Browser Friendly
Problem
Many security solutions rely on username/password forms, but several usability traps are easy to fall into when creating them. On some devices, automated capitalization and autocorrect can corrupt usernames and passwords in an attempt to be helpful. Some browsers will attempt to autocomplete username fields, but it is often unclear what rules they use, so autocomplete works on some sites but not others.
What practices should you follow when building login forms so that they will work with the browser rather than against it?
Solution
Several HTML attributes can significantly improve the usability of your login forms.
First, it can be useful to disable autocorrect for username fields. Autocorrect is frequently applied on mobile devices to
compensate for the small keyboards and the spelling mistakes that inevitably occur. But autocorrect is of little use when typing
usernames. You can disable autocorrect using the autoCorrect attribute:
<inputautoCorrect="off"/>
Next, if your username is an email address, consider setting the type to email, which might launch an email-specific keyboard on
mobile devices. Some browsers may even show recent email addresses in an autocomplete window or in the header of an email-specific
keyboard:
<inputtype="email"/>
You might also consider using j_username as the id and name of the username field. Why? It’s because Java-based applications
commonly have fields named j_username, and so the user is likely to have provided a j_username value in the past. This increases
the likelihood that the browser might offer the email address in an autocomplete window:
<inputid="j_username"name="j_username"/>
You can explicitly say that a field represents a username field, making it very likely that you will trigger an autocomplete response from the browser:
<inputautoComplete="username"/>
Now, what to do about passwords?
First, always set the type to password:
<inputtype="password"/>
Never be tempted to reproduce the visual appearance of a password field in some other way, for example, by custom CSS styling. Doing
so will prevent the browser from applying standard security features to the password field, such as disabling the copy function
inside it. Also, if you don’t set the type to password, the browser will not offer to store the value in its password manager.
There are two types of password fields: for current passwords (when logging in) and for new passwords (when signing up or changing a password).
Why is this relevant? It’s because the HTML autoComplete attribute can indicate to the browser how you intend to use the password
field.
If it’s a login form, you will want to say that the password is a current-password:
<inputtype="password"autoComplete="current-password"/>
If it’s a registration or change password form, you should set it to new-password:
<inputtype="password"autoComplete="new-password"/>
This value will encourage the browser to autocomplete stored passwords in a login form. It will also trigger any built-in or third-party password generation tools.
Finally, avoid using wizard-style login screens (see Figure 7-29 for an example from the Washington Post).
Browsers are less likely to recognize a single username field as a login form and so are less likely to offer to complete the details for you.
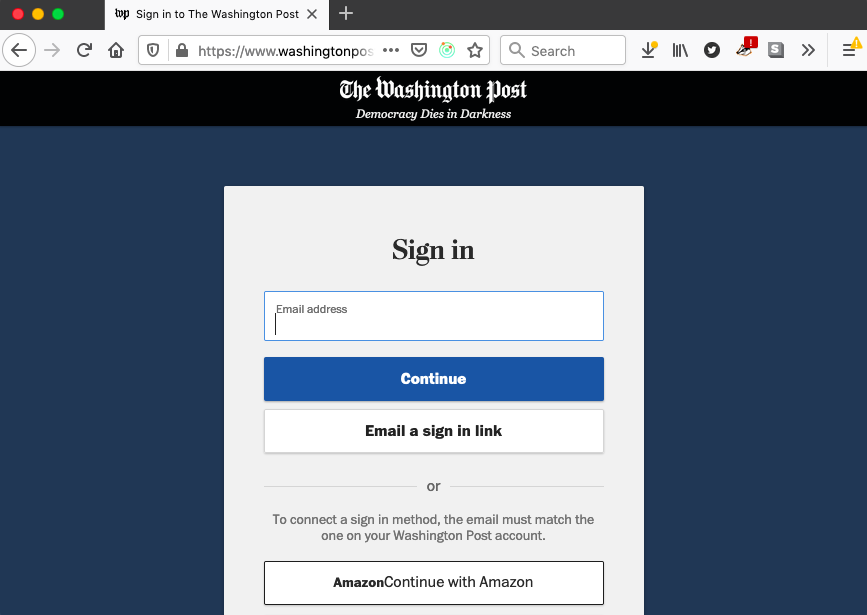
Figure 7-29. Multistep forms can prevent a browser from using autocomplete
Discussion
The autocomplete attribute has many other seldom-used values for several types of form fields, from address details and phone
numbers to credit card numbers. For further information, see the Mozilla development site.
1 Or, in the case of GraphQL, accessors and mutators.
2 With the notable exception of Internet Explorer.
3 See “Create Secured Routes”.
4 It is possible to get around this problem on Android devices by proxying your phone through your development machine. See “Test on an Android Device”.
5 See the Let’s Encrypt site.
6 By default, this will be on port 443.
7 The .pem extension stands for Privacy-Enhanced Mail. The PEM format was initially designed for use with email but is now used as a general certificate storage format.
8 For a detailed guide, see this tutorial from BounCA.
9 An exception would be if the user has connected an external fingerprint sensor.
10 For an example of such a service, see the useForum hook in “Refresh Automatically with State Counters”.
11 The assertion request is needed when the browser asks the user to scan their fingerprint or activate their token. It includes a list of all acceptable devices and so will be unique to a given user.
12 A consequence of this approach is that the user will perform single-factor authentication on the browser only where they registered the token. If they use a different browser or have recently cleared their cookies, they will have to fall back to using the login form.
13 This assumes that you are using a cookie that is readable by JavaScript. It’s also possible to use an HTTP-only cookie, which only the server (or service workers) can read. If you use an HTTP-only cookie, you will need code on the server to check whether the user should provide a token.
14 You will need to locate the Android SDK installed on your machine. You can find the adb command in a subdirectory within this installation.