Chapter 11. Progressive Web Applications
Progressive web applications (PWAs) are web applications that try to behave like locally installed applications. They can work offline, integrate with the native notification system, and have the ability to run long background processes, which can continue even after you leave the website. They’re called progressive because they smoothly downgrade their functionality if some feature is not available in the current browser.
This chapter focuses almost exclusively on one feature of PWAs: service workers. You will occasionally encounter the term progressive web application used to describe any JavaScript-rich browser application. The truth is that unless that application uses service workers, it isn’t a PWA.
Service workers are, in effect, a locally installed server for the application. The backend server is a software distribution mechanism and a provider of live data services, but the service worker is really in charge because it provides access to the network. It can choose to satisfy network requests from its own local cache. If the network is not available, it can choose to replace network resources with local placeholders. It can even queue data updates offline and synchronize with the backend server when the network connection reappears.
This is a good topic for the final chapter because it has been the most enjoyable chapter to write. Service workers are one of the most fascinating features found in modern browsers. We hope you have fun.
Create Service Workers with Workbox
Problem
PWAs can work even when you’re offline. They can cache any content or code they require, and the cache will survive the user refreshing the page. They can run background operations independently of the code that runs in the browser.
PWAs can do this because of service workers. Service workers are a kind of web worker. A web worker is a piece of JavaScript that runs in a separate thread from the JavaScript running in a web page. Service workers are specialized web workers that can intercept network traffic between a web page and the server, giving them a tremendous amount of control over the page that registers them. You can think of a service worker as a kind of local proxy service that’s available even when you’ve disconnected from the network.
Service workers are most often used to cache content locally. Browsers will cache most content they see, but a service worker can do so much more aggressively. For example, hitting force-refresh in a browser will often force it to reload assets from the network. But the force-refresh function will not affect service workers, no matter how many times a user uses it.
You can see a service worker in operation in Figure 11-1.
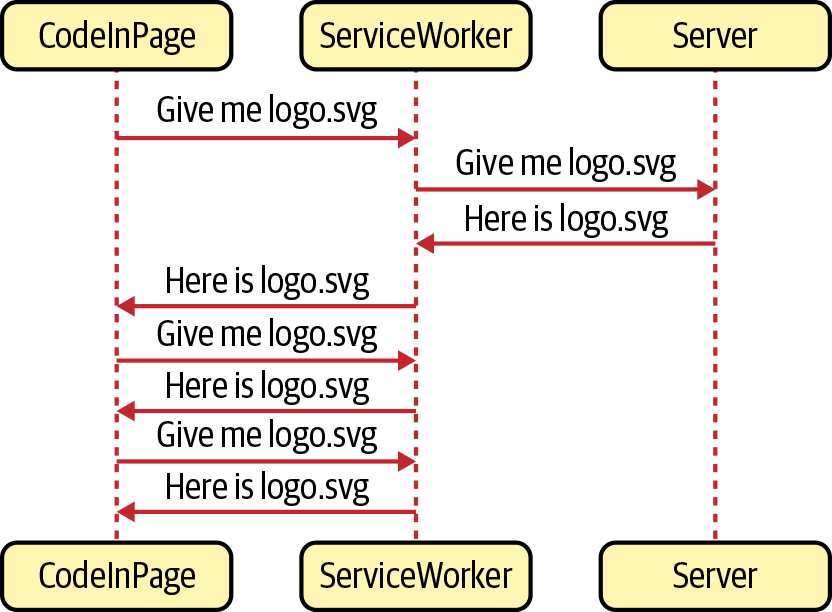
Figure 11-1. A service worker will intercept all network requests
In this case, the service worker will cache files the first time they are downloaded. If the page asks for the logo.svg file more than once, the service worker will return it from its private cache rather than from the network.
How a service worker caches data and how it decides if it needs to return data from its cache or the network is called a strategy. We will look at various standard strategies in this chapter.
Service workers are stored on the server as separate JavaScript files, and the browser will download and install them from a URL. There is nothing to prevent you from handcrafting a service worker and storing it in the public folder of your application, but there are several problems with writing service workers from scratch.
First, service workers are notoriously difficult to create. Not only can they include complex code, but they also have complex life cycles. It’s far too easy to write a service worker that fails to load or caches the wrong files. Even worse, it’s possible to write a service worker that will isolate your application from the network.
Second, you can use service workers to precache application code. For a React application, this is a fantastic feature. Instead of downloading several hundred kilobytes of JavaScript, a service worker can return it all in a split second from a local cache, which means that your application can start almost immediately, even on a low-powered device with a bad network connection.
But code caching has its own set of problems. Let’s say we have a React application that includes the following generated JavaScript files:
$ ls build/static/js/2.d106afb5.chunk.js 2.d106afb5.chunk.js.map3.9e79b289.chunk.js.map main.095e14c4.chunk.js.mapruntime-main.b175c5d9.js.map 2.d106afb5.chunk.js.LICENSE.txt3.9e79b289.chunk.js main.095e14c4.chunk.jsruntime-main.b175c5d9.js$
If we want to precache these files, the service worker will need to know the names. That’s because it will download the files in the background, even before the browser has asked for them. So if you create a service worker by hand, you will need to include the names of each of the files that it will precache.
But then what happens if you make a small change to your source code and then re-build the application?
$ yarn run build$ ls build/static/js/2.d106afb5.chunk.js 2.d106afb5.chunk.js.map3.9e79b289.chunk.js.map main.f5b66cc7.chunk.js.mapruntime-main.b175c5d9.js.map 2.d106afb5.chunk.js.LICENSE.txt3.9e79b289.chunk.js main.f5b66cc7.chunk.jsruntime-main.b175c5d9.js$
The filenames change, which means you will now have to update the service worker script with the latest generated filenames.
How can you create stable service workers that are always in sync with the latest application code?
Solution
We’re going to use a set of tools from Google called Workbox. The Workbox tools allow you to generate service workers that are up-to-date with your latest application files.
Workbox includes a set of standard strategies to handle the details of common service worker use cases. If you want to precache your application, you can do so with a single line of code into Workbox.
To see how to use Workbox, consider the application you can see in Figure 11-2.
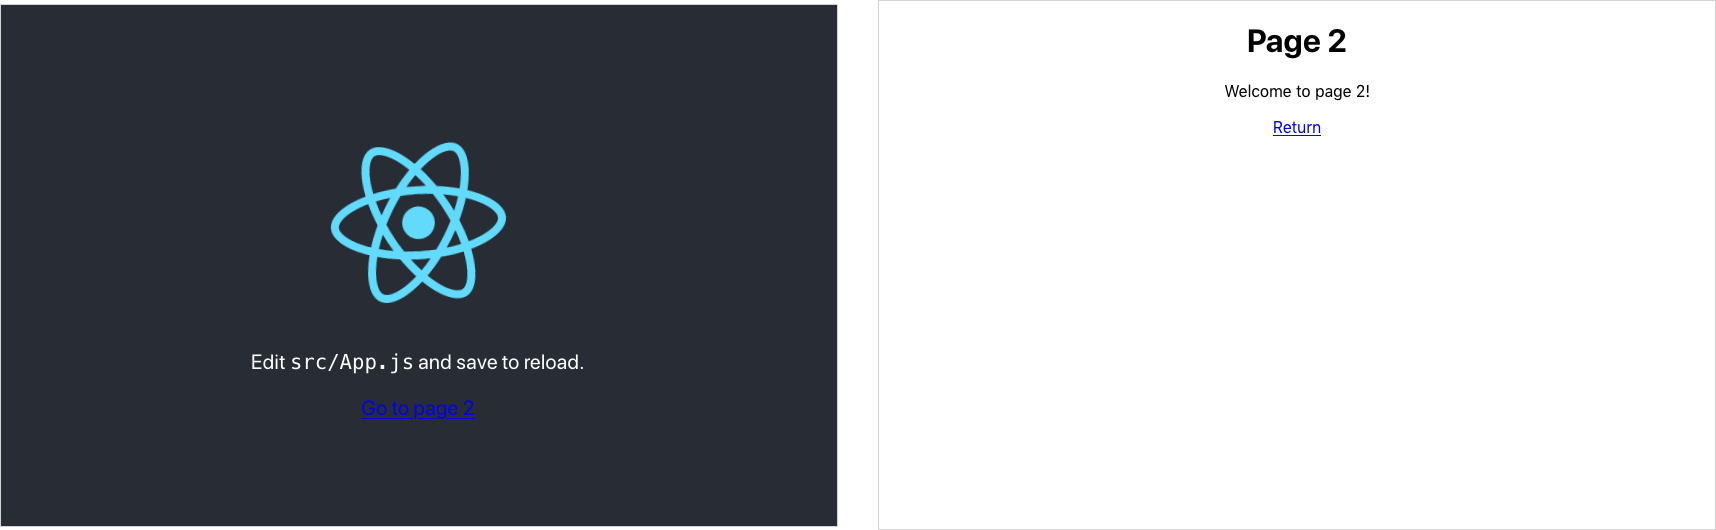
Figure 11-2. Our example application has two pages
It’s a simple two-page application based on the default application generated by create-react-app. We’re going to build a service
worker that will precache all of the application’s code and files.
We’ll begin by installing a few of the libraries from Workbox:
$ yarn add workbox-core$ yarn add workbox-precaching$ yarn add workbox-routing
You will see what each of these libraries is for as we build the service worker.
In our application, we will create a new file for the service worker called service-worker.js. We can place this file in the same directory as the rest of the application code:
import{clientsClaim}from'workbox-core'import{precacheAndRoute}from'workbox-precaching'clientsClaim()precacheAndRoute(self.__WB_MANIFEST)
If we were creating a service worker by hand, we would have to create it in the same directory we use to store other static
content. For example, in a create-react-app application, we would have to create it in the public directory.
Our service worker will precache all of the application code. That means it will automatically cache any CSS, JavaScript, HTML, and images that are part of the application.
The service worker calls the clientsClaim function from workbox-core, which will make the service worker the controller for all
clients within its scope. A client is a web page, and the scope is any web page with a URL within the same path as the service
worker. Workbox will generate our service worker at https://host/service-worker.js, which means the service worker will be the
controller for all pages that begin with https://host/.
The precacheAndRoute function will handle all of the gory details of the precaching process. It will create and manage the local cache, and it will intercept network requests for application files and load them from the local cache rather than the
network.
Service workers will function only if loaded with HTTPS. Most browsers make an exception for sites loaded from localhost. For security reasons, browsers will not run service workers in private tabs.
As we’ve created our service worker, we need to register it from the main application code. Registration is a complex process, but the good news is that it’s almost always the same. Once you’ve written the registration code for one application, you can copy it, unchanged, to another. Also, if you are building your application using the cra-template-pwa template, it will generate the registration code for you.1
It is still worth understanding the details of the registration process; it will give you insight into the life cycle of a service worker. That will make it a lot easier to understand any seemingly odd behavior that occurs after you deploy your application.
Create a new file called registerWorker.js in the main source directory of the application:
constregister=(pathToWorker,onInstall,onUpdate,onError)=>{// We will write this code shortly}constregisterWorker=()=>{register('/service-worker.js',(reg)=>console.info('Service worker installed',reg),(reg)=>console.info('Service worker updated',reg),(err)=>console.error('Service worker failed',err))}exportdefaultregisterWorker
Leave the register function empty for now.
We will call the registerWorker function from the index.js file in our application:
importReactfrom'react'importReactDOMfrom'react-dom'import'./index.css'importAppfrom'./App'importregisterWorkerfrom'./registerWorker'ReactDOM.render(<React.StrictMode><App/></React.StrictMode>,document.getElementById('root'))registerWorker()
The registerWorker function will call register with the path of our generated service worker: service-worker.js.
We can now start to write the register function:
constregister=(pathToWorker,onInstall,onUpdate,onError)=>{if(process.env.NODE_ENV==='production'&&'serviceWorker'innavigator){constpublicUrl=newURL(process.env.PUBLIC_URL,window.location.href)if(publicUrl.origin!==window.location.origin){return}// Do the loading and registering here}}
We’ll check that we’re in production mode and that the browser can run service workers. The progressive in progressive web application means that we should always check that a feature is available before using it. Almost all browsers (with the notable exception of Internet Explorer) support service workers, but we can skip the service worker entirely if a browser doesn’t. It will mean that the application will lose its ability to work offline, but other than that, the application should still work.
We also add an extra check to ensure we are running on the specified PUBLIC URL of the application, which will avoid cross-domain
issues that arise when loading code from content distribution networks.2
Now we can download and register the service worker:
constregister=(pathToWorker,onInstall,onUpdate,onError)=>{if(process.env.NODE_ENV==='production'&&'serviceWorker'innavigator){constpublicUrl=newURL(process.env.PUBLIC_URL,window.location.href)if(publicUrl.origin!==window.location.origin){return}window.addEventListener('load',async()=>{try{constregistration=awaitnavigator.serviceWorker.register(process.env.PUBLIC_URL+pathToWorker)// Code to check progress goes here}catch(err){if(onError){onError(err)}}})}}
Once we know the web page is loaded, we can register the service worker with the navigator.serviceWorker.register function,
passing it the full URL of the service worker: https://host/service-worker.js.
It returns a registration object, which can be used to track and manage the service worker. For example, you can use the registration object to find out when the service worker is updated or installed:
constregister=(pathToWorker,onInstall,onUpdate,onError)=>{if(process.env.NODE_ENV==='production'&&'serviceWorker'innavigator){constpublicUrl=newURL(process.env.PUBLIC_URL,window.location.href)if(publicUrl.origin!==window.location.origin){return}window.addEventListener('load',async()=>{try{constregistration=awaitnavigator.serviceWorker.register(process.env.PUBLIC_URL+pathToWorker)registration.onupdatefound=()=>{constworker=registration.installingif(worker){worker.onstatechange=()=>{if(worker.state==='installed'){if(navigator.serviceWorker.controller){if(onUpdate){onUpdate(registration)}}else{if(onInstall){onInstall(registration)}}}}}}}catch(err){if(onError){onError(err)}}})}}
The onupdatefound handler runs when the browser starts to install the service worker. Once the browser has installed the service
worker, we can check
navigator.serviceWorker.controller to see if a previous service worker is still running. If not, we know that
this is a fresh installation and not an update.
One of the most confusing things about service workers is the way that they are updated. If an old service worker is already in control of a page, the browser will put the new service worker into a waiting state, which means it will do absolutely nothing until the old service worker stops. A service worker stops when the user closes all the pages that it controls. Consequently, if you update your service worker, you will not run the new code until you open, close, and then open the page again.
This process can be confusing for anyone manually testing a new service worker feature.
Before we build the application, we will need to configure the build tools to convert our service-worker.js source file into a densely written service worker script.
If you’re building your application with Webpack, you should install the Workbox Webpack Plugin:
$ yarn install -D workbox-webpack-pluginYou will not need to install the Workbox Webpack Plugin or configure its use if you created your application with
create-react-app, which includes and configures the plugin for you.
You can then add the following to your webpack.config.js configuration:
const{InjectManifest}=require('workbox-webpack-plugin')module.exports={....plugins:[....newInjectManifest({swSrc:'./src/service-worker.js',}),],}
This configuration will tell Webpack to generate a service worker from the src/service-worker.js file. It will also generate a file called asset-manifest.json in your built application, which will list all of the application files. The service worker will use the information in asset-manifest.json when it’s precaching the application.
Now you build the application:
$ yarn run buildIn your build directory, you will see a generated service-worker.js file and the asset-manifest.json file:
asset-manifest.json logo192.png service-worker.js.mapfavicon.ico manifest.json staticindex.html robots.txtlogo512.png service-worker.js
The asset-manifest.json file will contain something like this:
{"files":{"main.css":"/static/css/main.8c8b27cf.chunk.css","main.js":"/static/js/main.f5b66cc7.chunk.js","main.js.map":"/static/js/main.f5b66cc7.chunk.js.map","runtime-main.js":"/static/js/runtime-main.b175c5d9.js","runtime-main.js.map":"/static/js/runtime-main.b175c5d9.js.map","static/js/2.d106afb5.chunk.js":"/static/js/2.d106afb5.chunk.js","static/js/2.d106afb5.chunk.js.map":"/static/js/2.d106afb5.chunk.js.map","static/js/3.9e79b289.chunk.js":"/static/js/3.9e79b289.chunk.js","static/js/3.9e79b289.chunk.js.map":"/static/js/3.9e79b289.chunk.js.map","index.html":"/index.html","service-worker.js":"/service-worker.js","service-worker.js.map":"/service-worker.js.map","static/css/main.8c8b27cf.chunk.css.map":"/static/css/main.8c8b27cf.chunk.css.map","static/js/2.d106afb5.chunk.js.LICENSE.txt":"/static/js/2.d106afb5.chunk.js.LICENSE.txt","static/media/logo.6ce24c58.svg":"/static/media/logo.6ce24c58.svg"},"entrypoints":["static/js/runtime-main.b175c5d9.js","static/js/2.d106afb5.chunk.js","static/css/main.8c8b27cf.chunk.css","static/js/main.f5b66cc7.chunk.js"]}
You can now run the application. You can’t just start the development server with this:
$ yarn run startThat will only run the application in development mode, and the service worker will not start. You will need to run a server on the contents of the build directory. The simplest way to do this is by installing the serve package globally and then running it against the build directory:
$ npm install -s serve$ serve -s build/┌──────────────────────────────────────────────────┐│ ││ Serving! ││ ││ - Local: http://localhost:5000 ││ - On Your Network: http://192.168.1.14:5000 ││ ││ Copied local address to clipboard! ││ │└──────────────────────────────────────────────────┘
The -s option is for running SPAs. If the server can’t find a matching file, it will return the
build/index.html file.
You can now open a browser at http://localhost:5000. The application will appear, and if you open the developer tools and switch to the Application tab, under Service Workers, you should see the service-worker.js script running (see Figure 11-3).
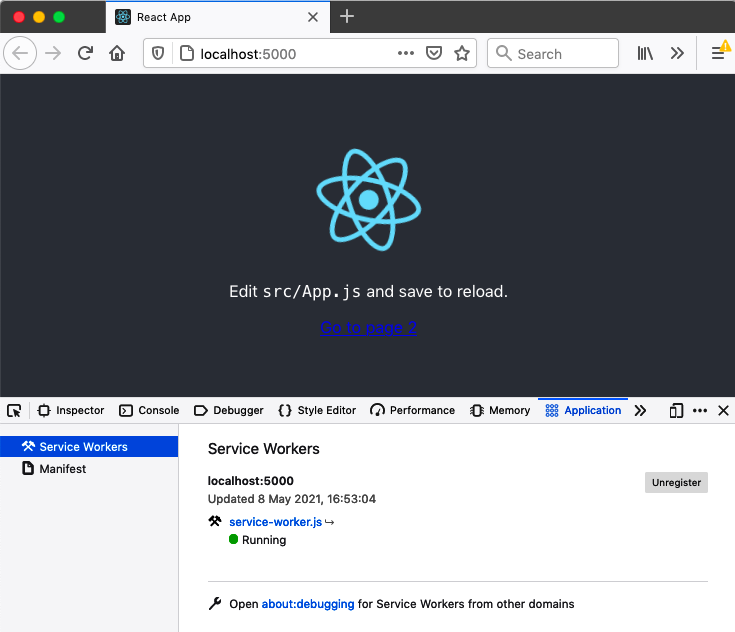
Figure 11-3. The service worker installed and running in the application
The service worker will download all of the application files into a local cache so that the next time the page is loaded, the files will come from the local cache rather than the server. You can see this happen if you switch to the Network tab in developer tools and then reload the page (see Figure 11-4). The service worker will supply each of the network responses, except those that fall outside its scope. Any file that belongs at the site level rather than page level, such as favicon icons, will still be downloaded in the usual way.
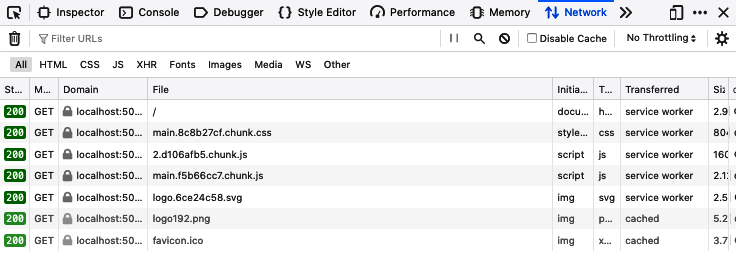
Figure 11-4. After refresh, the files are downloaded using the service worker
The service worker is returning the files from a local cache. If you are using Chrome, you can see the cache on the Application tab. For Firefox, you will find it on the Storage tab (see Figure 11-5).
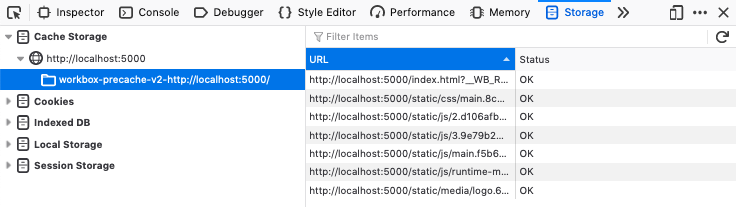
Figure 11-5. A cache stores the files locally
The cache doesn’t contain a copy of all the application files, only those that the application has requested. In this way, it will avoid downloading files that are not needed and will download files into the cache only after the browser or the application code has requested them.
So the first time you load the application, the cache might be empty. It depends on when the service worker becomes active. If the page loads before the service worker is active, the service worker won’t intercept the network requests and cache the responses. As a result, you might have to refresh a page before you see the caches appear.
To prove that the files are genuinely coming from the service worker, you can stop the server and refresh the web page. Even though the server is no longer there, the page should load as usual (see Figure 11-6).
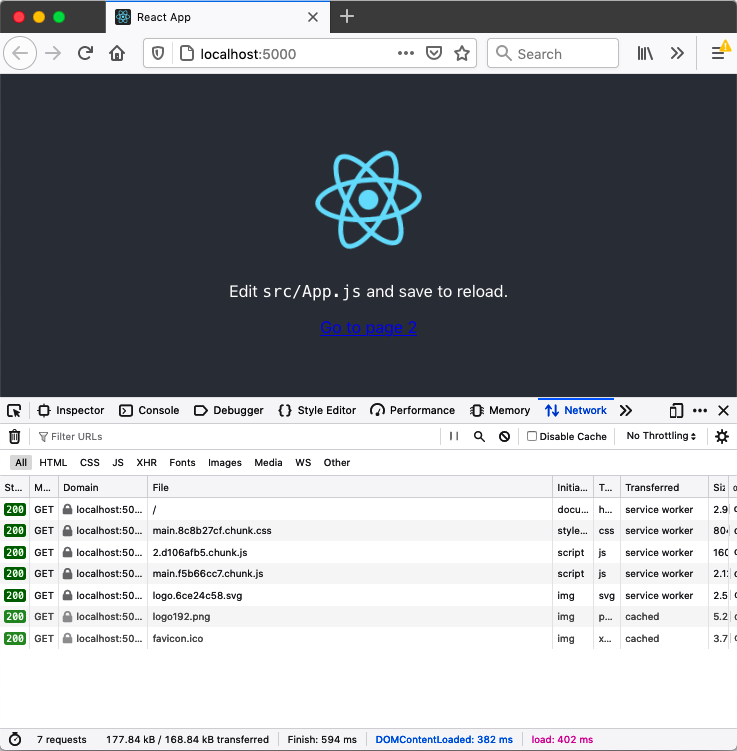
Figure 11-6. Even without the server running, you can refresh the page
You should now think of the React application as a local application rather than a network application. It’s served from the service worker rather than the backend server. It will even let you get to navigate to page 2 (see Figure 11-7).
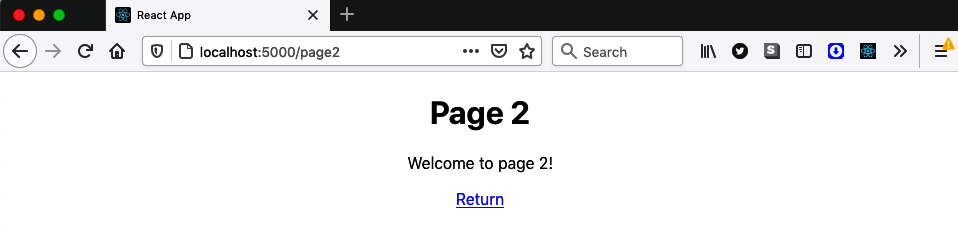
Figure 11-7. You can still navigate between pages even when the server is offline
Using code splitting can interfere with some offline functionality. If the code to display page 2 in the example application was stored in a separate JavaScript file that was not initially loaded, the browser will not return it from the local cache. It will be available once the browser has visited that page when the server is online.
While we are looking at page 2, we can examine a current problem with the service worker. Make sure the server is not running, and navigate to page 2. It should load normally. Then reload the page. Instead of seeing page 2, you will get an error page from the browser (see Figure 11-8).
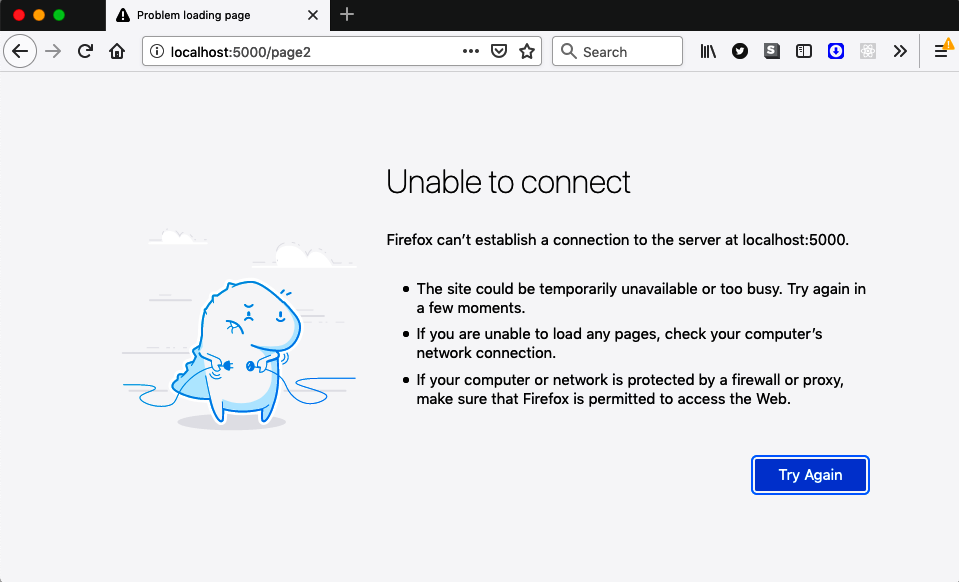
Figure 11-8. Page 2 will not reload when the server is offline
We can reload the front page of the application while offline, so why isn’t this true for page 2? It’s because this is an SPA. When we navigate to page 2, the browser isn’t loading a new web page from the server; instead, it uses the history API to update the URL in the address bar and then modify the DOM to show page 2.
However, when you reload the page, the browser will make a new request to the server for http://localhost:5000/page2. When the server is running, it will return the contents of index.html for all page requests, and the React router will render the components to look like page 2.
This process falls apart when the server is no longer online. The service worker will not be able to respond to a request for http://localhost:5000/page2 using cached data. There is nothing in the cache for page2. So, it will forward the request to the server, which is no longer running. That’s why you get the error page.
We can fix this by adding a little more code to service-worker.js:3
import{clientsClaim}from'workbox-core'import{createHandlerBoundToURL,precacheAndRoute,}from'workbox-precaching'import{registerRoute}from'workbox-routing'clientsClaim()precacheAndRoute(self.__WB_MANIFEST)constfileExtensionRegexp=newRegExp('/[^/?]+\.[^/]+$')registerRoute(({request,url})=>{if(request.mode!=='navigate'){returnfalse}if(url.pathname.startsWith('/_')){returnfalse}if(url.pathname.match(fileExtensionRegexp)){returnfalse}returntrue},createHandlerBoundToURL(process.env.PUBLIC_URL+'/index.html'))
We are now registering an explicit route using workbox-routing. A route decides how the service worker will deal with requests
for a set of paths. We’re registering a new route using a filter function and a handler in the previous example code. The filter
function is the first value passed to the registerRoute call. It will return true if this route deals with a given request. The
filter function in the preceding code will deal with any navigation requests to new web pages. So if you open the browser at
http://localhost:5000/ or http://localhost:5000/page2, this route will return the same cached copy of index.html.
The function createHandlerBoundToURL will create a handler to treat any of these requests as if they were requests for
http://localhost:5000/index.html, which means that if we reload the application while we’re on page 2, the service worker should
load the HTML the same way it does when we are on the front page.
Let’s try this. After saving the change to service-worker.js, rebuild the application:
$ yarn run buildNow make sure that your local server is running:
$ serve -s build/Open the browser at http://localhost:5000, and you should see the application. If you check the developer tools, you will find that it has loaded the new version of the service worker, but the old version of the service worker is still running (see Figure 11-9).
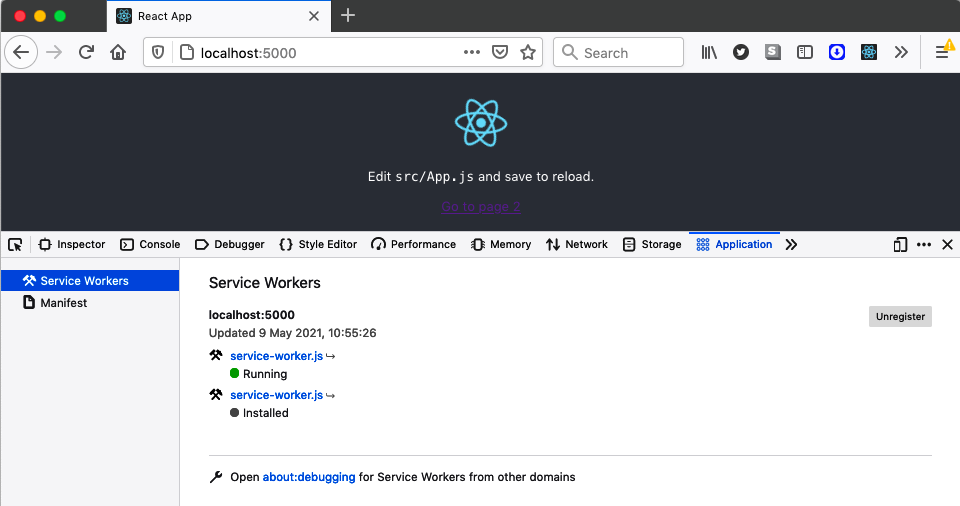
Figure 11-9. The old and new service workers are both visible in the tools
The previous version of the service worker is still in control of the application. The browser has installed the new service worker, but it’s in a waiting state. It won’t take over until the old service work disappears, and that will happen if you close down the tab and then reopen it (see Figure 11-10).
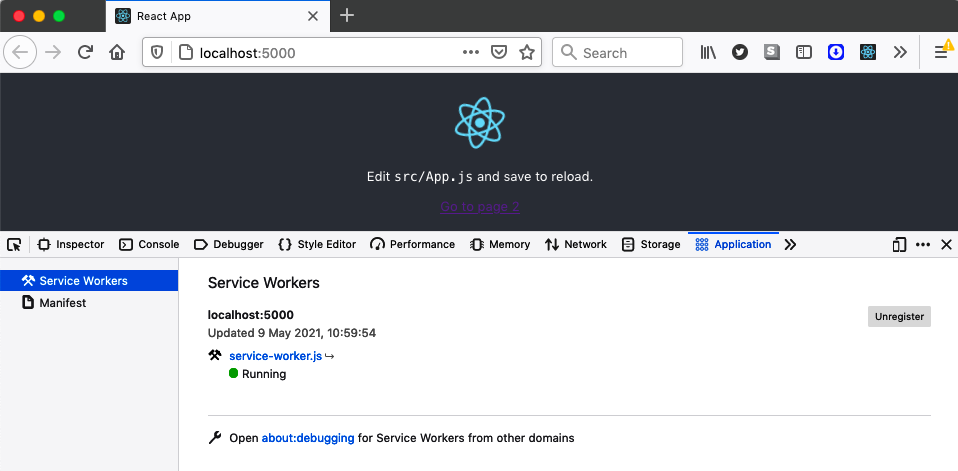
Figure 11-10. Reopen the application to activate the new worker
If you now stop your local server and navigate to page 2, you should be able to reload it with no problems (see Figure 11-11).
Figure 11-11. Once you’ve registered a route handler, you can reload page 2
Discussion
We’ve gone into quite a lot of depth in this recipe, looking at how to create, register, and use service workers. In the following recipe, you will see that you can automatically generate a lot of this code when you first build the application. But it’s still worth digging into the messy details of how service workers operate. It helps to understand the life cycle of a worker: how a browser installs a service worker and how it becomes active.
We have found that service workers can confuse anyone who is manually testing the code. If the browser is still running an old version of a service worker, it may still be running an old version of your application. This confusion can lead to failed test reports because an old bug might still appear to be there. Once you understand how new service workers load and how old service workers disappear, you can quickly diagnose the problem.
Out-of-date service workers are not an issue with automated browser tests, which will tend to run in a clean state at the start of a test, with no caches or running service workers.
Progressive web applications with service workers are a kind of hybrid between a local application and a remote application. The server becomes a distribution server for an application that is installed locally. When the application is updated, it will install a new version in the browser, but that new application will not typically become available until the browser reopens it.
Now that we’ve gone through service workers in a detailed way, we can look at how you can quickly add them to a new application.
You can download the source for this recipe from the GitHub site.
Build a PWA with Create React App
Problem
You need two things before you can run service workers in your application. First, you need a service worker, and “Create Service Workers with Workbox” looked at how the Workbox library would help simplify the creation and management of service workers. Second, you need code that will register the service worker in your application. Although complex to create, you can copy registration code to new applications with few changes.
However, as patterns evolve in the use of service workers, it would be helpful to avoid the need to create our own registration code. How can we do that?
Solution
We will look at how to use templates in create-react-app to build an application that includes service workers.
Even if you don’t intend to use create-react-app, it can be worth generating an application with it and then reusing the service
worker code in your project.
We briefly saw how to use application templates in Chapter 1 when we generated TypeScript projects with create-react-app.
Templates are the boilerplate code that create-react-app uses when it generates a new application.
If we want to create a progressive web application, we can do it by typing the following:
$ npx create-react-app appname --template cra-template-pwaIf you want to create a TypeScript application, replace cra-template-pwa with cra-template-pwa-typescript.
If we do that, it will generate a React application in a new folder called appname. The application will look virtually the same as any other CRA application, but it will install several Workbox libraries. It will add two additional source files. In the src directory, you will find an example service-worker.js script:
import{clientsClaim}from'workbox-core'import{ExpirationPlugin}from'workbox-expiration'import{precacheAndRoute,createHandlerBoundToURL,}from'workbox-precaching'import{registerRoute}from'workbox-routing'import{StaleWhileRevalidate}from'workbox-strategies'clientsClaim()precacheAndRoute(self.__WB_MANIFEST)constfileExtensionRegexp=newRegExp('/[^/?]+\.[^/]+$')registerRoute(({request,url})=>{if(request.mode!=='navigate'){returnfalse}if(url.pathname.startsWith('/_')){returnfalse}if(url.pathname.match(fileExtensionRegexp)){returnfalse}returntrue},createHandlerBoundToURL(process.env.PUBLIC_URL+'/index.html'))registerRoute(({url})=>url.origin===self.location.origin&&url.pathname.endsWith('.png'),newStaleWhileRevalidate({cacheName:'images',plugins:[newExpirationPlugin({maxEntries:50})],}))self.addEventListener('message',(event)=>{if(event.data&&event.data.type==='SKIP_WAITING'){self.skipWaiting()}})
The service worker is similar to the one we created in “Create Service Workers with Workbox”.
You will also find a new file in the src directory called serviceWorkerRegistration.js. This file is very long, so we won’t
include the contents here. But it serves the same purpose as the registerWorker.js script we wrote in “Create Service Workers with Workbox”. It registers the
service worker as the controller of the application. The serviceWorkerRegistration.js file is valuable, even if you don’t intend
to use create-react-app for your application. It has several additional features that the registration code in the previous recipe
did not. For example, suppose you are running on localhost. In that case, it will unregister any service workers that look like
they belong to a different application, which is helpful if you’re working on several React applications.
Even though the service worker and the registration code are created for you in your new application, they won’t actually be configured. In the index.js file, you will find that the application will actually unregister any service workers:
importReactfrom'react'importReactDOMfrom'react-dom'import'./index.css'importAppfrom'./App'import*asserviceWorkerRegistrationfrom'./serviceWorkerRegistration'importreportWebVitalsfrom'./reportWebVitals'ReactDOM.render(<React.StrictMode><App/></React.StrictMode>,document.getElementById('root'))serviceWorkerRegistration.unregister()reportWebVitals()
If you want to enable the service-worker.js script, you will need to change serviceWorkerRegistration.unregister to
serviceWorkerRegistration.register.
The register function allows you to pass callbacks into the registration process so that you can track the current status of the
service worker installation. To do this, pass an object with onInstall and onUpdate functions:
serviceWorkerRegistration.register({onInstall:(registration)=>{console.log('Service worker installed')},onUpdate:(registration)=>{console.log('Service worker updated')},})
The callbacks are helpful if you want to defer some processing until after the browser has installed the service worker or if you
would like to run code when the new service worker is an update to a previous one. If onUpdate is called, you will know that your
new service worker is waiting for an old service worker to disappear.
Discussion
“Create Service Workers with Workbox” helps you understand how service workers operate. When you are finally building a real application, templated code will be far more polished and feature-rich.
You can download the source for this recipe from the GitHub site.
Cache Third-Party Resources
Problem
Many of the resources used in a modern application come from third-party servers: payment libraries, fonts, images, etc. Third-party resources can consume a lot of bandwidth and might grow in size over time. If they come from slow servers, then they might slow down your application in a way that’s out of your control.4
Is it possible to use a service worker to cache third-party resources?
Solution
Service workers have limited scope because they are allowed to control pages only within the same URL path. That’s why service workers are generally at the root of an application; it allows them to control every page.
But there is no such limitation on the URLs that they are allowed to contact. They can talk to any endpoint that your page or code can. That means you can start to cache resources that come from third-party servers.
The application you can see in Figure 11-12 is using a font downloaded from Google Fonts.
Figure 11-12. An application with a Google font—beautiful!
The font was added using these two lines in the header of the page:
<linkrel="preconnect"href="https://fonts.gstatic.com"><linkhref="https://fonts.googleapis.com/css2?family=Fascinate&display=swap"rel="stylesheet">
The first link imports the web font, and the second imports the associated stylesheet.
To cache this in the application, we will first need to register a service worker. The example application was created with the
cra-template-pwa template, so we will need to call the register function in the index.js file:
importReactfrom'react'importReactDOMfrom'react-dom'import'./index.css'importAppfrom'./App'import*asserviceWorkerRegistrationfrom'./serviceWorkerRegistration'importreportWebVitalsfrom'./reportWebVitals'ReactDOM.render(<React.StrictMode><App/></React.StrictMode>,document.getElementById('root'))serviceWorkerRegistration.register()reportWebVitals()
We will now add some routes into the service-worker.js script, which contains the service worker for the application. The service worker uses the Workbox library.
We need to cache the stylesheet and the downloadable font.
We saw in “Create Service Workers with Workbox” that we could precache the application code, which is such a common requirement that Workbox lets you do it with a single line of code:
precacheAndRoute(self.__WB_MANIFEST)
This command will create a route that will cache any application code locally. We need to do a little more work if we want to cache third-party resources. Let’s create a route to cache the stylesheet:
registerRoute(({url})=>url.origin==='https://fonts.googleapis.com'// TODO Add handler)
When we call registerRoute, we have to pass it a filter function and a handler. The filter function is given a request object and
returns true if the handler should process it. The handler is a function that decides how to satisfy the request. It might look in a
local cache, pass the request onto the network, or do some combination of the two.
Handlers are quite complex functions to build, but they typically follow some standard strategy, such as checking the cache before downloading a file from the network. Workbox has functions that will provide implementations of several strategies.
When we’re downloading stylesheets, we’ll use a stale-while-revalidate strategy, which means that when the browser wants to download the Google stylesheet, we will send a request for the stylesheet and
also check the local cache to see if we already have a copy of the stylesheet file. If not, we’ll wait for the stylesheet network
request to return. This strategy is helpful if you make frequent requests for a resource but don’t care if you have the latest
version. We’ll prefer to use the cached version of the stylesheet because that will be faster. But we will also always request a new
version of the stylesheet from the network. We’ll cache whatever comes back from Google, so even if we don’t get the latest version
of the stylesheet this time, we will the next time we load it.
This is how we create a handler for the stale-while-revalidate strategy:
registerRoute(({url})=>url.origin==='https://fonts.googleapis.com',newStaleWhileRevalidate({cacheName:'stylesheets',}))
The StaleWhileRevalidate function will return a handler function that will cache the stylesheet in a cache called stylesheets.
When loading third-party requests, you might find that your request might fail with a cross-origin resource sharing (CORS) error.
This error can occur even if the third-party resource is returned with a valid CORS header because the GET request comes from
JavaScript code rather than the HTML of the page. You can fix it by setting the crossorigin to anonymous on the HTML element
using the resource, for example, the link reference that is downloading a stylesheet.
We could apply the same strategy when downloading the Google font. But font files can be large, and the stale-while-revalidate
strategy will always download the latest version of the resource, even if it does so only to update the local cache.
Instead, we’ll use a cache-first strategy. In a cache-first strategy, we first check the cache for the resource, and if it’s there, we use it. If we don’t find the resource locally, we will send a network request. This is a helpful strategy for large resources. It does have a downside: you will download a new version of the resource only if the cache doesn’t contain it. That means you might never be able to download any updated versions.
For that reason, we usually configure the cache-first strategy to cache resources for only a given period. If the handler finds the resource in the local cache but it’s too old, it will request the resource from the network and then cache the updated version.
Whatever we cache, we’ll be using until the cache times out. So if there’s some temporary problem on the third-party server and we
receive a 500 status,5 we don’t want to cache the response. So, we will also need to check the
status before we decide to cache a response.
The following code shows how we will register a route to cache the Google font:
registerRoute(({url})=>url.origin==='https://fonts.gstatic.com',newCacheFirst({cacheName:'fonts',plugins:[newCacheableResponsePlugin({statuses:[0,200],}),newExpirationPlugin({maxAgeSeconds:60*60*24*7,maxEntries:5,}),],}))
This code will cache up to five font files in a local cache called fonts. The cached copies will time out after a week, and we will cache the response only if the status is either 200 or 0. A 0 status indicates a cross-origin issue with the request, and in
this case, we cache the response. A CORS error will not go away without a code change, and if we cache the error, we will avoid
sending future requests that are doomed to fail.
Discussion
Third-party resource caching can significantly improve the performance of your application, but much more importantly, it will make resources available when your application is offline. It doesn’t matter too much if the application cannot read something cosmetic like a font file. Still, if you’re using third-party code to generate a payment form, it would be helpful to keep doing so, even if the user’s device is temporarily off the network.
You can download the source for this recipe from the GitHub site.
Automatically Reload Workers
Problem
The way that service workers are updated can be confusing for anyone using or testing an application. If we make a change to a service worker, the application will download the new version and set its status to Installed (see Figure 11-13).
Figure 11-13. The updated worker is installed, but the old version is still running
The old service worker will go away only if the user closes the tab and then reopens it. The old worker disappears, and the new worker can stop waiting and start running (see Figure 11-14).
Figure 11-14. The new worker will start only if you close and re-open the application
The service worker may be caching the application’s code, so if the service worker does not start running, it will not download the latest code from the server. You might find that you are using an old version of the entire client application. To run the new application, you need to reload the page (to install the new worker) and then close and reopen the tab (removing the old worker and starting the new one).
Testers will soon get used to this slightly odd sequence, but the same is not true for real users. In reality, the fact that new code will only update the next-but-one time that it’s available is usually not a big problem. It can be a problem if you have made a significant change to the code, such as an update to an API.6
In some cases, you want to use the new code immediately. Is there a way to clear out the old service workers and upgrade to the new version of the application?
Solution
There are two things that we need to do to switch to a new service worker:
If you’ve created your application with create-react-app or you are using the code from the cra-template-pwa
template,7 then you will be registering your service worker, using the
serviceWorkerRegistration.register function. For example, you might have code in the index.js file of your application that looks
like this:
importReactfrom'react'importReactDOMfrom'react-dom'import'./index.css'importAppfrom'./App'import*asserviceWorkerRegistrationfrom'./serviceWorkerRegistration'importreportWebVitalsfrom'./reportWebVitals'ReactDOM.render(<React.StrictMode><App/></React.StrictMode>,document.getElementById('root'))serviceWorkerRegistration.register()reportWebVitals()
Even if you’ve written your own registration code, you will likely have something similar.
The serviceWorkerRegistration.register function allows you to pass a couple of callbacks, which will tell you when a service
worker has been installed or updated:
serviceWorkerRegistration.register({onInstall:(registration)=>{},onUpdate:(registration)=>{},})
The callbacks receive a registration object: a wrapper for the service worker that the browser has just installed or updated.
A service worker is installed when it is downloaded. But if an existing service worker is running, the new service worker will wait
for the old service worker to disappear. If a service worker is waiting, the onUpdate function will be called.
We want to automatically remove the old service worker whenever the onUpdate function is called. That will allow the new service
worker to start operating.
Service workers are a specialized form of web worker. A web worker is a piece of JavaScript that runs in a separate thread from the JavaScript running in the web page. You communicate with all web workers by posting asynchronous messages to them. Service workers can intercept network requests because the browser will convert network requests into messages.
So, we can ask a service worker to run an arbitrary piece of code by sending it a message. We can make our service worker respond to messages by giving it a message event listener:
self.addEventListener('message',(event)=>{// handle messages here})
The self variable contains the global scope for the service worker. It’s like window is for page code.
The page code can send a message to the new service worker, telling it that we want it to stop waiting and replace the old service worker:
serviceWorkerRegistration.register({onUpdate:(registration)=>{registration.waiting.postMessage({type:'SKIP_WAITING'})},})
registration.waiting is a reference to the service worker, and registration.waiting.postMessage will send it a message.
When the browser installs a new version of a service worker but the old service worker is still running, the application code will
send a SKIP_WAITING message to the new service worker.
Service workers have a built-in function called skipWaiting, which will kill the old service worker and allow the new one to
take over. So, we can call skipWaiting in the service worker, when it receives a SKIP_WAITING message:
self.addEventListener('message',(event)=>{if(event.data&&event.data.type==='SKIP_WAITING'){self.skipWaiting()}})
If the application is now updated, the new service worker will immediately replace the old service worker.
There’s just one step remaining: we need to reload the page so that we can download the new application code through the new service worker. This means that the updated version of the index.js file in the application looks like this:
importReactfrom'react'importReactDOMfrom'react-dom'import'./index.css'importAppfrom'./App'import*asserviceWorkerRegistrationfrom'./serviceWorkerRegistration'importreportWebVitalsfrom'./reportWebVitals'ReactDOM.render(<React.StrictMode><App/></React.StrictMode>,document.getElementById('root'))serviceWorkerRegistration.register({onUpdate:(registration)=>{registration.waiting.postMessage({type:'SKIP_WAITING'})window.location.reload()},})reportWebVitals()
Once you’ve installed this new version of the code, the application will automatically update itself each time the application changes. Instead of seeing the old service worker alongside a patiently waiting version of the new service worker, you will instead just see the newly loaded version (see Figure 11-15).
Figure 11-15. The new service worker will now immediately replace the old version
Discussion
By adding a page reload, you will find that the page “blinks” when the new code is downloading. If you have a large application, this might be jarring for the user, so you might choose to ask the user if they want to upgrade to the new version of the application before reloading. Gmail does this whenever a significant update is available.
You can download the source for this recipe from the GitHub site.
Add Notifications
Problem
One of the advantages of service workers, and web workers in general, is that they don’t stop running just because the user leaves the page. If a service worker performs a slow operation, it will continue to run in the background, so long as the browser itself is still running. That means you can leave the page or close the tab and be sure that your worker will have time to finish.
However, what if the user wants to know when the background task has finally finished? Service workers don’t have any visual interface. They might control web pages, but they can’t update them. The only way that a web page and a service worker can communicate is by sending messages.
Given that service workers have no visual interface, how can they let us know when something important has happened?
Solution
We’re going to create notifications from a service worker. Our example application (see Figure 11-16) will start a long-running process, taking around 20 seconds, when you click the button.
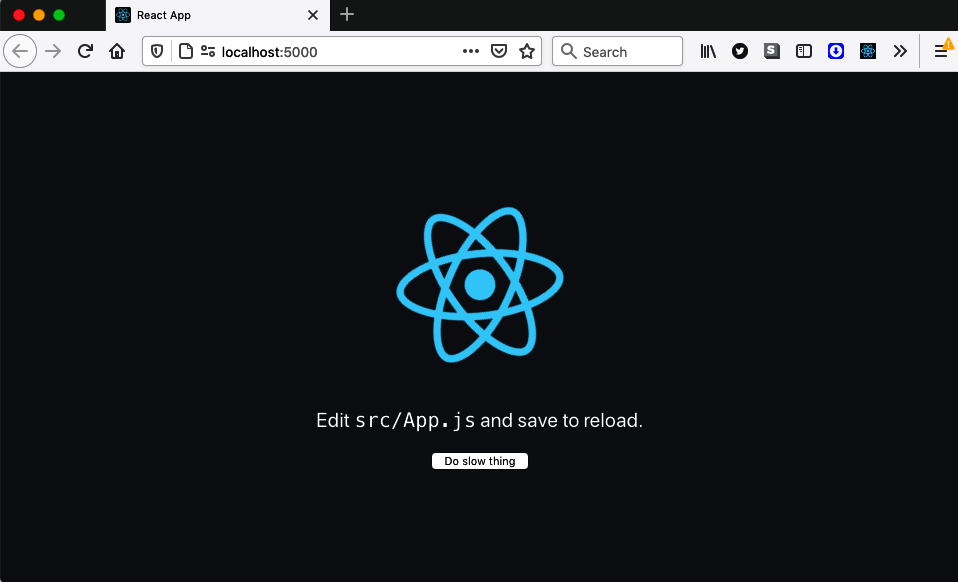
Figure 11-16. The example application starts a slow process when you click the button
The user will have to grant permission to be sent a completion notification (see Figure 11-17). If they deny permission, the background task will still run, but they won’t see anything when it’s complete.
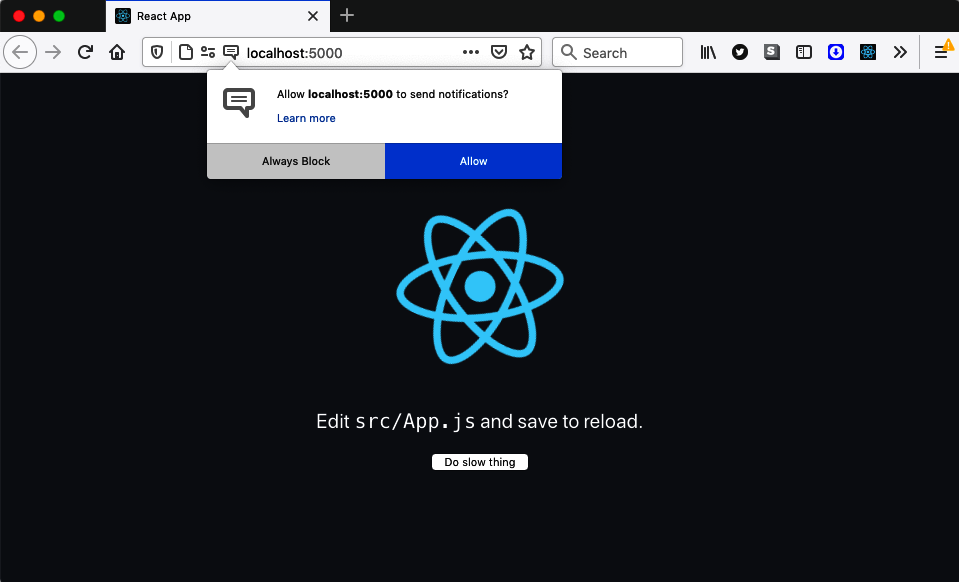
Figure 11-17. You will have to grant permission to receive notifications
Notifications have a poor reputation. You usually see them when a site wants to spam you with information. In general, if you’re using notifications, it’s best to defer asking for permission until it’s apparent to the user why you want it. Avoid asking for permission to send notifications when the page first loads because the user will have no idea why you want to send them.
The service worker will then run some code that will pause for 20 seconds, and then it will display a notification (see Figure 11-18).

Figure 11-18. The notification that appears when the task is finished
Let’s start to look at the code. In the App component, we’ll add a button to run the background but make sure we make it
visible only if the browser supports service workers:
functionApp(){conststartTask=()=>{// Start task here}return(<divclassName="App"><headerclassName="App-header"><imgsrc={logo}className="App-logo"alt="logo"/><p>Edit<code>src/App.js</code>andsavetoreload.</p>{'serviceWorker'innavigator&&(<buttononClick={startTask}>Doslowthing</button>)}</header></div>)}
When the user clicks the button, they will call the startTask function. We can ask for permission to show notifications in
there:
conststartTask=()=>{Notification.requestPermission((permission)=>{navigator.serviceWorker.ready.then(()=>{constnotifyMe=permission==='granted'// Then run task})})}
If the user grants permission, the permission string will have the value granted, which will set the notifyMe variable to
true. We can run the task in the service worker and tell it whether it’s allowed to send a notification when it’s complete.
We cannot talk to service workers directly. Instead, we have to post messages because service workers run in a separate thread from web page code.
We can get the current service worker controlling the page from navigator.serviceWorker.controller. So, we can send a message to
the service worker like this:
conststartTask=()=>{Notification.requestPermission((permission)=>{navigator.serviceWorker.ready.then(()=>{constnotifyMe=permission==='granted'navigator.serviceWorker.controller.postMessage({type:'DO_SLOW_THING',notifyMe,})})})}
In the example application, our service is in service-worker.js. It can receive messages by adding a message event handler:
self.addEventListener('message',(event)=>{...if(event.data&&event.data.type==='DO_SLOW_THING'){// Code for slow task here}})
In a service worker, self refers to the global scope object. It’s the equivalent of window in web page code. Let’s simulate a
slow task, with a call to setTimeout, which will wait for 20 seconds before sending a message to the console:8
self.addEventListener('message',(event)=>{...if(event.data&&event.data.type==='DO_SLOW_THING'){setTimeout(()=>{console.log('Slow thing finished!')// TODO: Send notification here},20000)}})
All that’s left to do now is show the notification. We can do this with the service worker’s registration object, which has a
showNotification method:
self.addEventListener('message',(event)=>{...if(event.data&&event.data.type==='DO_SLOW_THING'){setTimeout(()=>{console.log('Slow thing finished!')if(event.data.notifyMe){self.registration.showNotification('Slow thing finished!',{body:'Now get on with your life',icon:'/logo512.png',vibrate:[100,100,100,200,200,200,100,100,100],// tag: 'some-id-if-you-do-not-want-duplicates'})}},20000)}})
Notice that we check event.data.notifyMe before attempting to show a notification; this is the variable we added to the message in
the web page code.
The notification takes a title and an options object. The options allow you to modify the behavior of the notification. In this
case, we’re giving it some body text and an icon and setting a vibration sequence. If the user’s device supports them, they should
feel a set of dot-dot-dot-dash-dash-dash-dot-dot-dot vibrations when the notification appears.
There’s also a tag option, which we’ve commented out in the example code. We can use the tag to uniquely identify a notification
and prevent the user from receiving the same notification multiple times. If you omit it, each call to showNotification will make a new
notification appear.
To try the code, you will first need to build the application because service workers will run only in production mode:
$ yarn run buildYou will then need to run a server on the contents of the generated build directory. You can do this by installing the serve module and then running this command:
$ serve -s buildIf you open the application at http://localhost:5000 and click the button, the slow process will start. You can then go to a different page or close the tab, and the slow task will continue running. It will stop only if you close the browser.
After 20 seconds, you should see a notification appear that looks similar to Figure 11-19.
Figure 11-19. A notification as it appears on a Mac
It’s tempting to access your server from a mobile device to check that the vibrations work in the notification. Be aware that service workers are enabled only if you access localhost or are using HTTPS. If you want to test your application over HTTPS, see “Enable HTTPS” to enable it on a server.
Given that notifications can appear after you’ve closed the page, it’s helpful if you give the user a simple way of navigating back
to your application. You can do this by adding a notification-click handler to your service worker. If a service worker creates a
notification and the user clicks it, the browser will send a notificationclick event to the service worker. You can create a
handler for it like this:
self.addEventListener('notificationclick',(event)=>{event.notification.close()// TODO Go back to the application})
You can close the notification by calling event.notification.close. But how do you send the user back to the React application?
The service worker is the controller of zero or more browser tabs, which are called its clients. These are tabs whose network
requests are intercepted by the service worker. You can get access to the list of clients using self.clients. This object has a
utility function called openWindow that can be used to open a new tab in the browser:
self.addEventListener('notificationclick',(event)=>{event.notification.close()if(self.clients.openWindow){self.clients.openWindow('/')}})
If the user now clicks the notification, the browser will return them to the front page of the React application.
But we can do a little better than that. If the user has switched to a different tab but the React application is still open, we can switch the focus back to the correct tab.
To do this, we will need to get hold of an array of each of the open tabs that our service worker controls. Then we can look to see if any match the correct path. If we find one, we can switch focus to that tab:
self.addEventListener('notificationclick',(event)=>{event.notification.close()event.waitUntil(self.clients.matchAll({type:'window',}).then((clientList)=>{constreturnPath='/'consttab=clientList.find((t)=>{returnt.url===self.location.origin+returnPath})if(tab&&'focus'intab){tab.focus()}elseif(self.clients.openWindow){self.clients.openWindow(returnPath)}}))})
If we click the notification, we will switch back to an open tab rather than always create a new one (see Figure 11-20).
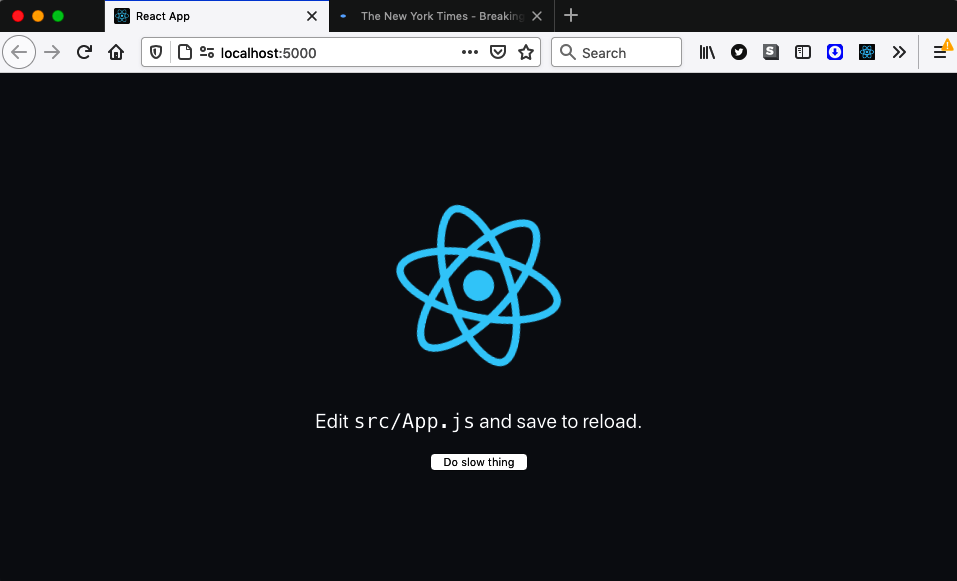
Figure 11-20. The notification can switch back to our application if it’s still open
Discussion
Notifications are a great way of keeping the user informed about important events. The critical thing is to clarify why they should agree to receive notifications and then send them only if something significant has happened.
You can download the source for this recipe from the GitHub site.
Make Offline Changes with Background Sync
Problem
Imagine someone is using an application in a place where a network connection is not available, for example, on a subway train.9 Precaching of application code means that there should be no problem opening an application without a network connection. The user can also move from page to page, and everything should appear normal.
But what if they do something that will send data to a server? What if they try to post a message?
Solution
Background sync is a way of queuing network requests when the server is not available and then resending them automatically at a later time.
Our example application will send some data to a backend server when the user clicks a button (see Figure 11-21).
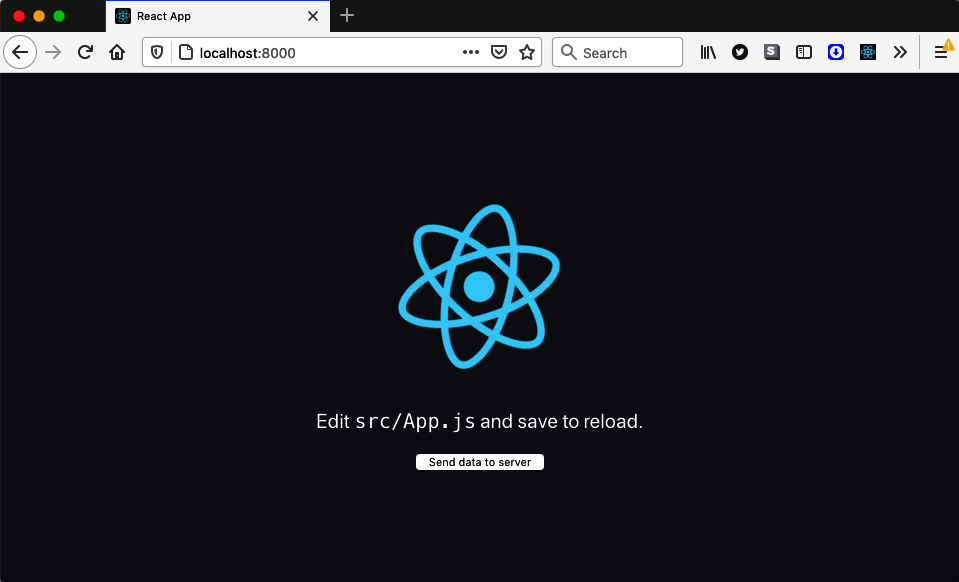
Figure 11-21. The example application sends data to the server when the user clicks a button
To start the application, you will first need to build it with this command:
$ yarn run buildThe example project includes this server in server/index.js:
constexpress=require('express')constapp=express()app.use(express.json())app.use(express.static('build'))app.post('/endpoint',(request,response)=>{console.log('Server received data',request.body)response.send('OK')})app.listen(8000,()=>console.log('Launched on port 8000!'))
The server will deliver content from the build directory, where the generated code is published. It also displays the data from
any POST requests sent to http://localhost:8000/endpoint.
You can start the server with this command:
$ node serverIf you now open the application in a browser at http://localhost:8000 and click the button on the front page a few times, you will see data appearing in the server window:
$ node serverLaunched on port 8000!Server received data { timeIs: '2021-05-09T18:59:37.280Z' }Server received data { timeIs: '2021-05-09T18:59:37.720Z' }Server received data { timeIs: '2021-05-09T18:59:38.064Z' }Server received data { timeIs: '2021-05-09T18:59:38.352Z' }
This is the application code that sends data to the server. It uses the fetch function to POST the current time when the
button is pressed:
importReactfrom'react'importlogofrom'./logo.svg'import'./App.css'functionApp(){constsendData=()=>{constoptions={method:'POST',body:JSON.stringify({timeIs:newDate()}),headers:{'Content-Type':'application/json',},}fetch('/endpoint',options)}return(<divclassName="App"><headerclassName="App-header"><imgsrc={logo}className="App-logo"alt="logo"/><p>Edit<code>src/App.js</code>andsavetoreload.</p><buttononClick={sendData}>Senddatatoserver</button></header></div>)}exportdefaultApp
If you now stop the server, clicking the button on the web page will generate a series of failed network requests, as shown in Figure 11-22.

Figure 11-22. If the server cannot be contacted, the network requests fail
Stopping the server simulates what would happen if the user was temporarily out of network contact and then tried to send data from the application.
We can fix this problem using service workers. A service worker can intercept the network requests made by a web page in a progressive web application. In the other recipes in this chapter, we have used service workers to handle network failures by returning locally cached versions of files. We now need to handle data going in the opposite direction: from the browser to the server.
We need to cache the POST requests that we try to send to the server and then resend them when we are back in contact with the
server.
To do this, we will use the workbox-background-sync library. Background sync is an API for diverting network requests onto a
queue in those cases where we cannot contact the server. It’s a complex API, and not all browsers support it.
The workbox-background-sync library makes the API far easier to use, and it will also work on browsers like Firefox that don’t
support Background Sync natively.
The service worker for the example application is in the service-worker.js file. We can add background syncing by adding this code:
import{NetworkOnly}from'workbox-strategies'import{BackgroundSyncPlugin}from'workbox-background-sync'// Other service worker code here....registerRoute(//endpoint/,newNetworkOnly({plugins:[newBackgroundSyncPlugin('endPointQueue1',{maxRetentionTime:24*60,}),],}),'POST')
This code will register a new route in the service worker, saying how to deal with network requests to particular URLs. In this
case, we are creating a route to handle all requests to http://localhost:8000/endpoint. We’re using a regular expression to match
the path. We’re then using a Network Only strategy, which means that the browser will send all requests to the service worker, and all responses will come from the network.
But we’re configuring that strategy to use the background sync plugin. The third parameter in the route says that it is
interested only in POST requests to the
endpoint.
When the application sends a POST request to http://localhost:8000/endpoint, the service worker intercepts it. The service worker
will forward the request to the server, and if successful, it will return the response to the web page. If the server is
unavailable, the service worker will return a network error to the web page and then add the network request to a retry queue called
endPointQueue1.
Workbox stores queues in indexed databases within the browser. Setting the maxRetentionTime to 24 * 60 stores the requests in
the database for a maximum of one day.
The workbox-background-sync library will resend the requests in the queue whenever it thinks the server might have become
available, for example, if the network connection comes online. Retries will also happen every few minutes.
If you restart the server and then wait about five minutes, you should see the failed network requests appearing in the server:
$ node serverLaunched on port 8000!Server received data { timeIs: '2021-05-09T21:26:11.068Z' }Server received data { timeIs: '2021-05-09T21:02:44.647Z' }Server received data { timeIs: '2021-05-09T21:02:45.647Z' }
You can force Chrome to resend the requests immediately if you open the Application tab in the developer tools, select the service
worker, and then send a sync message to workbox-background-sync:endPointQueue1 (as shown in Figure 11-23).
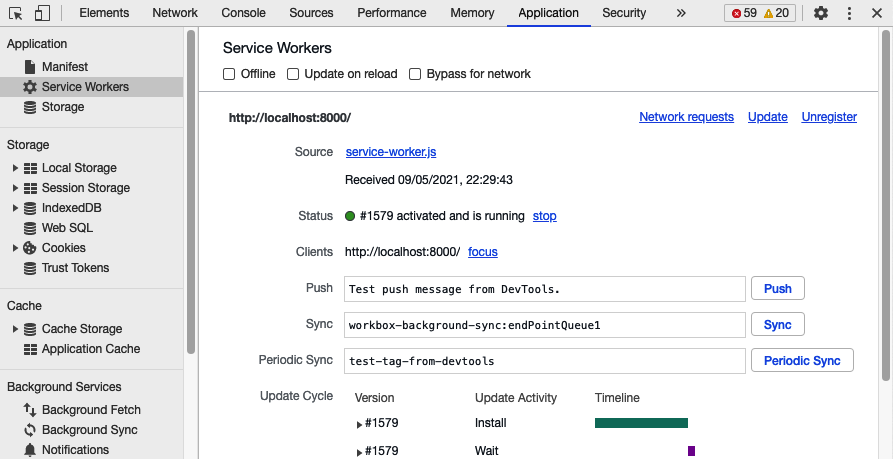
Figure 11-23. Forcing a sync to occur in Chrome
Discussion
Background sync is a tremendously powerful feature, but you need to think carefully before enabling it. The order in which the client code sends requests will not necessarily be the order they are processed at the server.
The exact order will probably not matter if you are creating a simple set of resources with POST requests. For example, if you buy
books from an online bookstore, it doesn’t matter what sequence you buy them in.
But if you create dependent resources or apply multiple updates to the same resource,10 then you need to careful. If you amend your credit card number to 1111 1111 1111 1111 and then to 2222 2222 2222 2222, the order of updates will completely change the final result.
You can download the source for this recipe from the GitHub site.
Add a Custom Installation UI
Problem
PWAs behave, in many ways, like locally installed applications. You can install them alongside other applications on a desktop machine or a mobile device. Many browsers allow you to create a shortcut on the current device to launch your application in a separate window. If you’re using a desktop machine, you can add the shortcut to the dock or launch menus. If you’re on a mobile device, you can add the application to the home screen.
But many users miss the fact that that they can install PWAs, a situation that is not helped by the low-key interface used in browsers to indicate that installation is possible (see Figure 11-24).

Figure 11-24. PWAs are installed with a small button in the address bar
Browsers do this to maximize the amount of screen estate available for your website. However, if you think that a local installation would be helpful to your users, you might choose to add a custom installation UI. But how can you do that?
Solution
Some browsers11 will generate a JavaScript beforeinstallprompt event if they detect that your application is a fully fledged PWA.12
You can capture this event and use it to display your custom installation UI.
Create a component called MyInstaller.js and add this code:
importReact,{useEffect,useState}from'react'constMyInstaller=({children})=>{const[installEvent,setInstallEvent]=useState()useEffect(()=>{window.addEventListener('beforeinstallprompt',(event)=>{event.preventDefault()setInstallEvent(event)})},[])return(<>{installEvent&&(<buttononClick={async()=>{installEvent.prompt()awaitinstallEvent.userChoicesetInstallEvent(null)}}>Installthisapp!</button>)}{children}</>)}exportdefaultMyInstaller
This component will capture the onbeforeinstallprompt event and store it in the installEvent variable. It then uses the
existence of the event to display a custom user interface. In the code here, it displays a simple button on the screen. You can then
insert this component into your application, for example:
functionApp(){return(<divclassName="App"><MyInstaller><headerclassName="App-header"><imgsrc={logo}className="App-logo"alt="logo"/><p>Edit<code>src/App.js</code>andsavetoreload.</p><aclassName="App-link"href="https://reactjs.org"target="_blank"rel="noopener noreferrer">LearnReact</a></header></MyInstaller></div>)}
If you now build and run the application:
$ yarn run build$ serve -s build
you will see the install button at the top of the front page (see Figure 11-25). You won’t see the install button if you run the application with the development server, like this:
$ yarn run start
Figure 11-25. The custom install button appears at the top of the page
That’s because the application will qualify as a PWA only if it has a service worker running. The service worker will run only in production code.
If you click the Install button, the MyInstaller component will run the installEvent.prompt method. This will display the
usual installation dialog (see Figure 11-26).
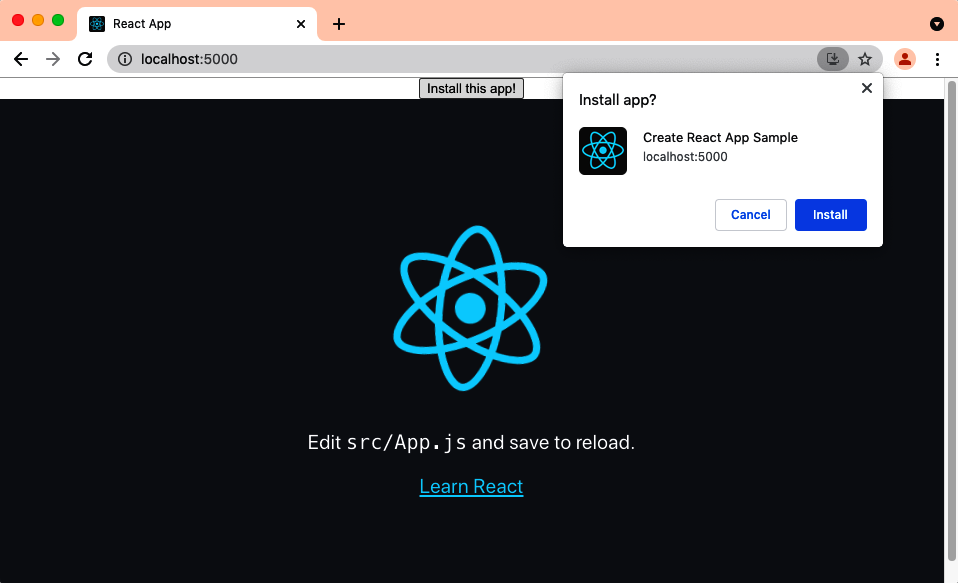
Figure 11-26. The install prompt will appear when you click the custom install button
If your device has already installed the application, the browser will not fire the onbeforeinstallprompt event.
If the user chooses to install the application, it will launch a separate application window.13 If they are using a desktop machine, a finder or explorer window might appear, with a launch icon for the application that can be added to the dock or launch menus on your machine (see Figure 11-27). On a mobile device, the icon will appear on the home screen.
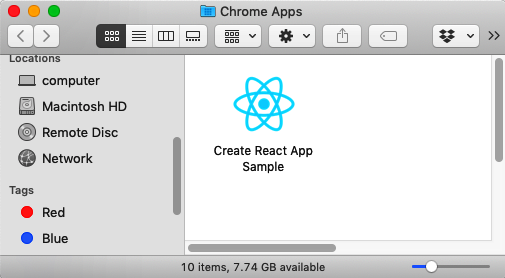
Figure 11-27. The browser will create a launch icon for the application
Discussion
Local installation is an excellent feature for users who want to run your application often. In our experience, many users don’t realize that the installation option is available for some sites, so adding a custom interface is a good idea. However, you should be wary of creating an intrusive interface if you think your users are likely to be one-time visitors. It’s probably also best to avoid triggering the appearance of the instance automatically when the page loads. Doing so is likely to irritate your users and deter them from returning to your site.
You can download the source for this recipe from the GitHub site.
Provide Offline Responses
Problem
You won’t want to cache all third-party resources in your application; it would take too much space. That means there will be times when your code will be unable to load all the resources it needs. For example, you can see in Figure 11-28 an application we created in an earlier chapter that displayed a series of images from a third-party image site.
Figure 11-28. The application displays images from http://picsum.photos
You can use a service worker to cache all of this application’s code to work offline. You probably wouldn’t want to cache the third-party images because there will be too many. That means that if you disconnect from the network, the application will still open but without images (see Figure 11-29).
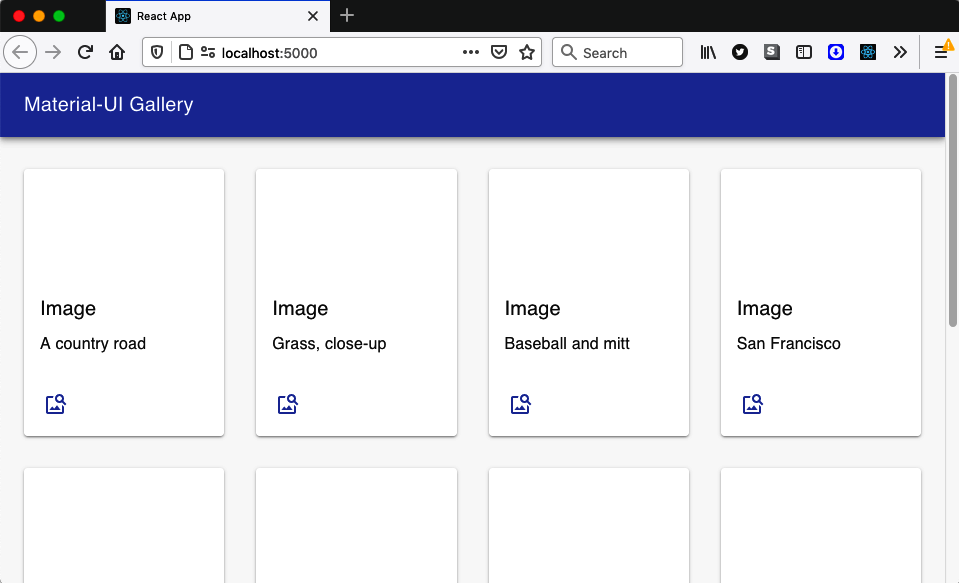
Figure 11-29. If you’re offline, the images won’t load
It would be helpful to replace the missing image with a locally served replacement. That way, when the user is offline, they will still see a placeholder image.
This is a particular case of a general problem: you may want to have placeholder files when a sizable external file is unavailable. You might want to replace video files, audio files, or even complete web pages with some temporary replacement.
Solution
To solve this problem, we’ll use a couple of service worker techniques that together will return a local replacement with a cached file.
Let’s say we want to replace all failed image loads with the replacement image shown in Figure 11-30.

Figure 11-30. Replacement for images that fail to load
The first thing we need to do is make sure that the image file is available in the local cache. We’ll add the image to static files used by the application, but we can’t rely on the replacement image being cached automatically. Precaching will store any files we download from the server. We will not need the placeholder image until the network is offline, so we will have to use cache warming to load the image into a local cache explicitly.
In the service worker, we’re going to run some code as soon as the service worker is installed. We can do this by adding an
install event handler:
self.addEventListener('install',(event)=>{// Cache image here})
We can explicitly open a local cache—which we’ll call fallback—and then add the file to it from the network:
self.addEventListener('install',(event)=>{event.waitUntil(caches.open('fallback').then((cache)=>{cache.add('/comingSoon.png')}))})
You can use this technique if you ever want to cache files when your application is installed, which is helpful for files that will be needed when you’re offline but that are not immediately loaded by the application.
Now that we have the replacement image stored, we need to return it when the real images are not available. We’ll need to add code that will run when network requests fail. We can do this with a catch handler. A catch handler is executed when a Workbox strategy fails:14
setCatchHandler(({event})=>{if(event.request.destination==='image'){returncaches.match('/comingSoon.png')}returnResponse.error()})
The catch handler receives the failed request object. We could check the URL of the request, but it is better to check the request’s
destination. The destination is the thing that will consume the file, and the destination is helpful when selecting a placeholder
for the file. If the destination is image, the request happened because the browser was trying to load an img element. Here are
some other examples of request destinations:
| Destination | Generated by |
|---|---|
“” |
JavaScript network requests |
“audio” |
Loading an <audio> |
“document” |
Navigation to a web page |
“embed” |
Loading an <embed> |
“font” |
Loading a font in CSS |
“frame” |
Loading a <frame> |
“iframe” |
Loading an<iframe> |
“image” |
Loading an <img>, /favicon.ico, SVG <image>, or a CSS image |
“object” |
Loading an <object> |
“script” |
Loading a <script> |
“serviceworker” |
Loading a service worker |
“sharedworker” |
Loading a shared worker |
“style” |
Loading CSS |
“video” |
Loading a <video> |
“worker” |
Loading a worker |
If our catch handler is called, we will return the comingSoon.png image from the cache. We’re using caches.match to find the
file in any of the available caches.
But now that we have a catch handler, we need to make sure that we define a Workbox strategy for every request. If not, a failed request might not trigger the catch handler. If we set a default handler, it will apply a strategy to every request not handled in some other way:
setDefaultHandler(newNetworkOnly())
This command will ensure that the service worker forwards all requests to the network unless some more specific handler is defined.
Each of the img tags on the page will generate a request with a destination of image. The default handler will forward them to a
third-party server, which will cause an error because the application can’t contact the network. The catch handler will then return
the replacement image file to each img element. You can see the result of this process in Figure 11-31.
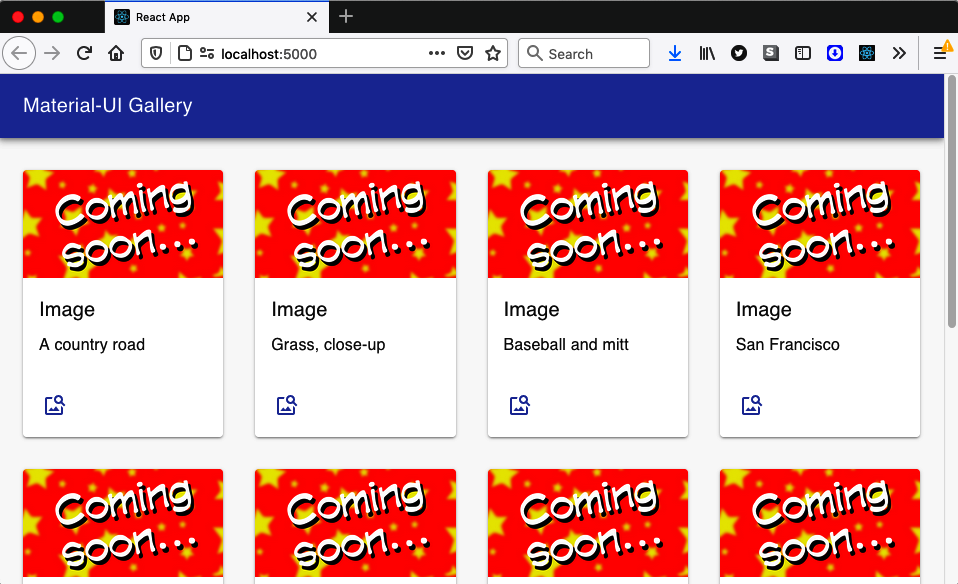
Figure 11-31. When offline, all images are replaced by a placeholder
Discussion
This technique is beneficial for large media files that are difficult or impossible to cache locally. If, for example, you have built an application to play podcasts, you could replace a missing episode with a short audio clip, explaining that the episode will be available only when you are next online.
Warming the cache with files can increase the time needed for the service worker to install. For this reason, if you’re warming a cache with reasonably large files, you should also add this line to your service worker:
import*asnavigationPreloadfrom'workbox-navigation-preload'...navigationPreload.enable()
Navigation preload is a browser optimization that will run network requests in the background if they begin when a service worker
is installing. Not all browsers support navigation preload, but the workbox-navigation-preload library will use it if it’s
available.
You can download the source for this recipe from the GitHub site.
1 See “Build a PWA with Create React App”.
2 The code we will build here is a simplified version of the code in the cra-template-pwa library. For further information, see this issue on GitHub.
3 This code is based on the example service worker is cra-template-pwa, which we will look at in the following recipe.
4 A recent project we worked on relied on a third-party payment library. When we were testing the application’s performance, the payment library was by far the slowest component, not simply because it was large but because its server often took several 100 ms to start downloading the code.
5 “Internal Server Error.”
6 This is not the case if you use semantic versioning of API endpoints.
7 See “Build a PWA with Create React App”.
8 You will see the message in Chrome. You will not see it if you use Firefox because Firefox does not give service workers access to the JavaScript console.
9 Admittedly, more and more subways now have mobile repeater stations.
10 In a RESTful API, you would probably perform updates with a PUT or PATCH request.
11 At the time of writing, Chrome, Edge, and Samsung Internet support this event.
12 You can check if your application meets the requirements of a PWA by running the Lighthouse tool in Chrome Developer Tools. Not only will it tell you if your application qualifies, it will also give you reasons why, if it doesn’t.
13 While it will create a separate application window, it will disappear if you close the web browser. If you launch the application directly, it will also launch the web browser if it’s not already running.
14 For more details about the Workbox library, see the other recipes in this chapter.