In this final chapter, we’ll discuss optimization strategies with Rust. Rust’s zero-cost abstractions allow you to confidently write Rust code without thinking too hard about performance. Rust delegates much of its machine code generation to LLVM, which has mature, robust, widely deployed, and well-tested code optimization. Code written in Rust will be fast and well optimized without you spending time hand-tuning code.
There are, however, certain cases in which you may need to dive deeper, which we’ll discuss, along with the tools you’ll need, in this chapter. We’ll also discuss how you can use Rust to accelerate code from other languages, which is a fun way to introduce Rust into codebases without needing to perform a complete rewrite.
An important feature of Rust is its zero-cost abstractions. In short, Rust’s abstractions allow you to write high-level code, which produces optimized machine code with no additional runtime overhead. Rust’s compiler takes care of figuring out how to get from high-level Rust to low-level machine code in the optimal way, without the overhead. You can safely use Rust’s abstractions without needing to worry about whether they will create a performance trap.
The tradeoff to Rust’s promise of zero-cost abstractions is that some features from high-level languages you may have come to expect don’t appear in Rust or, at the very least, may not exist in a familiar form. Some of those features include virtual methods, reflection, function overloading, and optional function arguments. Rust provides alternatives to these, or ways to emulate their behavior, but they’re not baked into the language. If you want to introduce that overhead, you have to do it yourself (which, of course, makes it much easier to reason about), such as by using trait objects for dynamic dispatch, as with virtual methods.
We can compare Rust’s abstractions to those of C++, for example, which does have runtime overhead. In the case of C++, the core class abstraction may contain virtual methods, which require runtime lookup tables (called vtables). While this overhead is not usually significant, it can become significant in certain cases, such as when calling virtual methods within a tight loop over many elements.
Note Rust’s trait objects use vtables for method calls. Trait objects are a feature enabled by the dyn Trait syntax. For example, you can store a trait object with Box<dyn MyTrait>, where the item in the box must implement MyTrait, and the methods from MyTrait can be called using a vtable lookup.
Reflection is another opaque abstraction used extensively in some languages to dispatch function calls or perform other operations at run time. Reflection is often used in Java, for example, to handle a variety of problems, but it also tends to generate a significant number of difficult-to-debug run-time errors. Reflection offers a bit of convenience for the programmer with the tradeoff of flakier code.
Rust’s zero-cost abstractions are based on compile-time optimizations. Within that framework, Rust can optimize out unused code or values, as needed. Rust’s abstractions can also be deeply nested, and the compiler can (in most cases) perform optimizations down the abstraction chain. When we talk about zero-cost abstractions in Rust, what we really mean is zero-cost abstractions once all optimizations have been performed.
When we want to build a production binary or benchmark our code, we must enable compiler optimizations by compiling our code in release mode. We can do this by enabling the --release flag with cargo, as the default compilation mode is debug. If you forget to enable release mode, you may experience unexpected performance penalties, one of which we’ll demonstrate in the next section.
Vectors are the core collection abstraction in Rust. As I’ve mentioned throughout this book, you should use Vec in most cases where you require a collection of elements. Because you’ll be using Vec so often in Rust, it’s important to understand a few details about its implementation and how it can affect the performance of your code. Additionally, you should understand when it makes sense to use something other than Vec.
The first thing to understand about Vec is how memory is allocated. We have discussed this a fair bit already in chapters 4 and 5, but we’ll go into a little more detail here. Vec allocates memory in contiguous blocks, with a configurable chunk size based on capacity. It allocates memory lazily by delaying allocation until it’s necessary and always allocating in contiguous blocks.
The first thing you should understand about the way Vec allocates memory is how it determines capacity size. By default, an empty Vec has a capacity of 0, and thus, no memory is allocated. It’s not until data is added that memory allocation occurs. When the capacity limit is reached, Vec will double the capacity (i.e., capacity increases exponentially).
We can see how Vec adds capacity by running a small test:
let mut empty_vec = Vec::<i32>::new();
(0..10).for_each(|v| {
    println!(
        "empty_vec has {} elements with capacity {}",
        empty_vec.len(),
        empty_vec.capacity()
    );
    empty_vec.push(v)
});
Note that capacity is measured in number of elements, not number of bytes. The number of bytes required for the vector is the capacity multiplied by the size of each element. When we run the preceding code, it generates the following output:
empty_vec has 0 elements with capacity 0
empty_vec has 1 elements with capacity 4    ❶
empty_vec has 2 elements with capacity 4
empty_vec has 3 elements with capacity 4
empty_vec has 4 elements with capacity 4
empty_vec has 5 elements with capacity 8    ❷
empty_vec has 6 elements with capacity 8
empty_vec has 7 elements with capacity 8
empty_vec has 8 elements with capacity 8
empty_vec has 9 elements with capacity 16   ❸
❶ Capacity is increased from 0 to 4.
❷ Capacity is increased from 4 to 8.
❸ Capacity is increased from 8 to 16.
We can examine the source code from the Rust standard library to see the algorithm itself, which is part of RawVec, the internal data structure used by Vec, in the following listing.
Listing 11.1 Vec::grow_amortized() from the Rust standard library
// This method is usually instantiated many times. So we want it to be as
// small as possible, to improve compile times. But we also want as much of
// its contents to be statically computable as possible, to make the
// generated code run faster. Therefore, this method is carefully written
// so that all of the code that depends on `T` is within it, while as much
// of the code that doesn’t depend on `T` as possible is in functions that
// are non-generic over `T`.
fn grow_amortized(&mut self, len: usize, additional: usize) ->
Result<(), TryReserveError> {
    // This is ensured by the calling contexts.
    debug_assert!(additional > 0);

    if mem::size_of::<T>() == 0 {
        // Since we return a capacity of `usize::MAX` when `elem_size` is
        // 0, getting to here necessarily means the `RawVec` is overfull.
        return Err(CapacityOverflow.into());
    }

    // Nothing we can really do about these checks, sadly.
    let required_cap = len.checked_add(additional).ok_or(CapacityOverflow)?;

    // This guarantees exponential growth. The doubling cannot overflow
    // because `cap <= isize::MAX` and the type of `cap` is `usize`.
    let cap = cmp::max(self.cap * 2, required_cap);                    ❶
    let cap = cmp::max(Self::MIN_NON_ZERO_CAP, cap);                   ❷

    let new_layout = Layout::array::<T>(cap);

    // `finish_grow` is non-generic over `T`.
    let ptr = finish_grow(new_layout, self.current_memory(),
    ➥ &mut self.alloc)?;
    self.set_ptr_and_cap(ptr, cap);
    Ok(())
}
❶ Here, the capacity (self.cap) is doubled.
❷ Self::MIN_NON_ZERO_CAP varies, depending on the size of the elements, but it can be either 8, 4, or 1.
What can we do with this information? There are two main takeaways:
The lazy allocation by Vec can be inefficient if you’re adding many elements, a few at a time.
For large vectors, the capacity will be up to twice the number of elements in the array.
The first takeaway (lazy allocation) can be problematic in cases when you are frequently creating new vectors and pushing data into them. Reallocations are costly because they can involve shuffling memory around. Reallocations with a small number of elements aren’t as costly because your machine likely has lots of space in memory for small contiguous regions, but as the structure grows, it can become more and more difficult to find available contiguous regions (thus, more memory shuffling is required).
The second problem with large vectors can be mitigated either by using a different structure (e.g., a linked list) or keeping the capacity trimmed with the Vec::shrink_to_fit() method. It’s also worth noting that vectors can be large in two different dimensions: a large number of small elements or a small number of large elements. For the latter case (a few large elements), a linked list or storing elements within a Box will provide relief from memory pressure.
Another important thing to consider when discussing Vec performance is iterating over elements. There are two ways to loop over a Vec: either using iter() or into_iter(). The iter() iterator allows us to iterate over elements with references, whereas into_iter() consumes self. Let’s look at the following listing to analyze Vec iterators.
Listing 11.2 Demonstrating Vec iterator performance
let big_vec = vec![0; 10_000_000];
let now = Instant::now();
for i in big_vec {
    if i < 0 {
        println!("this never prints");
    }
}
println!("First loop took {}s", now.elapsed().as_secs_f32());

let big_vec = vec![0; 10_000_000];
let now = Instant::now();
big_vec.iter().for_each(|i| {
    if *i < 0 {
        println!("this never prints");
    }
});
println!("Second loop took {}s", now.elapsed().as_secs_f32());
In this listing, we have some large vectors we’re going to iterate over with a no-op block of code to prevent the compiler from optimizing it out. We’ll test the code with cargo run --release because we want to enable all compiler optimizations. Now, if we run this code, it will produce the following output:
First loop took 0.007614s
Second loop took 0.00410025s
Whoa! What happened there? Why does the for loop run nearly twice as slowly?
The answer involves a bit of sugar syntax: the for loop expression roughly translates into using the into_iter() method to obtain an iterator and looping over the iterator until hitting the end (the full expression is documented at http://mng.bz/ W1nd). into_iter() takes self by default, meaning it consumes the original vector and (in some cases) may even require allocating an entirely new structure.
The for_loop() method provided by the core iterator trait in Rust, however, is highly optimized for this purpose, which gives us a slight performance gain. Additionally, iter() takes &self and iterates over references to elements in the vector, which can be further optimized by the compiler.
To verify this, we can update our code to use into_iter() instead of iter(). Let’s try by adding a third loop:
let big_vec = vec![0; 10_000_000];
let now = Instant::now();
big_vec.into_iter().for_each(|i| {
    if i < 0 {
        println!("this never prints");
    }
});
println!("Third loop took {}s", now.elapsed().as_secs_f32());
Then, we can run the code again in release mode to produce the following output:
First loop took 0.011229166s
Second loop took 0.005076166s
Third loop took 0.008608s
That’s much closer; however, it seems that using iterators directly instead of for loop expressions is slightly faster. Out of curiosity, what happens if we run the same test in debug mode? Let’s try and see what it produces:
First loop took 0.074964s
Second loop took 0.14158678s
Third loop took 0.07878621s
Wow, those results are drastically different! What’s particularly interesting is that, in debug mode, for loops are slightly faster. This is likely because of the additional overhead imposed by enabling debugging symbols and disabling compiler optimizations. The lesson here is that benchmarking performance in debug mode will lead to strange results.
Vectors include quite a few other built-in optimizations, but the ones you’ll generally need to concern yourself with are memory allocation and iterators. We can decrease the amount of memory allocations required by pre-allocating memory with Vec::with_capacity(), and we can avoid confusing performance problems by using iterators directly rather than for loop expressions.
Let’s discuss one more optimization with vectors, which has to do with copying memory. Rust has a fast-path optimization for vectors and slices where it can perform a faster copy of everything within a Vec, under certain circumstances. The optimization lives inside the Vec::copy_from_slice() method, for which the key parts of the implementation are shown in the following listing.
Listing 11.3 Partial listing of copy_from_slice() from the Rust standard library
pub fn copy_from_slice(&mut self, src: &[T])
    where
        T: Copy,
    {
        // ... snip ...
        unsafe {
            ptr::copy_nonoverlapping(src.as_ptr(), self.as_mut_ptr(),
            ➥ self.len());
        }
    }
In this partial listing lifted from the Rust standard library, you’ll notice two important things: the trait-bound Copy and the unsafe call to ptr::copy_nonoverlapping. In other words, if you use a Vec and want to copy items between two vectors, provided those items implement Copy, you can take the fast track. We can run a quick benchmark to see the difference in the following listing.
Listing 11.4 Benchmarking ptr::copy_nonoverlapping()
let big_vec_source = vec![0; 10_000_000];
let mut big_vec_target = Vec::<i32>::
➥ with_capacity(10_000_000);           ❶
let now = Instant::now();
big_vec_source
    .into_iter()
    .for_each(|i| big_vec_target.push(i));
println!("Naive copy took {}s", now.elapsed().as_secs_f32());

let big_vec_source = vec![0; 10_000_000];
let mut big_vec_target = vec![0; 10_000_000];
let now = Instant::now();
big_vec_target.copy_from_slice(&big_vec_source);
println!("Fast copy took {}s", now.elapsed().as_secs_f32());
❶ We initialize the target Vec with pre-allocated memory of the correct size.
Running the preceding code in release mode produces the following result:
Naive copy took 0.024926165s
Fast copy took 0.003599458s
In other words, using Vec::copy_from_slice() gives us about an 8x speedup in copying data directly from one vector to another. This optimization also exists for the slice (&mut [T]) and array (mut [T]) types.
There may come a point in your life as a developer where you need to use single instruction, multiple data (SIMD). SIMD is a hardware feature of many modern microprocessors that allows performing operations on sets of data simultaneously with a single instruction. The most common use case for this is either to optimize code for a particular processor or guarantee consistent timing of operations (such as to avoid timing attacks in cryptographic applications).
SIMD is platform dependent: different CPUs have different SIMD features available, but almost all modern CPUs have some SIMD features. The most commonly used SIMD instruction sets are MMX, SSE, and AVX, on Intel devices, and Neon on ARM devices.
In the past, if you needed to use SIMD, you’d need to write inline assembly yourself. Thankfully, modern compilers provide an interface for using SIMD without needing to write assembly directly. These functions standardize some of the shared behavior among the different SIMD implementations in a somewhat portable way. The advantage of using portable SIMD is that we don’t need to worry about instruction set details for any particular platform, with the tradeoff that we only have access to the common denominator features. It’s still possible to write inline assembly if you choose, but I’m going to focus on portable SIMD. One convenient feature of portable SIMD is that the compiler can automatically generate substitute non-SIMD code for cases in which features are not available at the hardware level.
The Rust standard library provides the std::simd module, which is currently a nightly only experimental API. Documentation for the portable SIMD API can be found at https://doc.rust-lang.org/std/simd/struct.Simd.html.
To illustrate, we can write a benchmark to compare the speed of some math operations on 64 element arrays with and without SIMD.
Listing 11.5 Multiplying vectors with SIMD versus iterators
#![feature(portable_simd, array_zip)]             ❶

fn initialize() -> ([u64; 64], [u64; 64]) {
    let mut a = [0u64; 64];
    let mut b = [0u64; 64];
    (0..64).for_each(|n| {
        a[n] = u64::try_from(n).unwrap();
        b[n] = u64::try_from(n + 1).unwrap();
    });
    (a, b)
}

fn main() {
    use std::simd::Simd;
    use std::time::Instant;

    let (mut a, b) = initialize();                ❷

    let now = Instant::now();                     ❸
    for _ in 0..100_000 {
        let c = a.zip(b).map(|(l, r)| l * r);
        let d = a.zip(c).map(|(l, r)| l + r);
        let e = c.zip(d).map(|(l, r)| l * r);
        a = e.zip(d).map(|(l, r)| l ^ r);         ❹
    }
    println!("Without SIMD took {}s", now.elapsed().as_secs_f32());

    let (a_vec, b_vec) = initialize();            ❺

    let mut a_vec = Simd::from(a_vec);            ❻
    let b_vec = Simd::from(b_vec);

    let now = Instant::now();                     ❼
    for _ in 0..100_000 {
        let c_vec = a_vec * b_vec;
        let d_vec = a_vec + c_vec;
        let e_vec = c_vec * d_vec;
        a_vec = e_vec ^ d_vec;                    ❽
    }
    println!("With SIMD took {}s", now.elapsed().as_secs_f32());

    assert_eq!(&a, a_vec.as_array());             ❾
}
❶ Enables experimental features for this crate
❷ Initializes our 64 element arrays
❸ Perform some calculations using normal math.
❹ Stores the result back into a
❺ Initializes with the same values again
❻ Converts our arrays into SIMD vectors
❼ Perform the same calculations with SIMD.
❽ Stores the result back into a_vec
❾ Finally, check that a and a_vec have the same result
Running this code will produce the following output:
Without SIMD took 0.07886646s
With SIMD took 0.002505291s
Wow! We got a nearly 40x speedup by using SIMD. Additionally, the SIMD code provides consistent timing, which is important for applications that are timing dependent, such as cryptography.
For problems where performance can be improved with the use of parallelization (i.e., parallel programming with threads), the Rayon crate is your best place to start. While the Rust language certainly provides threading features as part of its core library, these features are somewhat primitive, and most of the time, it’s better to write code based on higher-level APIs.
Rayon provides two ways to interact with data in parallel: a parallel iterator implementation and some helpers for creating lightweight tasks based on threads. We’re going to focus mainly on Rayon’s iterator because that is the most useful part of the library.
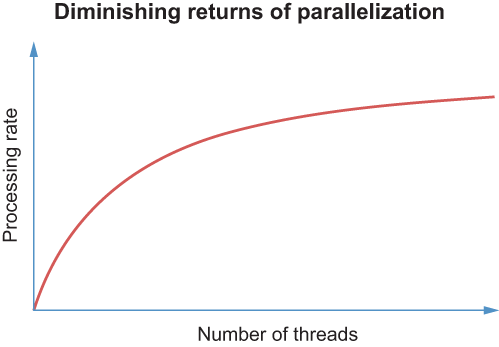
The typical use case for Rayon is one where you have a significant number of tasks, each of which are relatively long running or compute intense. If you have a small number of tasks or your tasks are not very compute intensive, introducing parallelization is likely to actually decrease performance. Generally speaking, parallelization has diminishing returns as the number of threads increases, due to synchronization and data starvation problems that can arise when moving data between threads (as shown in figure 11.1).
Figure 11.1 Diminishing returns with increased parallelization
One handy feature of Rayon’s iterators is that they’re mostly compatible with the core Iterator trait, which makes it very easy to quickly benchmark code with or without parallelization. Let’s demonstrate by creating two different tests: one that will be slower with Rayon and one that will be faster with Rayon.
First, let’s write a test that’s faster without Rayon:
let start = Instant::now();
let sum = data
    .iter()
    .map(|n| n.wrapping_mul(*n))
    .reduce(|a: i64, b: i64| a.wrapping_add(b));          ❶
let finish = Instant::now() - start;
println!(
    "Summing squares without rayon took {}s",
    finish.as_secs_f64()
);

let start = Instant::now();
let sum = data
    .par_iter()
    .map(|n| n.wrapping_mul(*n))
    .reduce(|| 0, |a: i64, b: i64| a.wrapping_add(b));    ❷
let finish = Instant::now() - start;
println!("Summing squares with rayon took {}s", finish.as_secs_f64());
❶ We use reduce() instead of sum() because sum() performs addition without handling overflow.
❷ Notice the slight difference in signature of reduce() with Rayon, which requires an identity value that may be inserted to create opportunities for parallelization.
In the preceding code, we’ve generated an array filled with random integer values. Next, we square each value and then calculate the sum across the whole set. This is a classic map/reduce example. If we run this code, we get the following result:
Summing squares without rayon took 0.000028875s
Summing squares with rayon took 0.000688583s
This test with Rayon takes 23x longer than without! This is clearly not a good candidate for parallelization.
Let’s construct another test, which will use a regular expression to scan a long string for a word. We’ll randomly generate some very large strings before we run the search. The code looks like this:
let re = Regex::new(r"catdog").unwrap();     ❶

let start = Instant::now();
let matches: Vec<_> = data.iter().filter(|s| re.is_match(s)).collect();
let finish = Instant::now() - start;
println!("Regex took {}s", finish.as_secs_f64());

let start = Instant::now();
let matches: Vec<_> =
    data.par_iter().filter(|s| re.is_match(s)).collect();
let finish = Instant::now() - start;
println!("Regex with rayon took {}s", finish.as_secs_f64());
❶ Regex is both Send and Sync. We can use it in a parallel filter with Rayon.
Running this code, we get the following result:
Regex took 0.043573333s
Regex with rayon took 0.006173s
In this case, parallelization with Rayon gives us a 7x speedup. Scanning strings is one case where we might see a significant boost in performance across sufficiently large datasets.
Another notable feature of Rayon is its parallel sorting implementation, which allows you to sort slices in parallel. For larger datasets, this can provide a decent performance boost. Rayon’s join() also provides a work-stealing implementation, which executes tasks in parallel when idle worker threads are available, but you should use parallel iterators instead, when possible. For more details on Rayon, consult the documentation at https://docs.rs/rayon/latest/rayon/index.html.
The last thing we’ll discuss in this chapter is one of the coolest application of Rust: calling Rust code from other languages to perform operations that are either safety critical or compute intensive. This is a common pattern with C and C++, too: many language runtimes implement performance-critical features in C or C++. With Rust, however, you have the added bonus of its safety features. This, in fact, was one of the major motivating factors behind the adoption of Rust by several organizations, such as Mozilla, with their plans to improve the security and performance of the Firefox browser.
An example of how you might use Rust in this case would be to parse or validate data from external sources, such as a web server receiving untrusted data from the internet. Many security vulnerabilities are discovered by feeding random data into public interfaces and seeing what happens, and often, code contains mistakes (such as reading past the end of a buffer), which aren’t possible in Rust.
Most programming languages and runtimes provide some form of foreign function interface (FFI) bindings, which we demonstrated in chapter 4. However, for many popular languages, there are higher-level bindings and tooling available, which can make integrating Rust much easier than dealing with FFI, and some also help with packaging native binaries. Table 11.1 provides a summary of some useful tools for integrating Rust with other popular programming languages.
Table 11.1 Rust bindings and tooling for integrating Rust into other languages
|
GitHub stars1 |
||||
|---|---|---|---|---|
|
Rust bindings for Python, with tools for making native Python packages with Rust |
||||
|
setuptools extension for including binaries in Python packages, including Rust |
||||
|
Bindings between Ruby and Rust, which enable integrating Rust with Ruby or Ruby with Rust |
||||
|
Library for creating safe bindings to Rust for Elixir and Erlang |
||||
Congratulations on making it to the end of Code Like a Pro in Rust. Let’s take a moment to reflect on what we’ve discussed in this book and, more importantly, where to go from here to learn more.
In chapters 1 through 3, we focused on tooling, project structure, and the basic skills you need to work effectively with Rust. Chapters 4 and 5 covered data structures and Rust’s memory model. Chapters 6 and 7 focused on Rust’s testing features and how to get the most out of them. Chapters 8, 9, and 10 introduced us to async Rust, and this final chapter focused on optimization opportunities for Rust code.
At this point in the book, you may want to take some time to go back and revisit previous sections, especially if you found the content dense or hard to grok. It’s often good to give your brain a rest and then return to problems once you’ve had time to digest new information. For further reading on Rust, I recommend my follow-up book Rust Design Patterns as well as Tim McNamara’s Rust in Action, both from Manning Publications.
Rust and its ecosystem is forward looking and always evolving. The Rust language, while already quite mature, is actively developed and continuously moving forward. As such, I will close out the final chapter of this book by leaving you with some resources on where to go from here to learn about new Rust features, changes, and proposals, and how to get more involved with the Rust community.
Most of Rust language and tool development is hosted on GitHub, under the rust-lang project at https://github.com/rust-lang. Additionally, the following resources are a great place to dive deeper on the Rust language:
Release notes for each Rust version—https://github.com/rust-lang/rust/blob/master/RELEASES.md
Rust request for comments (RFCs), proposed Rust features, and these features’ current statuses—https://rust-lang.github.io/rfcs
The official Rust language reference—https://doc.rust-lang.org/reference
The official Rust language users forum, where you can discuss Rust with other like-minded people—https://users.rust-lang.org
Rust’s zero-cost abstractions allow you to write fast code without needing to worry about overhead, but code must be compiled in release mode to take advantage of these optimizations.
Vectors, Rust’s core sequence data structure, should be pre-allocated with the capacity needed, if you know the required capacity ahead of time.
When copying data between structures, the copy_from_slice() method provides a fast path for moving data between slices.
Rust’s experimental portable SIMD feature allows you to easily build code using SIMD. You don’t need to deal directly with assembly code or compiler intrinsics or worry about which instructions are available.
Code can be easily parallelized using the Rayon crate, which builds on top of Rust’s iterator pattern. Building parallelized code in Rust is as easy as using iterators.
We can introduce Rust into other languages by swapping out individual components for Rust equivalents, offering the benefit of Rust’s safety and performance features without needing to completely rewrite our applications.