Before we can jump into the Rust language itself, we need to familiarize ourselves with the basic tools required to work with Rust. This may seem tedious, but I can assure you that mastering tooling is critical to success. The tools were created by the language creators for the language users to make your life easier, so understanding their purpose will forever pay dividends.
Rust’s package management tool is called Cargo, and it’s the interface to Rust’s compiler rustc, the https://crates.io registry, and many other Rust tools (which we cover in more detail in chapter 3). Strictly speaking, it’s possible to use Rust and rustc without using Cargo, but it’s not something I’d recommend for most people.
When working with Rust, you’ll likely spend a lot of time using Cargo and tools that work with Cargo. It’s important to familiarize yourself with its use and best practices. In chapter 3, I’ll provide recommendations and details on how to further increase the usefulness of Cargo with community crates.
To demonstrate Cargo’s features, let’s take a tour of Cargo and its typical usage. I implore you to follow along (ideally by running the commands as demonstrated in the chapter). In doing so, you may discover new features even if you’re already familiar with Cargo and its usage.
To start, run cargo help to list the available commands:
$ cargo help
Rust's package manager

USAGE:
    cargo [+toolchain] [OPTIONS] [SUBCOMMAND]

OPTIONS:
    -V, --version           Print version info and exit
        --list              List installed commands
        --explain <CODE>    Run `rustc --explain CODE`
    -v, --verbose           Use verbose output (-vv very verbose/build.rs
                            output)
    -q, --quiet             No output printed to stdout
        --color <WHEN>      Coloring: auto, always, never
        --frozen            Require Cargo.lock and cache are up to date
        --locked            Require Cargo.lock is up to date
        --offline           Run without accessing the network
    -Z <FLAG>...            Unstable (nightly-only) flags to Cargo, see
    'cargo -Z help' for details
    -h, --help              Prints help information

Some common cargo commands are (see all commands with --list):
    build, b    Compile the current package
    check, c    Analyze the current package and report errors, but don't
    build object files
    clean       Remove the target directory
    doc         Build this package's and its dependencies' documentation
    new         Create a new cargo package
    init        Create a new cargo package in an existing directory
    run, r      Run a binary or example of the local package
    test, t     Run the tests
    bench       Run the benchmarks
    update      Update dependencies listed in Cargo.lock
    search      Search registry for crates
    publish     Package and upload this package to the registry
    install     Install a Rust binary. Default location is $HOME/.cargo/bin
    uninstall   Uninstall a Rust binary

See 'cargo help <command>' for more information on a specific command.
If you run this yourself, your output may differ slightly, depending on the version of Cargo you have installed. If you don’t see output similar to the preceding code, you may need to verify your Cargo installation is working. Refer to the appendix for details on installing Cargo.
Cargo has a built-in boilerplate generator, which can create a Hello, world! application or library, saving you time on getting started. To get started, run the following command in your shell from a development directory (I personally like to use ~/dev):
$ cargo new dolphins-are-cool
     Created binary (application) `dolphins-are-cool` package
This command creates a new boilerplate application called dolphins-are-cool (you can change the name to anything you want). Let’s quickly examine the output:
$ cd dolphins-are-cool/
$ tree
.
├── Cargo.toml
└── src
    └── main.rs

1 directory, 2 files
In this code, we see Cargo has created two files:
Cargo.toml, which is the Cargo configuration file for the new application, in TOML format
main.rs inside the src directory, which represents the entry point for our new application
Tip Tom’s obvious minimal language (TOML) is a configuration file format used by many Rust-related tools. For details on TOML, refer to https://toml.io.
Next, use cargo run to compile and execute the newly created application:
$ cargo run
   Compiling dolphins-are-cool v0.1.0 (/Users/brenden/dev/dolphins-are-cool)
    Finished dev [unoptimized + debuginfo] target(s) in 0.59s
     Running `target/debug/dolphins-are-cool`
Hello, world!                                   ❶
❶ This is the Rust program output.
Running the cargo new command like this but with the --lib argument will create a new library:
$ cargo new narwhals-are-real --lib
     Created library `narwhals-are-real` package
$ cd narwhals-are-real/
$ tree
.
├── Cargo.toml
└── src
    └── lib.rs

1 directory, 2 files
The code generated from cargo new --lib is slightly different, as it contains a single-unit test in src/lib.rs rather than a main function. You can run the tests with cargo test:
$ cargo test
    Finished test [unoptimized + debuginfo] target(s) in 0.00s
     Running target/debug/deps/narwhals_are_real-3265ca33d2780ea2

running 1 test
test tests::it_works ... ok

test result: ok. 1 passed; 0 failed; 0 ignored; 0 measured; 0 filtered out;
finished in 0.00s

   Doc-tests narwhals-are-real

running 0 tests

test result: ok. 0 passed; 0 failed; 0 ignored; 0 measured; 0 filtered out;
finished in 0.00s
Tip Applications use src/main.rs as their entrypoint, and libraries use src/lib.rs as their entrypoint.
When using cargo new, Cargo will automatically initialize the new directory as a Git repository (except when already inside a repository), including a .gitignore file. Cargo also supports hg, Pijul, and Fossil with the --vcs flag.
The Cargo commands you’ll likely spend the most time working with are build, check, test, and run. These commands are summarized in table 2.1.
Table 2.1 Cargo build and run commands
|
Similar to build, except does not actually generate any targets or objects—merely checks the validity of code |
|
The commands you will likely spend a great deal of time working with are cargo check and cargo test. By using check, you can save time and iterate quickly while writing code, as it will validate syntax faster than cargo build. To illustrate this, let’s time the compilation of the dryoc crate, available from https://github.com/brndnmtthws/dryoc, which I use throughout this book for examples:
$ cargo clean
$ time cargo build
...
    Finished dev [unoptimized + debuginfo] target(s) in 9.26s
cargo build  26.95s user 5.18s system 342% cpu 9.374 total
$ cargo clean
$ time cargo check
...
    Finished dev [unoptimized + debuginfo] target(s) in 7.97s
cargo check  23.24s user 3.80s system 334% cpu 8.077 total
In this case, the difference is not substantial: about 9.374 seconds for the build command versus 8.077 seconds for check (according to the wall-clock time given by the time command). However, on larger crates, the time saved can become substantial. Additionally, there’s a multiplicative effect, as you often recompile (or recheck) the code several times when iterating on changes.
A toolchain is a combination of an architecture, a platform, and a channel. One example is stable-x86_64-apple-darwin, which is the stable channel for x64-64 Darwin (equivalent to Apple’s macOS on Intel CPUs). Rust is published as three different channels: stable, beta, and nightly. Stable is the least frequently updated, best tested channel. Beta contains features that are ready for stabilization but which require further testing and are subject to change. Nightly contains unreleased language features that are considered a work in progress.
When working with Rust, you’ll often find yourself needing to switch between different toolchains. In particular, you may often need to switch between the stable and nightly channels. An easy way to do this directly with Cargo is to use the +channel option, like so:
# Runs tests with stable channel:
$ cargo +stable test
...
# Runs tests with nightly channel:
$ cargo +nightly test
...
Note You may need to install the nightly toolchain with rustup toolchain install nightly before running any cargo +nightly ... commands, if you haven’t already done so. If you install cargo via a system-level package manager (e.g., Debian’s apt), this command may not work as expected.
This option works with all Cargo commands, and it’s the quickest way to switch between toolchains. The alternative is to switch your default toolchain using rustup, covered in the appendix.
In many cases, you’ll want to test your code with both stable and nightly before publishing, especially with open source projects, as many people use both toolchains. Additionally, many Rust projects are nightly only, which is discussed in greater detail in chapter 3.
You may also use the override option with rustup, which allows you to set the toolchain for a specific project or directory. The rustup tool stores this configuration in its settings.toml, which is located within $HOME/.rustup on UNIX-like systems. For example, you can set the current working directory to the nightly channel with the following code:
# Only applies to the current directory and its children
$ rustup override set nightly
This is quite handy, as it allows you to keep the stable channel by default, but switch to nightly for specific projects.
The crates.io package (or crate) registry is one of Rust’s force multipliers. In the Rust community, packages are called crates, and they include both applications and libraries. As of the time of writing, there are more than 92,000 different crates available.
When referring to crates in this book, we’re likely using libraries rather than applications. In chapter 3, we’ll discuss more Rust tooling that can be installed from crates, but most of the time we’ll be using libraries.
Rust has a unique approach compared to some programming languages, in that the core language itself does not include many features. By comparison, languages like Java, C#, and even C++, to some degree, include significant components as part of the core language (either in the runtime or as part of the compiler). For example, Rust’s core data structures—compared to other languages—are quite minimal, and many are just wrappers around the core data resizable structure, Vec. Rust prefers to provide features through crates, rather than creating a large standard library.
The Rust language itself doesn’t even include a random number generator, which is critical for many programming tasks. For that you need to use the rand crate, which is the most downloaded crate as of the time of writing (or write your own random number generator).
If you’re coming from a language like JavaScript, Ruby, or Python, Rust’s crates will be somewhat similar to their corresponding package management tools. Coming from languages like C or C++ is like discovering fire for the first time. Gone are the days of manually writing complicated build checks for third-party libraries or integrating third-party code and build systems into your own source repository.
Describing dependencies in Rust is done by listing them in Cargo.toml. A simple example using the rand crate looks as shown in the following listing.
Listing 2.1 A minimal Cargo.toml
[package]
name = "simple-project"
version = "0.1.0"
authors = ["Brenden Matthews <brenden@brndn.io>"]
edition = "2018"

[dependencies]
rand = "0.8"
In the preceding code, we’re including the rand crate, using the latest 0.8 release of the library. When specifying dependency versions, you should follow semantic versioning (SemVer, https://semver.org), which uses the major.minor.patch pattern. By default, Cargo will use caret requirements if an operator is not specified, which permits updates to the least-specified version.
You can also add a dependency to a project with the cargo add command:
# Adds the rand crate as a dependency to the current project
$ cargo add rand
Cargo supports carets (^x.y.z), tildes (~x.y.z), wildcards (*, x.*), comparison requirements (>=x, <x.y, =x.y.z), and combinations thereof (see table 2.2). In practice, you would specify the library version as major.minor (allows compatible upgrades under the caret rules) or =major.minor.patch (pinned to a specific version). Refer to http://mng.bz/rjAB for more information on dependency specifications.
Table 2.2 Summary of SemVer dependency specification
Internally, Cargo uses the semver crate (https://crates.io/crates/semver) for parsing the versions specified. When you run cargo update within your project, Cargo will update the Cargo.lock file with the newest available crates, per your dependency specification.
Tip I prefer to avoid pinning dependency versions when possible, especially in libraries. It can cause headaches down the road when competing downstream packages require different versions of common libraries. While many advocate for version pinning, it’s better to permit flexibility as needed.
How exactly to specify dependencies is a topic of much debate. There are no hard-and-fast rules, but you should generally assume other projects follow SemVer. Some projects adhere to SemVer rules strictly, and others do not. In most cases, it needs to be evaluated on a case-by-case basis. A reasonable default assumption is to allow upgrades to minor and patch versions by specifying the minimum required version with the caret operator, which is the default in Rust (if you don’t explicitly specify an operator). For your own published crates, please follow SemVer, as it helps other developers build on your work and preserves compatibility.
Handling Cargo.lock requires a bit of special consideration, at least with regard to version control systems. The file contains a list of the package dependencies (both direct and indirect dependencies), their versions, and checksums for verifying integrity.
If you’re coming from languages with similar package management systems, you’ve probably seen similar files before (npm uses package-lock.json, Ruby gems use Gemfile .lock, and Python Poetry uses poetry.lock). For libraries, it’s recommended you do not include this file in your version control system. When using Git, you can do this by adding Cargo.lock to .gitignore. Leaving out the lock file allows downstream packages to update indirect dependencies as needed.
For applications, it’s recommended you always include Cargo.lock alongside Cargo.toml. This helps to ensure consistent behavior in published releases, should third-party libraries change in the future.
This is a well-established convention and not unique to Rust. Lastly, Cargo will automatically create an appropriate .gitignore file for you and initialize a Git repository.
It’s common practice when publishing software, particularly libraries, to have optional dependencies. This is usually for the purpose of keeping compile times low and binaries small, and, perhaps, providing performance improvements, with the tradeoff of some additional complexity at compile time.
In some cases, you may want to include optional dependencies as part of your crate. These can be expressed as feature flags with Cargo (table 2.3). There are some limitations with feature flags, notably that they only permit Boolean expressions (i.e., enabled or disabled). Feature flags are also passed through to crates in your dependency list, so you can enable features for underlying crates through top-level feature flags.
Table 2.3 Example feature flags from the dryoc crate
I recommend not relying too heavily on feature flags. You may find yourself leaning toward creating supercrates with lots of feature flags, but if you find yourself doing this, you may want to instead break your crate into smaller, separate subcrates. This pattern is quite common; some good examples include the serde, rand, and rocket crates. There are some cases where you must use feature flags to express certain optional features, such as when providing optional trait implementations in the top-level crate.
To examine how feature flags are used in practice, let’s look at the dryoc crate in the following listing. This crate uses a few flags to express some features: serde; base64, for binary encoding (with serde); and SIMD optimizations.
Listing 2.2 Cargo.toml from the dryoc crate
[dependencies]
base64 = {version = "0.13", optional = true}                       ❶
curve25519-dalek = "3.0"
generic-array = "0.14"
poly1305 = "0.6"
rand_core = {version = "0.5", features = ["getrandom"]}
salsa20 = {version = "0.7", features = ["hsalsa20"]}
serde = {version = "1.0", optional = true, features = ["derive"]}  ❷
sha2 = "0.9"
subtle = "2.4"
x25519-dalek = "1.1"
zeroize = "1.2"

[dev-dependencies]
base64 = "0.13"
serde_json = "1.0"
sodiumoxide = "0.2"

[features]                                                         ❸
default = [                                                        ❹
  "u64_backend",
]
simd_backend = ["curve25519-dalek/simd_backend", "sha2/asm"]       ❺
u32_backend = ["x25519-dalek/u32_backend"]
u64_backend = ["x25519-dalek/u64_backend"]
❶ An optional base64 dependency, which is not included by default
❷ An optional serde dependency, which is not included by default
❸ The default and optional features section
❹ The list of default features
❺ Optional features and the features they switch on for dependencies
Next, let’s examine some of the crate’s code to see how these flags are used by utilizing cfg and cfg_attr, which instruct the Rust compiler, rustc, how to use these flags. We’ll look at src/message.rs, which demonstrates the use of feature flags, in the following listing.
Listing 2.3 Partial code for src/message.rs from the dryoc crate
#[cfg(feature = "serde")]                                                ❶
use serde::{Deserialize, Serialize};

use zeroize::Zeroize;

#[cfg_attr(                                                              ❷
    feature = "serde",                                                   ❷
    derive(Serialize, Deserialize, Zeroize, Debug, PartialEq)            ❷
)]
#[cfg_attr(not(feature = "serde"), derive(Zeroize, Debug, PartialEq))]   ❸
#[zeroize(drop)]
/// Message container, for use with unencrypted messages
pub struct Message(pub Box<InputBase>);
❶ Enables the use statement only when serde is enabled
❷ Enables the derive() statement only when serde is enabled
❸ Enables the derive() statement only when serde is disabled
The preceding code listing uses several conditional compilation attributes:
cfg(predicate)—Instructs the compiler to only compile what it is attached to if the predicate is true
cfg_attr(predicate, attribute)—Instructs the compiler to only enable the specified attribute (second argument) if the predicate (first argument) is true
not(predicate)—Returns true if the predicate is false and vice versa
Additionally, you may use all(predicate) and any(predicate), which return true when all or any of the predicates are true. For more examples, see src/lib.rs, src/b64.rs, src/dryocbox.rs, and src/dryocsecretbox.rs within the dryoc crate.
Tip When you generate documentation for a project with rustdoc, it automatically provides a feature flag listing for you. We’ll explore rustdoc in detail later in this chapter.
One problem you may encounter from time to time is the need to patch an upstream crate (i.e., a crate you depend on from outside your project). I have encountered many instances where I needed to update another crate I was depending on, usually for some minor problem. It’s rarely worth the trouble of replacing the functionality of upstream crates just to fix one or two minor bugs. In some cases, you may be able to simply switch to the prerelease version of the crate, or else you have to patch it yourself.
The process for patching an upstream crate goes something like this:
Change your Cargo.toml to point to your fork while waiting for the pull request to be merged and released.
This process is not without problems. One obstacle is keeping track of changes to the upstream crate and integrating them as needed. Another problem is that your patch may never be accepted upstream—in which case, you can get stuck on a fork. When working with upstream crates, you should try to avoid forking when possible.
Cargo provides a way for you to patch crates using the preceding fork method without too much fuss; however, there are some caveats. To illustrate, let’s walk through the typical process for patching a crate. For this example, I’ll make a local copy of the source code rather than creating a forked project on GitHub.
Let’s modify the num_cpus crate, to replace it with our own patched version. I chose this crate for its simplicity; it returns the number of logical CPU cores. Start by creating an empty project:
$ cargo new patch-num-cpus
...
$ cd patch-num-cpus
$ cargo run
...
Hello, world!
Next, add the num_cpus dependency to Cargo.toml:
[dependencies]
num_cpus“= "”.0"
Update src/main.rs to print the number of CPUs:
fn main() {
    printl“!("There are {} C”Us", num_cpus::get());
}
$ cargo run
    Finished dev [unoptimized + debuginfo] target(s) in 0.00s
     Running `target/debug/patch-num-cpus`
There are 4 CPUs
At this point, we haven’t patched or modified anything. Let’s create a new library within the same working directory, where we’ll reimplement the same API:
$ cargo new num_cpus --lib
...
Next, we’ll patch the default src/lib.rs to implement num_cpus::get(). Update src/lib.rs from the num_cpus directory to the following:
pub fn get() -> usize {
    100                  ❶
}
❶ Return some arbitrary value, for test purposes.
Now, we have num_cpus with our own implementation, which returns a rather pointless hardcoded value (100, in this case). Go back up a directory to the original patch- num-cpus project, and modify Cargo.toml to use the replacement crate:
[dependencies]
num_cpus = { path = "num_cpus" }
Run the same code with the patched crate:
$ cargo run
   Compiling patch-num-cpus v0.1.0
    Finished dev [unoptimized + debuginfo] target(s) in 0.33s
     Running `target/debug/patch-num-cpus`
There are 100 CPUs
This example is fairly pointless, but it effectively illustrates the process. If you want to patch a dependency using a fork from GitHub, for example, you would point your dependency directly to your GitHub repository, like this (in Cargo.toml):
[dependencies]
num_cpus = { git = "https://github.com/brndnmtthws/num_cpus",
  rev = "b423db0a698b035914ae1fd6b7ce5d2a4e727b46" }
If you execute cargo run now, you should again see the correct number of CPUs reported (as I created the fork above but without any changes). rev in the preceding example is referring to a Git hash for the latest commit at the time of writing. When you compile the project, Cargo will fetch the source code from the GitHub repository, check out the particular revision specified (which could be a commit, branch, or tag), and compile that version as a dependency.
Sometimes, you need to patch dependencies of dependencies. That is to say, you might depend on a crate that depends on another crate that requires patching. Using num_cpus as an example, the crate currently depends on libc = "0.2.26" (but only on non-Windows platforms). For the sake of this example, we can patch that dependency to a newer release by updating Cargo.toml like so:
[patch.crates-io]
libc = { git = "https://github.com/rust-lang/libc", tag = "0.2.88" }
In this example, we’re going to point to the Git repository for libc and specify the 0.2.88 tag explicitly. The patch section in Cargo.toml serves as a way to patch the crates.io registry itself, rather than patching a package directly. You are, in effect, replacing all upstream dependencies for libc with your own version.
Use this feature carefully, and only under special circumstances. It does not affect downstream dependencies, meaning any crates that depend on your crate won’t inherit the patch. This is a limitation of Cargo that currently does not have a reasonable workaround. In cases in which you need more control over second- and third-order dependencies, you’ll need to either fork all the projects involved or include them directly in your own project as subprojects using workspaces (discussed later in this chapter).
There are a few rules we should try to follow when it comes to patching dependencies, as outlined here:
Patching dependencies should be a last resort, as patches are difficult to maintain over time.
When patching is necessary, submit patches upstream with the required changes for open source projects, especially when required by licenses (i.e., GPL-licensed code).
Avoid forking upstream crates, and in cases where it’s unavoidable, try to get back onto the main branch as quickly as possible. Long-lived forks will diverge and can eventually become a maintenance nightmare.
For projects you wish to publish to crates.io, the process is simple. Once your crate is ready to go, you can run cargo publish, and Cargo takes care of the details. There are a few requirements for publishing a crate, such as specifying a license, providing certain project details like documentation and a repository URL, and ensuring all dependencies are also available to crates.io.
It is possible to publish to a private registry; however, at the time of writing, Cargo’s support for private registries is quite limited. Thus, it’s recommended to use private Git repositories and tags instead of relying on crates.io for private crates.
For most crates, you’ll want to set up a system for publishing releases to crates.io automatically. Continuous integration/continuous deployment (CI/CD) systems are a common component of modern development cycles. They’re usually composed of two distinct steps:
Continuous integration (CI)—A system that compiles, checks, and verifies each commit to a VCS repository
Continuous deployment (CD)—A system that automatically deploys each commit or release, provided it passes all necessary checks from the CI
To demonstrate this, I will walk through the dryoc project, which uses GitHub Actions (https://github.com/features/actions), freely available for open source projects.
Before looking at the code, let’s describe the release process with a typical Git workflow once you’ve decided it’s time to publish a release:
If needed, update the version attribute within Cargo.toml to the version you want to release.
The CI system will run, verifying all the tests and checks pass.
You’ll create and push a tag for the release (use a version prefix, such as git tag -s vX.Y.Z).
The CD system will run, build the tagged release, and publish to crates.io with cargo publish.
Update the version attribute in Cargo.toml for the next release cycle in a new commit.
Note Published crates are immutable, so any changes will require rolling forward. There is no way to roll back or make changes to a crate once published to crates.io.
Let’s examine the dryoc crate, which implements this pattern using GitHub Actions. There are two Actions to look at:
.github/workflows/build-and-test.yml—Builds and runs tests for a combination of features, platforms, and toolkits (http://mng.bz/VRmP)
.github/workflows/publish.yml—Builds and runs tests for a tagged release matching the v* pattern, publishing the crate to crates.io (http://mng.bz/xjAW)
Listing 2.4 shows the build job parameters, including the feature, channel, and platform matrix. These jobs use the brndnmtthws/rust-action all-in-one GitHub Action (http://mng.bz/A87z) to set up the Rust environment.
Listing 2.4 Partial code for .github/workflows/build-and-test.yml
name: Build & test
on:                             ❶
  push:
    branches: [main]
  pull_request:
    branches: [main]
env:
  CARGO_TERM_COLOR: always
concurrency:
  group: ${{ github.workflow }}-${{ github.ref }}
  cancel-in-progress: true
jobs:
  build:
    strategy:
      matrix:
        rust:                   ❷
          - stable
          - beta
          - nightly
        features:               ❸
          - serde
          - base64
          - simd_backend
          - default
        os:                     ❹
          - ubuntu-latest
          - macos-latest
          - windows-latest
        exclude:                ❺
          - rust: stable
            features: simd_backend
          - rust: beta
            features: simd_backend
          - os: windows-latest
            features: simd_backend
❶ Builds will only run on Git pushes and pull requests for the main branch.
❷ Runs with stable, beta, and nightly channels
❸ Runs tests with different features enabled separately
❹ Runs on Linux, macOS, and Windows
❺ Some build combinations don’t work, so they’re disabled here.
The following listing shows the individual steps to build, test, format, and run Clippy (discussed in chapter 3).
Listing 2.5 Partial code for .github/workflows/build-and-test.yml
runs-on: ${{ matrix.os }}
    env:
      FEATURES: >
        ${{ matrix.rust != ‘nightly’ && matrix.features
        || format(‘{0},nightly’, matrix.features) }}
    steps:
      - uses: actions/checkout@v3
      - name: Setup ${{ matrix.rust }} Rust toolchain with caching
        uses: brndnmtthws/rust-action@v1
        with:
          toolchain: ${{ matrix.rust }}                                    ❶
      - run: cargo build --features ${{ env.FEATURES }}                    ❷
      - run: cargo test --features ${{ env.FEATURES }}                     ❸
        env:
          RUST_BACKTRACE: 1
      - run: cargo fmt --all -- --check                                    ❹
        if: ${{ matrix.rust == ‘nightly’ && matrix.os == ‘ubuntu-latest’ }}
      - run: cargo clippy --features ${{ env.FEATURES }} -- -D warnings    ❺
❶ This step installs the desired toolchain.
❷ Runs the build with the specified features
❸ Runs all tests with the specified features
❺ Runs Clippy checks with the specified features
The following listing shows the steps involved to publish our crate.
Listing 2.6 Code for .github/workflows/publish.yml
name: Publish to crates.io
on:
  push:
    tags:
      - v*                                                  ❶
env:
  CARGO_TERM_COLOR: always
jobs:
  build-test-publish:
    runs-on: ubuntu-latest
    steps:
      - uses: actions/checkout@v3
      - uses: brndnmtthws/rust-action@v1
        with:
          toolchain: stable
      - run: cargo build
      - run: cargo test
      - run: cargo login -- ${{ secrets.CRATES_IO_TOKEN }}  ❷
      - run: cargo publish                                  ❸
      - name: Create Release                                ❹
        id: create_release
        uses: softprops/action-gh-release@v1
        if: startsWith(github.ref, ‘refs/tags/’)
        with:
          draft: false
          prerelease: false
          discussion_category_name: General
          generate_release_notes: true
❶ Only runs when tag matches v*
❷ Log in to crates.io using the secret stored in the repository’s secrets configuration. This token is stored using GitHub’s secret storage feature, which must be supplied ahead of time.
❸ Publishes the crate to https://crates.io
Note GitHub’s Actions doesn’t currently support any way to gate a release when using separate stages (i.e., wait until the build stage succeeds before proceeding with the deploy stage). To accomplish this, you must verify the build stage succeeds before pushing any tags.
In the final publish step, you’ll need to provide a token for https://crates.io. This can be done by creating a crates.io account, generating a token from the crates.io account settings, and then adding it to GitHub’s secret storage in the settings for your GitHub repository.
You may occasionally find yourself needing to use external libraries from non-Rust code. This is usually accomplished with a foreign function interface (FFI). FFI is a fairly standard way to accomplish cross-language interoperability. We’ll revisit FFI again in greater detail in chapter 4.
Let’s walk through a simple example of calling functions from one of the most popular C libraries: zlib. Zlib was chosen because it’s nearly ubiquitous, and this example should work easily out of the box on any platform where zlib is available. We’ll implement two functions in Rust: compress() and uncompress(). Here are the definitions from the zlib library (which has been simplified for the purposes of this example).
Listing 2.7 Simplified code listing from zlib.h
int compress(void *dest, unsigned long *destLen,
             const void *source, unsigned long sourceLen);

unsigned long compressBound(unsigned long sourceLen);

int uncompress(void *dest, unsigned long *destLen,
               const void *source, unsigned long sourceLen);
First, we’ll define the C interface in Rust using extern.
Listing 2.8 Code for zlib utility functions
use libc::{c_int, c_ulong};

#[link(name = "z")]
extern "C" {
    fn compress(
        dest: *mut u8,
        dest_len: *mut c_ulong,
        source: *const u8,
        source_len: c_ulong,
    ) -> c_int;
    fn compressBound(source_len: c_ulong) -> c_ulong;
    fn uncompress(
        dest: *mut u8,
        dest_len: *mut c_ulong,
        source: *const u8,
        source_len: c_ulong,
    ) -> c_int;
}
We’ve included libc as a dependency, which provides C-compatible types in Rust. Whenever you’re linking to C libraries, you’ll want to use types from libc to maintain compatibility. Failure to do so may result in undefined behavior. We’ve defined three utility functions from zlib: compress, compressBound, and uncompress.
The link attribute tells rustc that we need to link these functions to zlib. This is equivalent to adding the -lz flag at link time. On macOS, you can verify this with otool -L, as shown in the following code (on Linux, use ldd, and on Windows, use dumpbin):
$ otool -L target/debug/zlib-wrapper
target/debug/zlib-wrapper:
    /usr/lib/libz.1.dylib (compatibility version 1.0.0, current version
  1.2.11)
    /usr/lib/libiconv.2.dylib (compatibility version 7.0.0, current version
  7.0.0)
    /usr/lib/libSystem.B.dylib (compatibility version 1.0.0, current version
  1292.60.1)
    /usr/lib/libresolv.9.dylib (compatibility version 1.0.0, current version
  1.0.0)
Next, we need to write Rust functions that wrap the C functions and can be called from Rust code. Calling C functions directly is considered unsafe in Rust, so you must wrap the call in an unsafe {} block.
Listing 2.9 Code for zlib_compress
pub fn zlib_compress(source: &[u8]) -> Vec<u8> {
    unsafe {
        let source_len = source.len() as c_ulong;

        let mut dest_len = compressBound(source_len);          ❶
        let mut dest = Vec::with_capacity(dest_len as usize);  ❷

        compress(                                              ❸
            dest.as_mut_ptr(),
            &mut dest_len,
            source.as_ptr(),
            source_len,
        );
        dest.set_len(dest_len as usize);
        dest                                                   ❹
    }
}
❶ Returns the upper bound of the length of the compressed output
❷ Allocates dest_len bytes on the heap using a Vec
The zlib_uncompress version of the preceding function is nearly identical, except we need to provide our own length for the destination buffer. Finally, we can demonstrate the usage as shown in the following listing.
fn main() {
    let hello_world = "Hello, world!".as_bytes();
    let hello_world_compressed = zlib_compress(&hello_world);
    let hello_world_uncompressed =
        zlib_uncompress(&hello_world_compressed, 100);
    assert_eq!(hello_world, hello_world_uncompressed);
    println!(
        "{}",
        String::from_utf8(hello_world_uncompressed)
            .expect("Invalid characters")
    );
}
The biggest challenge when dealing with FFI is the complexity of some C APIs and mapping the various types and functions. To work around this, you can use the rust bindgen tool, which is discussed in greater detail in chapter 4.
Rust’s binaries are composed of all Rust dependencies for a given platform included as a single binary—excluding the C runtime—in addition to any non-Rust libraries that may have been dynamically linked. You can build binaries that are statically linked to the C runtime, but, by default, this is optional. Thus, when distributing Rust binaries, you’ll need to consider whether you want to statically link the C runtime or rely on the system’s runtime.
The binaries themselves are platform dependent. They can be cross-compiled for different platforms, but you cannot mix different architectures or platforms with the same Rust binary. A binary compiled for Intel-based x64-64 CPUs will not run on ARM-based platforms, like AArch64 (also known as ARMv8) without some type of emulation. A binary compiled for macOS won’t run on Linux.
Some OS vendors, notably Apple’s macOS, provide emulation for other CPU platforms. It’s possible to run x86-64 binaries automatically on ARM using Apple’s Rosetta tool, which should happen automatically. For more detail on macOS binary distribution, consult Apple’s developer documentation at http://mng.bz/ZRvP. In most cases, you’ll want to stick with the defaults for the platform you’re using, but there are some exceptions to this rule.
If you’re coming from a language such as Go, you may have become accustomed to distributing precompiled binaries without worrying about the C runtime. Unlike Go, Rust requires a C runtime, and it uses dynamic linking by default.
You can use Cargo to cross-compile binaries for different targets but only where compiler support is available for that target. For example, you can easily compile Linux binaries on Windows, but compiling Windows binaries on Linux is not as easy (but not impossible).
You can list the available targets on your host platform using rustup:
$ rustup target list
rustup target list
aarch64-apple-darwin
aarch64-apple-ios
aarch64-fuchsia
aarch64-linux-android
aarch64-pc-windows-msvc
..
You can install different targets with rustup target add <target> and then use cargo build --target <target> to build for a particular target. For example, on my Intel-based macOS machine, I can run the following to compile binaries for AArch64 (used by the M1 chip):
$ rustup target add aarch64-apple-darwin
info: downloading component ‘rust-std’ for ‘aarch64-apple-darwin’
info: installing component ‘rust-std’ for ‘aarch64-apple-darwin’
info: using up to 500.0 MiB of RAM to unpack components
 18.3 MiB /  18.3 MiB (100 %)  14.7 MiB/s in  1s ETA:  0s
$ cargo build --target aarch64-apple-darwin
...
    Finished dev [unoptimized + debuginfo] target(s) in 3.74s
However, if I try to run the binary, it will fail:
$ ./target/aarch64-apple-darwin/debug/simple-project
-bash: ./target/aarch64-apple-darwin/debug/simple-project: Bad CPU type in
executable
If I had access to an AArch64 macOS device, I could copy this binary to that machine and run it there successfully.
Normal Rust binaries include all the compiled dependencies, except the C runtime library. On Windows and macOS, it’s normal to distribute precompiled binaries and link to the OS’s C runtime libraries. On Linux, however, most packages are compiled from source by the distributions’ maintainers, and the distributions take responsibility for managing the C runtime.
When distributing Rust binaries on Linux, you can use either glibc or musl, depending on your preference. Glibc is the default C library runtime on most Linux distributions. However, I recommend statically linking to musl when you want to distribute Linux binaries for maximum portability. In fact, when trying to statically link on certain targets, Rust assumes you want to use musl.
Note Musl behaves slightly differently from glibc in certain cases. These differences are documented on the musl wiki at http://mng.bz/Rm7K.
You can instruct rustc to use a static C runtime with the target-feature flag like this:
$ RUSTFLAGS="-C target-feature=+crt-static" cargo build
    Finished dev [unoptimized + debuginfo] target(s) in 0.01s
In this code, we’re passing -C target-feature=+crt-static to rustc via the RUSTFLAGS environment variable, which is interpreted by Cargo and passed to rustc.
We use the following code to link statically to musl on x86-64 Linux:
$ rustup target add x86_64-unknown-linux-musl    ❶
...
$ RUSTFLAGS="-C target-feature=+crt-static" cargo build --target
x86_64-unknown-linux-musl                        ❷
...
❶ Make sure musl target is installed.
❷ Compile using musl target and force static C runtime.
To explicitly disable static linking, use RUSTFLAGS="-C target-feature=-crt-static" instead (by flipping the plus [+] to minus [-]). This may be desirable on targets that default to static linking—if unsure, use the default parameters.
Alternatively, you can specify rustc flags for Cargo with ~/.cargo/config:
[target.x86_64-pc-windows-msvc]
rustflags = ["-Ctarget-feature=+crt-static"]
The preceding code, when added to ~/.cargo/config, will instruct rustc to link statically when using the x86_64-pc-windows-msvc target.
Rust’s tool for documenting code, which ships with Rust by default, is called rustdoc. If you’ve used code documentation tools from other projects (e.g., Javadoc, docstring, or RDoc), rustdoc will come naturally.
Using rustdoc is as simple as adding comments in your code and generating docs. Let’s run through a quick example. Start by creating a library:
$ cargo new rustdoc-example --lib
     Created library `rustdoc-example` package
Now, let’s edit src/lib.rs to add a function called mult, which takes two integers (a and b) and multiplies them. We’ll also add a test:
pub fn mult(a: i32, b: i32) -> i32 {
    a * b
}

#[cfg(test)]
mod tests {
    use super::*;
    #[test]
    fn it_works() {
        assert_eq!(2 * 2, mult(2, 2));
    }
}
We haven’t added any documentation yet. Before we do, let’s generate some empty documentation using Cargo:
$ cargo doc
 Documenting rustdoc-example v0.1.0
 (/Users/brenden/dev/code-like-a-pro-in-rust/code/c2/2.8/rustdoc-example)
    Finished dev [unoptimized + debuginfo] target(s) in 0.89s
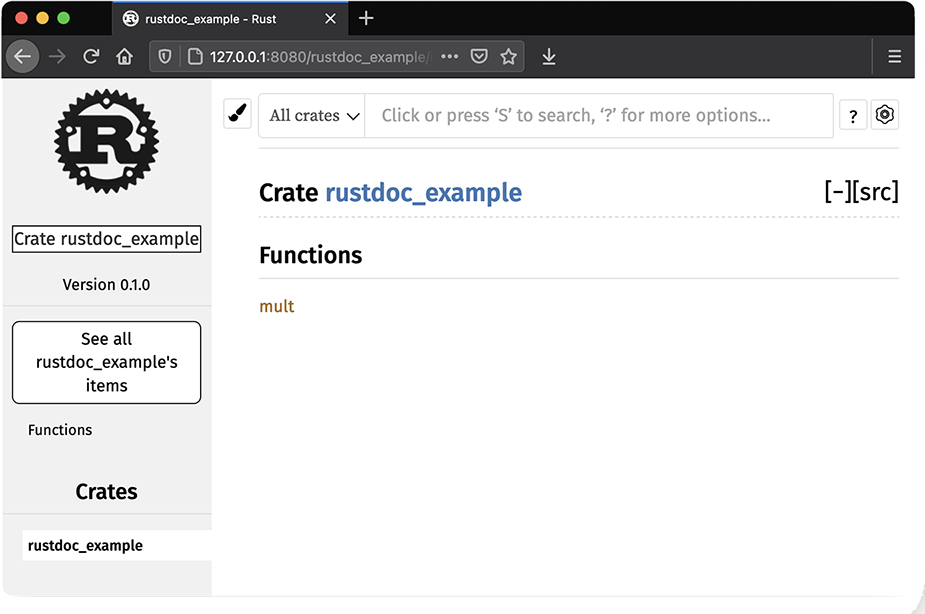
Now, you should see the generated HTML docs in target/. If you want to open the docs in a browser, you can open target/doc/src/rustdoc_example/lib.rs.html to view them. The result should look like figure 2.1. The default docs are empty, but you can see the public function mult listed in the docs.
Figure 2.1 Screenshot of empty rustdoc HTML output
Next, let’s add a compiler attribute and some docs to our project. Update src/lib.rs so that it looks like this:
//! # rustdoc-example                                                     ❶
//!                                                                       ❶
//! A simple project demonstrating the use of rustdoc with the function   ❶
//! [`mult`].                                                             ❶

#![warn(missing_docs)]                                                    ❷

/// Returns the product of `a` and `b`.                                   ❸
pub fn mult(a: i32, b: i32) -> i32 {
    a * b
}
❶ This is a crate-level doc string, which appears on the front page for the crate’s docs.
❷ This compiler attribute tells rustc to generate a warning when docs are missing for public functions, modules, or types.
❸ This comment provides the documentation for the function mult.
Tip Rust documentation is formatted using CommonMark, a subset of Markdown. A reference for CommonMark can be found at https://commonmark.org/help.
If you rerun cargo doc with the newly created code documentation and open it in a browser, you will see the output shown in figure 2.2. For crates published to crates.io, there’s a companion rustdoc site that automatically generates and hosts documentation for crates at https://docs.rs. For example, the docs for the dryoc crate are available at https://docs.rs/dryoc.
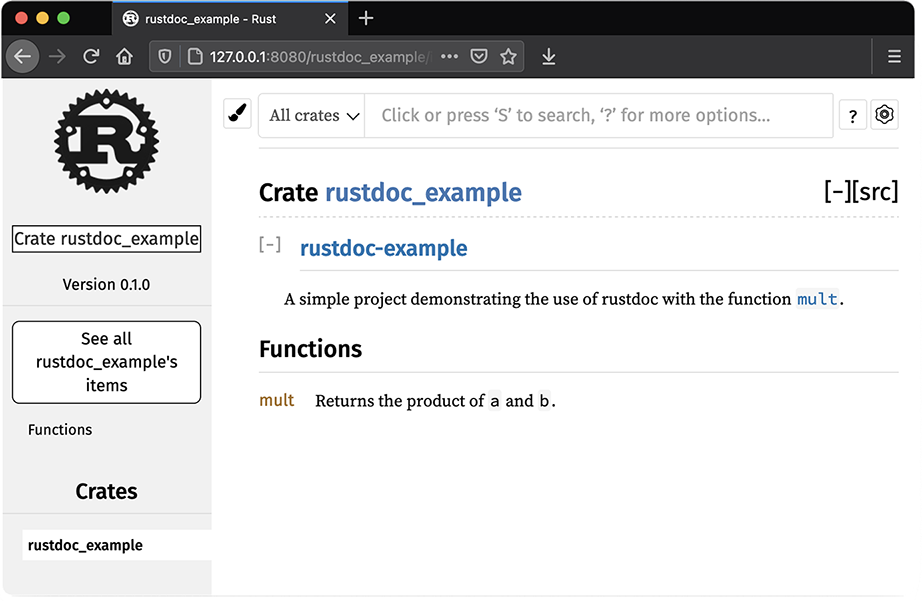
Figure 2.2 Screenshot of rustdoc HTML output with comments
In documented crates, you should update Cargo.toml to include the documentation property, which links to the documentation for the project. This is helpful for those who find their crate on sources like crates.io. For example, the dryoc crate has the following in Cargo.toml:
[package]
name = "dryoc"
documentation = "https://docs.rs/dryoc"
You don’t have to do anything else to use docs.rs. The website automatically generates updated docs when new releases are published to crates.io. Table 2.4 serves as a reference for rustdoc syntax.
Table 2.4 Quick reference for rustdoc usage
One handy feature of rustdoc is that code included as examples within documentation is compiled and executed as integration tests. Thus, you can include code samples with assertions, which are tested when you run cargo test. This helps you maintain high-quality documentation with working code samples.
One such example might look like this (appended to the crate-level docs in src/lib.rs from the previous example):
//! # Example
//!
//! -----
//! use rustdoc_example::mult;
//! assert_eq!(mult(10, 10), 100);
//! -----
Running the tests with the preceding example using cargo test yields the following:
cargo test
   Compiling rustdoc-example v0.1.0
   (/Users/brenden/dev/code-like-a-pro-in-rust/code/c2/2.8/rustdoc-example)
    Finished test [unoptimized + debuginfo] target(s) in 0.42s
     Running target/debug/deps/rustdoc_example-bec4912aee60500b

running 1 test
test tests::it_works ... ok

test result: ok. 1 passed; 0 failed; 0 ignored; 0 measured; 0 filtered out;
  finished in 0.00s

   Doc-tests rustdoc-example

running 1 test
test src/lib.rs - (line 7) ... ok

test result: ok. 1 passed; 0 failed; 0 ignored; 0 measured; 0 filtered out;
  finished in 0.23s
For more information about rustdoc, refer to the official documentation at https://doc.rust-lang.org/rustdoc. For more information about CommonMark, refer to CommonMark’s help page at https://commonmark.org/help.
Rust modules provide a way to organize code hierarchically, into a set of distinct units, which can optionally be split into separate source files. Rust’s modules combine two features into one: the inclusion of code from other source files and namespacing of publicly visible symbols. In Rust, all symbols are declared as private by default, but they can be exported (or made publicly visible) with the pub keyword. If we were to export too many symbols, we might eventually have a name collision. Thus, we can organize our code by modules to prevent namespace pollution.
A module declaration block uses the mod keyword, with an optional pub visibility specifier, and is followed immediately by a code block in braces:
mod private_mod {
  // ...              ❶
}
pub mod public_mod {
  // ...              ❷
}
❷ Public code to be exported goes here.
The terms module and mod are sometimes used interchangeably when talking about Rust code. By convention, module names typically use snake case, whereas most other names use camel case (structs, enums, traits). Primitive types (i32, str, u64, etc.) are usually short, single words and sometimes snake case. Constants are typically uppercase, which is also the convention in most other languages. Following these patterns makes it easier to determine what’s being imported just by glancing at use statements.
We can include a module with the same mod keyword, except, instead of a code block, it simply ends with a semicolon:
mod private_mod;
pub mod public_mod;
mod outer_mod {
  mod inner_mod {
    mod super_inner_mod {
      ...
    }
  }
}
When we include a symbol or module from another crate, we do so with the use statement like so:
use serde::ser::{Serialize, Serializer}; ❶
❶ Includes the Serialize and Serializer symbols from the ser module within the serde crate
When we include code with a use statement, the first name is usually the name of the crate we want to include code from followed by a module, specific symbols, or a wildcard (*) to include all symbols from that module.
Modules can be organized using the file system, too. We can create the same hierarchy as in the previous example using paths within our crate’s source directory, but we still need to tell cargo which files to include in the crate. To do this, we use the mod statement, rather than a block. Consider a crate with the following structure:
$ tree .
.
├── Cargo.lock
├── Cargo.toml
└── src
    ├── lib.rs
    ├── outer_module
    │   └── inner_module
    │       ├── mod.rs
    │       └── super_inner_module.rs
    └── outer_module.rs

3 directories, 6 files
In this code, we have a crate with three nested inner modules, like in the earlier example. In our top-level lib.rs, we’ll include the outer module, which is defined in outer_ module.rs:
mod outer_module;
The compiler will look for the mod declaration in either outer_module.rs or outer_ module/mod.rs. In our case, we supplied outer_module.rs at the same level as lib.rs. Within outer_module.rs, we have the following to include the inner module:
mod inner_module;
The compiler next looks for inner_module.rs or inner_module/mod.rs within the outer module. In this case, it finds inner_module/mod.rs, which contains the following:
mod super_inner_module;
This includes super_inner_module.rs within the inner_module directory. This seems quite a bit more complex than the example from earlier in this section, but for larger projects, it’s much better to use modules than to include all the source code for a crate in either lib.rs or main.rs. If modules seem a bit confusing, try recreating similar structures from scratch to understand how the pieces fit together. You can start with the example included in this book’s source code under c02/modules. We’ll also explore module structures again in chapter 9.
Cargo’s workspace feature allows you to break a large crate into multiple separate crates and group those crates together within a workspace that shares a single Cargo.lock lockfile. Workspaces have a few important features, which we’ll discuss in this section, but their main feature is allowing you to share parameters from Cargo.toml and the resolved dependency tree from a single Cargo.lock. Each project within a workspace shares the following:
The target/ output directory, containing project targets from all workspaces
[patch], [replace], and [profile.*] sections from the top-level Cargo.toml
To use workspaces, you’ll create projects with Cargo as you normally would, within subdirectories that don’t overlap with the top-level crate’s directories (i.e., they shouldn’t be in src/, target/, tests/, examples/, benches/, etc.). You can then add these dependencies as you normally would, except that rather than specifying a version or repository, you simply specify a path or add each project to the workspace.members list in Cargo.toml.
Let’s walk through an example project using workspaces. Start by creating a top-level application, and change into the newly created directory:
$ cargo new workspaces-example
     Created binary (application) `workspaces-example` package
$ cd workspaces-example
Now, create a subproject, which will be a simple library:
$ cargo new subproject --lib
The newly created directory structure should look like this:
$ tree
.
├── Cargo.toml
├── src
│   └── main.rs
└── subproject
    ├── Cargo.toml
    └── src
        └── lib.rs

3 directories, 4 files
Next, let’s update the top-level Cargo.toml to include the subproject by adding it as a dependency (you still need to define dependencies within workspaces):
[dependencies]
subproject = { path = "./subproject" }
In the preceding example, we’re adding the subproject by specifying it as a dependency and using the path property on it. To include the project in the workspace, we also need to add it to [workspace.members], which holds a list of paths or a glob pattern for the workspace members. For larger projects, using a glob may be easier than listing each path explicitly, provided you use a consistent path hierarchy. For this example, the workspace code in Cargo.toml would look like this:
[workspace]
members = ["subproject"]
You can now run cargo check to make sure everything compiles without any errors. Currently, our top-level project doesn’t use the code from the subproject, so let’s add a function that returns "Hello, world!" and call that from our application. First, update subproject/src/lib.rs to include our hello_world function:
pub fn hello_world() -> String {
    String::from("Hello, world!")
}
Now, update src/main.rs in the top-level application to call this function:
fn main() {
    println!("{}", subproject::hello_world());
}
$ cargo run
   Compiling subproject v0.1.0
   (/Users/brenden/dev/code-like-a-pro-in-rust/code/c2/2.9/workspaces-examp
   le/subproject)
   Compiling workspaces-example v0.1.0 (/Users/brenden/dev/
   ➥ code-like-a-pro-in-rust/code/c2/2.9/workspaces-example)
    Finished dev [unoptimized + debuginfo] target(s) in 0.85s
     Running `target/debug/workspaces-example`
Hello, world!
You can repeat these steps with as many subprojects as desired by substituting a different name for each occurrence of subproject in the preceding code. The full code for this example can be found under c02/workspaces-example.
Tip Cargo also supports virtual manifests, which are top-level crates that do not specify a [package] section in Cargo.toml and only contain subprojects. This is useful when you want to publish a collection of packages under one top-level crate.
Many crates use workspaces to break out projects. An additional feature of workspaces is that each subproject may be published as its own individual crate for others to use.
A couple of notable examples of projects that make use of the workspaces feature include the rand (https://crates.io/crates/rand) crate and the Rocket (https://rocket.rs/) crate—the latter of which uses a virtual manifest. For a complete reference on Cargo workspaces, see http://mng.bz/1JRj.
Cargo provides a build-time feature that allows one to specify build-time operations in a Rust script. The script contains a single rust main function plus any other code you’d like to include, including build dependencies, which are specified in a special [build-dependencies] section of Cargo.toml. The script communicates with Cargo by printing specially formatted commands to stdout, which Cargo will interpret and act upon.
Note It’s worth noting that although it’s called a script, it’s not a script in the sense of being interpreted code. That is to say, the code is still compiled by rustc and executed from a binary.
A few common uses for build scripts include the following:
Running custom preprocessors on Rust code before compiling it
Generating Rust protobuf code using protoc-rust (https://crates.io/crates/ protoc-rust)
Running platform checks, such as verifying the presence of and finding libraries
Cargo normally reruns the build script every time you run a build, but this can be modified using cargo:rerun-if-changed.
Let’s walk through a simple "Hello, world!" example using a tiny C library. First, create a new Rust application and change into the directory:
$ cargo new build-script-example
$ cd build-script-example
Next, let’s make a tiny C library with a function that returns the string "Hello, world!". Create a file called src/hello_world.c:
const char *hello_world(void) {
    return "Hello, world!";
}
Now, update Cargo.toml to include the cc crate as a build dependency and the libc crate for C types:
[dependencies]
libc = "0.2"
[build-dependencies]
cc = "1.0"
Let’s create the actual build script by creating the file build.rs at the top-level directory (not inside src/, where the other source files are):
fn main() {
    println!("cargo:rerun-if-changed=src/hello_world.c");    ❶
    cc::Build::new()                                         ❷
        .file("src/hello_world.c")
        .compile("hello_world");
}
❶ Instructs Cargo to only rerun the build script when src/hello_world.c is modified
❷ Compiles the C code into a library using the cc crate
Finally, let’s update src/main.rs to call the C function from our tiny library:
use libc::c_char;
use std::ffi::CStr;

extern "C" {
    fn hello_world() -> *const c_char;    ❶
}

fn call_hello_world() -> &'static str {   ❷
    unsafe {
        CStr::from_ptr(hello_world())
            .to_str()
            .expect("String conversion failure")
    }
}

fn main() {
    println!("{}", call_hello_world());
}
❶ Defines the external interface of the C library
❷ A wrapper around the external library that extracts the static C string
Finally, compile and run the code:
$ cargo run
   Compiling cc v1.0.67
   Compiling libc v0.2.91
   Compiling build-script-example v0.1.0 (/Users/brenden/dev/
   code-like-a-pro-in-rust/code/c2/2.10/build-script-example)
    Finished dev [unoptimized + debuginfo] target(s) in 2.26s
     Running `target/debug/build-script-example`
Hello, world!
The full code for this example can be found under c02/build-script-example.
As a systems-level programming language, Rust is an excellent candidate for embedded programming. This is especially true in cases where memory allocation is explicit and safety is paramount. In this book, I won’t explore embedded Rust in depth—that’s a subject that warrants its own book entirely—but it’s worth mentioning in case you’re considering Rust for embedded projects.
Rust’s static analysis tooling is especially powerful in embedded domains, where it can be more difficult to debug and verify code at run time. Compile-time guarantees can make it easy to verify resource states, pin selections, and safely run concurrent operations with shared state.
If you’d like to experiment with embedded Rust, there is excellent support for Cortex-M device emulation using the popular QEMU project (https://www.qemu.org). Sample code is available at https://github.com/rust-embedded/cortex-m-quickstart.
At the time of writing, embedded Rust resources for non-ARM architectures are limited, but one notable exception is the Arduino Uno platform. The ruduino crate (https://crates.io/crates/ruduino) provides reusable components specifically for Arduino Uno, which is an affordable, low-power, embedded platform that can be acquired for the cost of dinner for two. More information on the Arduino platform can be found at https://www.arduino.cc.
Rust’s compiler (rustc) is based on the LLVM project (https://llvm.org); therefore, any platform for which LLVM has an appropriate backend is technically supported, although peripherals may not necessarily work. For example, there is early support for RISC-V, which is supported by LLVM, but hardware options for RISC-V are limited. To learn more about embedded Rust, The Embedded Rust Book is available online at https://docs.rust-embedded.org/book.
For cases where dynamic memory allocation isn’t necessary, you can use the heapless crate to provide data structures with fixed sizes and no dynamic allocation. If dynamic memory allocation is desired, it’s relatively easy to create your own allocator by implementing the GlobalAlloc trait (http://mng.bz/PR7n). For some embedded platforms, such as the popular Cortex-M processors, there already exists a heap allocator implementation with the alloc-cortex-m crate.
Cargo is the primary tool used for building, managing, and publishing Rust projects.
In Rust, packages are known as crates, and crates can be published as libraries or applications to the https://crates.io registry.
Cargo can be used to automate build, test, and publish steps of a continuous integration and deployment system.
The cargo doc command will automatically generate documentation for a Rust project using rustdoc. Documentation can be formatted using the CommonMark format (a specification of Markdown).
As with crates.io, https://docs.rs provides free documentation hosting automatically for open source crates published to crates.io.
Rust can generate binaries for distribution that include all dependencies, excluding the C library. On Linux systems, you should statically link to musl rather than using the system’s C library for maximum portability when distributing precompiled binaries.
Crates can be organized into modules and workspaces, which provides a way to separate code into its parts.